
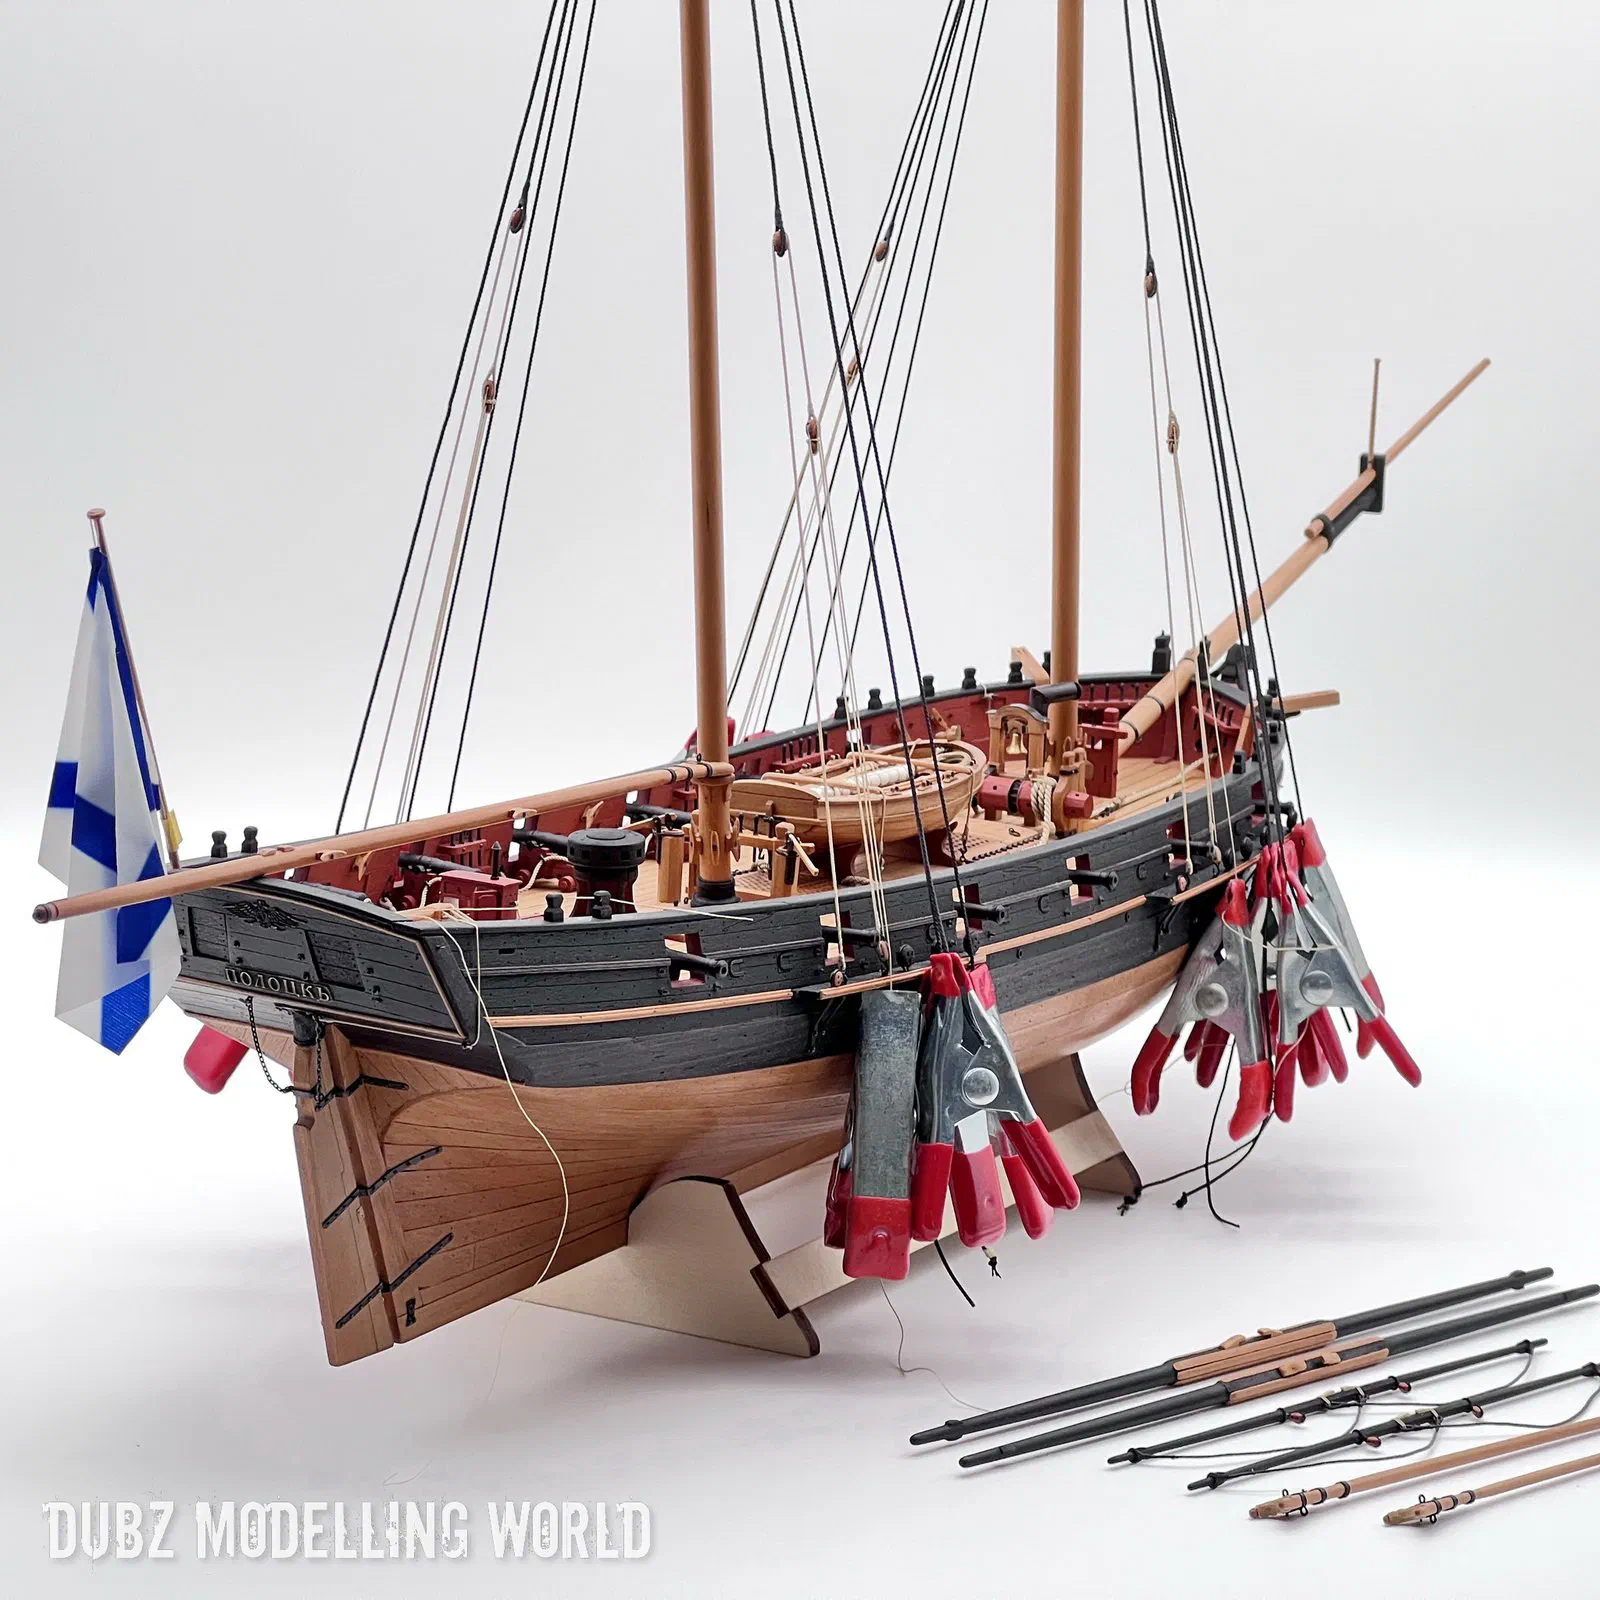
History
The Polotsk was a small two-masted sailing schooner of the Russian Black Sea Fleet. She was 23.2 metres long, 7.3 metres in the beam and drew 2.9 metres; her armament consisted of fourteen six-pounder cast-iron guns, and she carried a crew of 120.
She did not begin her life as a Russian ship. She was built at a yard in the Sicilian town of Ragusa – other sources say in Greece – and sailed as a corsair in the Aegean, preying on Turkish merchant ships. In 1787 Russia bought her from Greek merchants, with the help of the diplomat Y. I. Bulgakov, and Lieutenant-Commander A. P. Aleksiano, later a vice admiral, brought her to Sevastopol. She was renamed Polotsk after the city whose right-bank part had become part of the Russian Empire in 1772, after the first partition of the Polish-Lithuanian Commonwealth. Her first duties were runs between Kozlov – the old name of Evpatoria – and Sevastopol.
In 1788 she became the repeating ship of the squadron, the vessel that passed on the admiral’s signals to the line, and Lieutenant G. S. Karandino took command. From June 1788 she sailed with the squadron of Rear Admiral Count M. I. Voinovich in search of the enemy, and on 3 (14) July 1788 she took part in the battle of Fidonisi, the first naval battle of the Russo-Turkish War of 1787–1791. In September of the same year she cruised off the Anatolian coast in a detachment under Captain 2nd Rank D. N. Senyavin, together with four corsair vessels crewed by Greek volunteers. The detachment bombarded Sinop and Kerasunt, destroyed a shore battery, burned a provision depot and destroyed ten Turkish transports laden with timber, provisions and ammunition, taking one more as a prize, before returning safely to Sevastopol in stormy weather on 6 (17) October. Senyavin received the Order of St. George 4th class for the raid, and Karandino was promoted to lieutenant-commander in January 1789 and kept his ship in the squadron of Rear Admiral F. F. Ushakov, cruising repeatedly off the mouths of the Danube.
In 1790 Lieutenant-Commander G. G. Belli took over. The Polotsk sailed with the squadron to the Anatolian coast near Sinop in May, carried Ushakov’s report to Prince Potemkin at Feodosia, and fought in the battles of the Kerch Strait on 8 (19) July 1790, off Hajibey (Tendra) at the end of August 1790 and off Cape Kaliakra on 31 July (11 August) 1791. Ushakov’s report to Potemkin praised Belli and his repeating ship for performing their duty in battle with excellent bravery, skill and speed, and Belli received the Order of St. Vladimir 4th class.
From 1792 to 1798 the schooner went on practice cruises in the Black Sea every year, under Belli until 1794 and then under Lieutenant-Commander F. F. Messer, later also a vice admiral. She was hove down and careened in 1791, 1793, 1794 and again in 1796. In December 1799, under Lieutenant K. P. Lobisevich, she left Nikolaev with supplies for Ushakov’s squadron in the Mediterranean – and was never seen again. She is believed to have been wrecked near the mouths of the Danube.
The kit
The model is built from the Polotsk kit by Master Korabel in 1:72. It is a sandwich design with laser-cut frames, jigs for the more difficult assemblies, pre-spiled planks and photo-etched parts, and it is one of the best-designed kits I know: there is so much potential in it without the need to replace a lot. Where I did replace parts, it was mostly a question of wood. I prefer pear for anything that stays visible, and Master Korabel was generous enough to laser several parts in pear for me during the build – the parts for the head, the handrails and the complete dinghy. They also sent me the 3D-printed gun barrels and other printed samples that are now part of their newer kits.
One thing I insist on with any laser-cut kit is to remove all the laser char. Every visible edge on this model has been cleaned back to bare wood before glue or finish went near it. It takes time, but burnt edges simply do not belong on a model.
Frame and stern
The build started in October 2020 with the keel former and the lower bulkheads. The frame went together without drama, apart from one small lapse of my own: I forgot to install the transom before closing up the stern. It was an easy fix at the time, and the upper bulkheads and the false deck followed, but the forgotten transom did come back to haunt me later as a centreline that was not quite perfect.
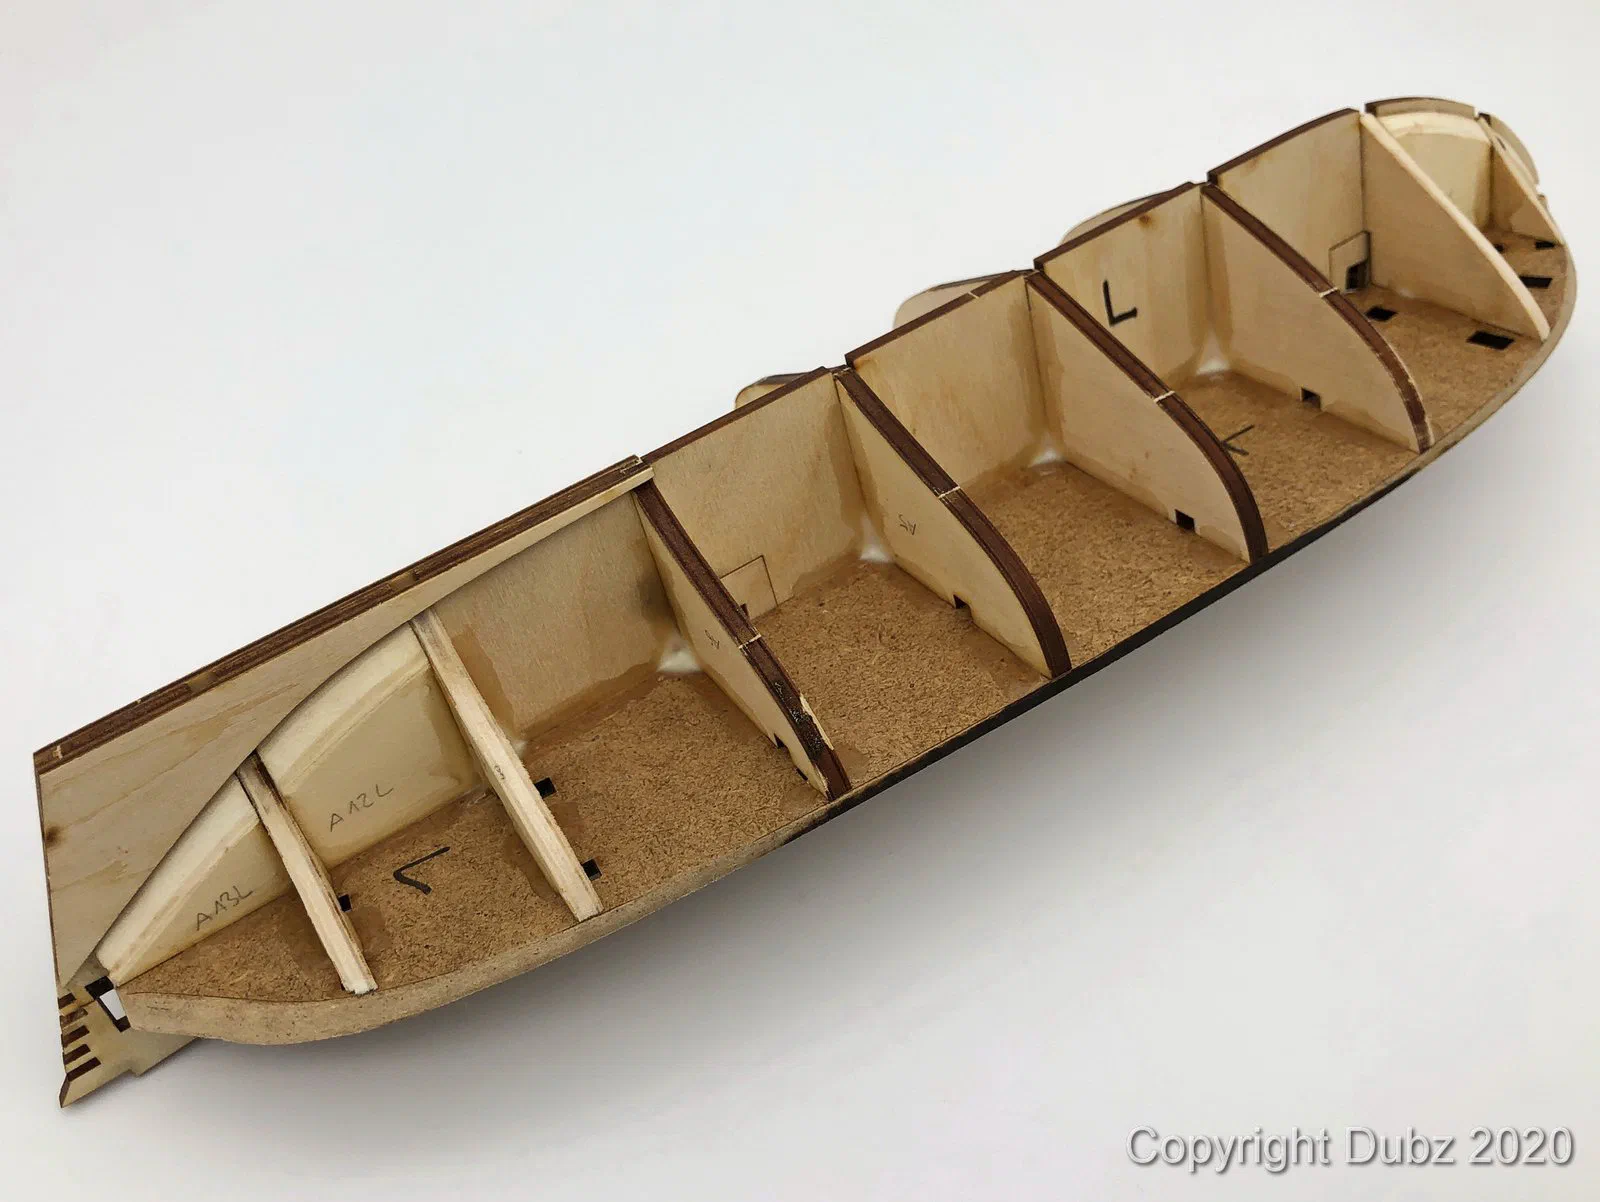
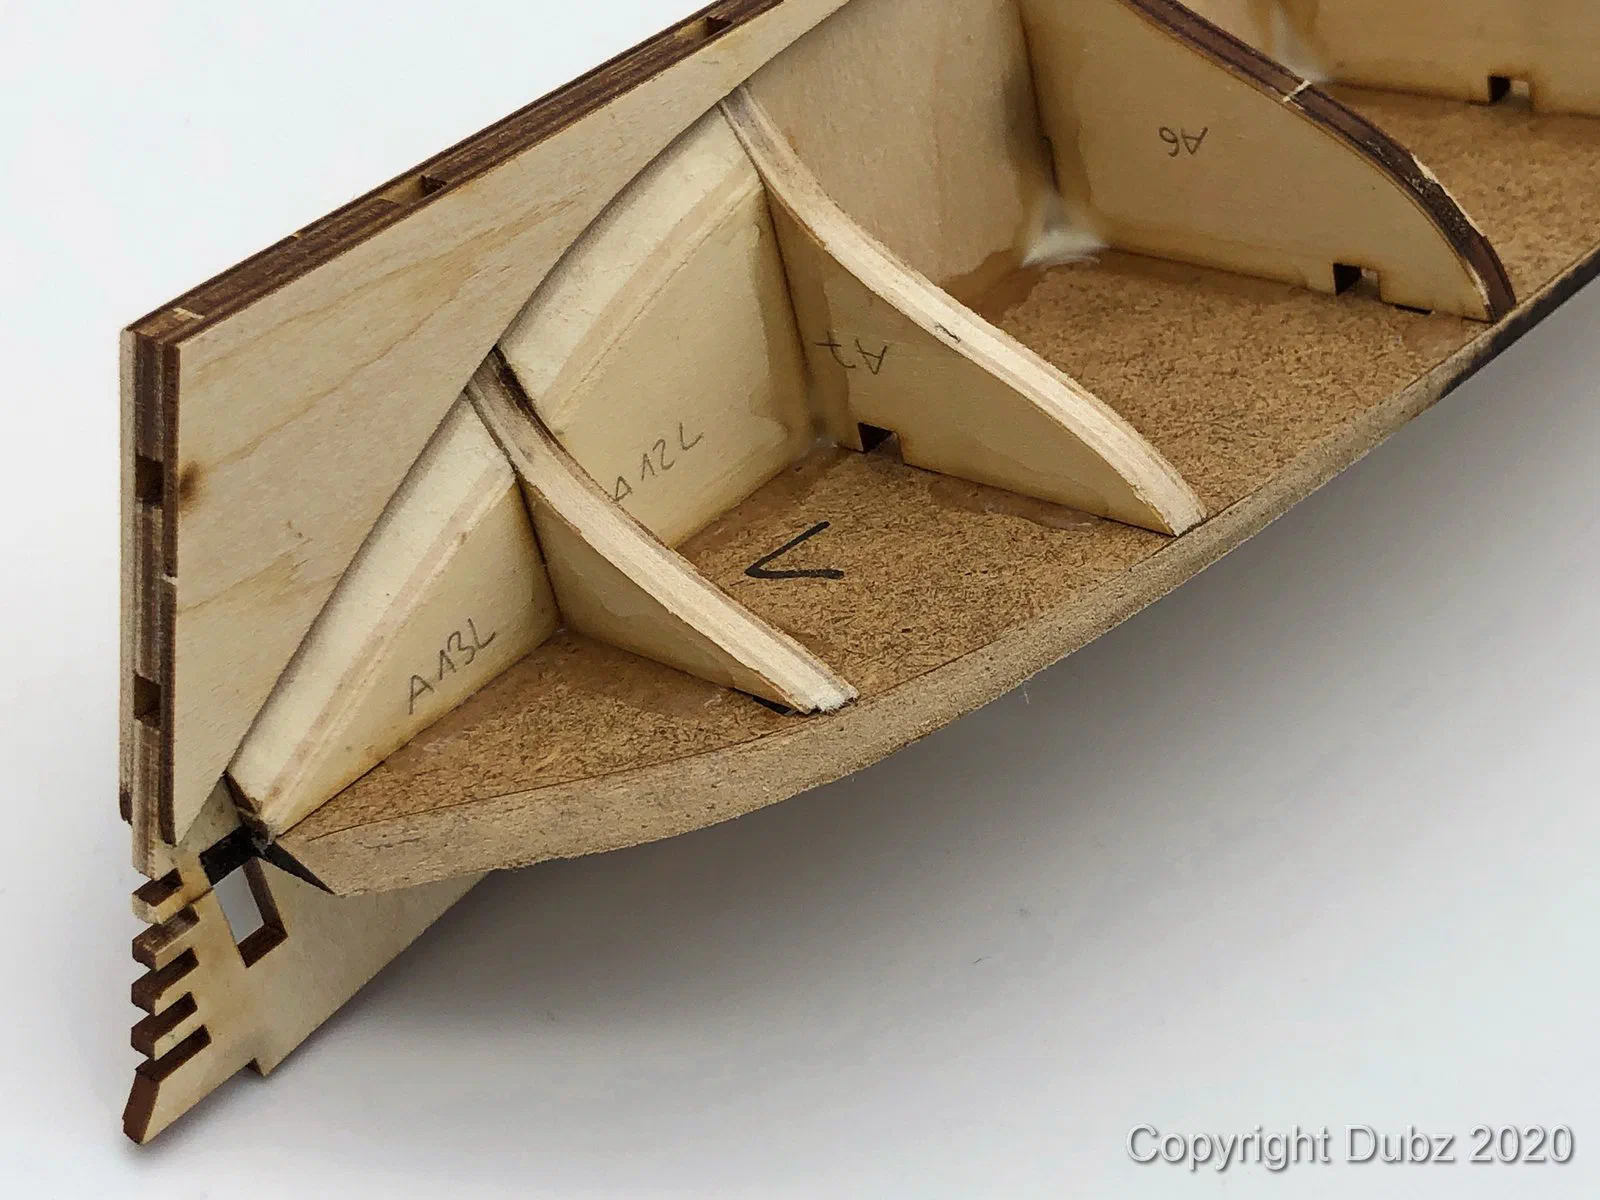
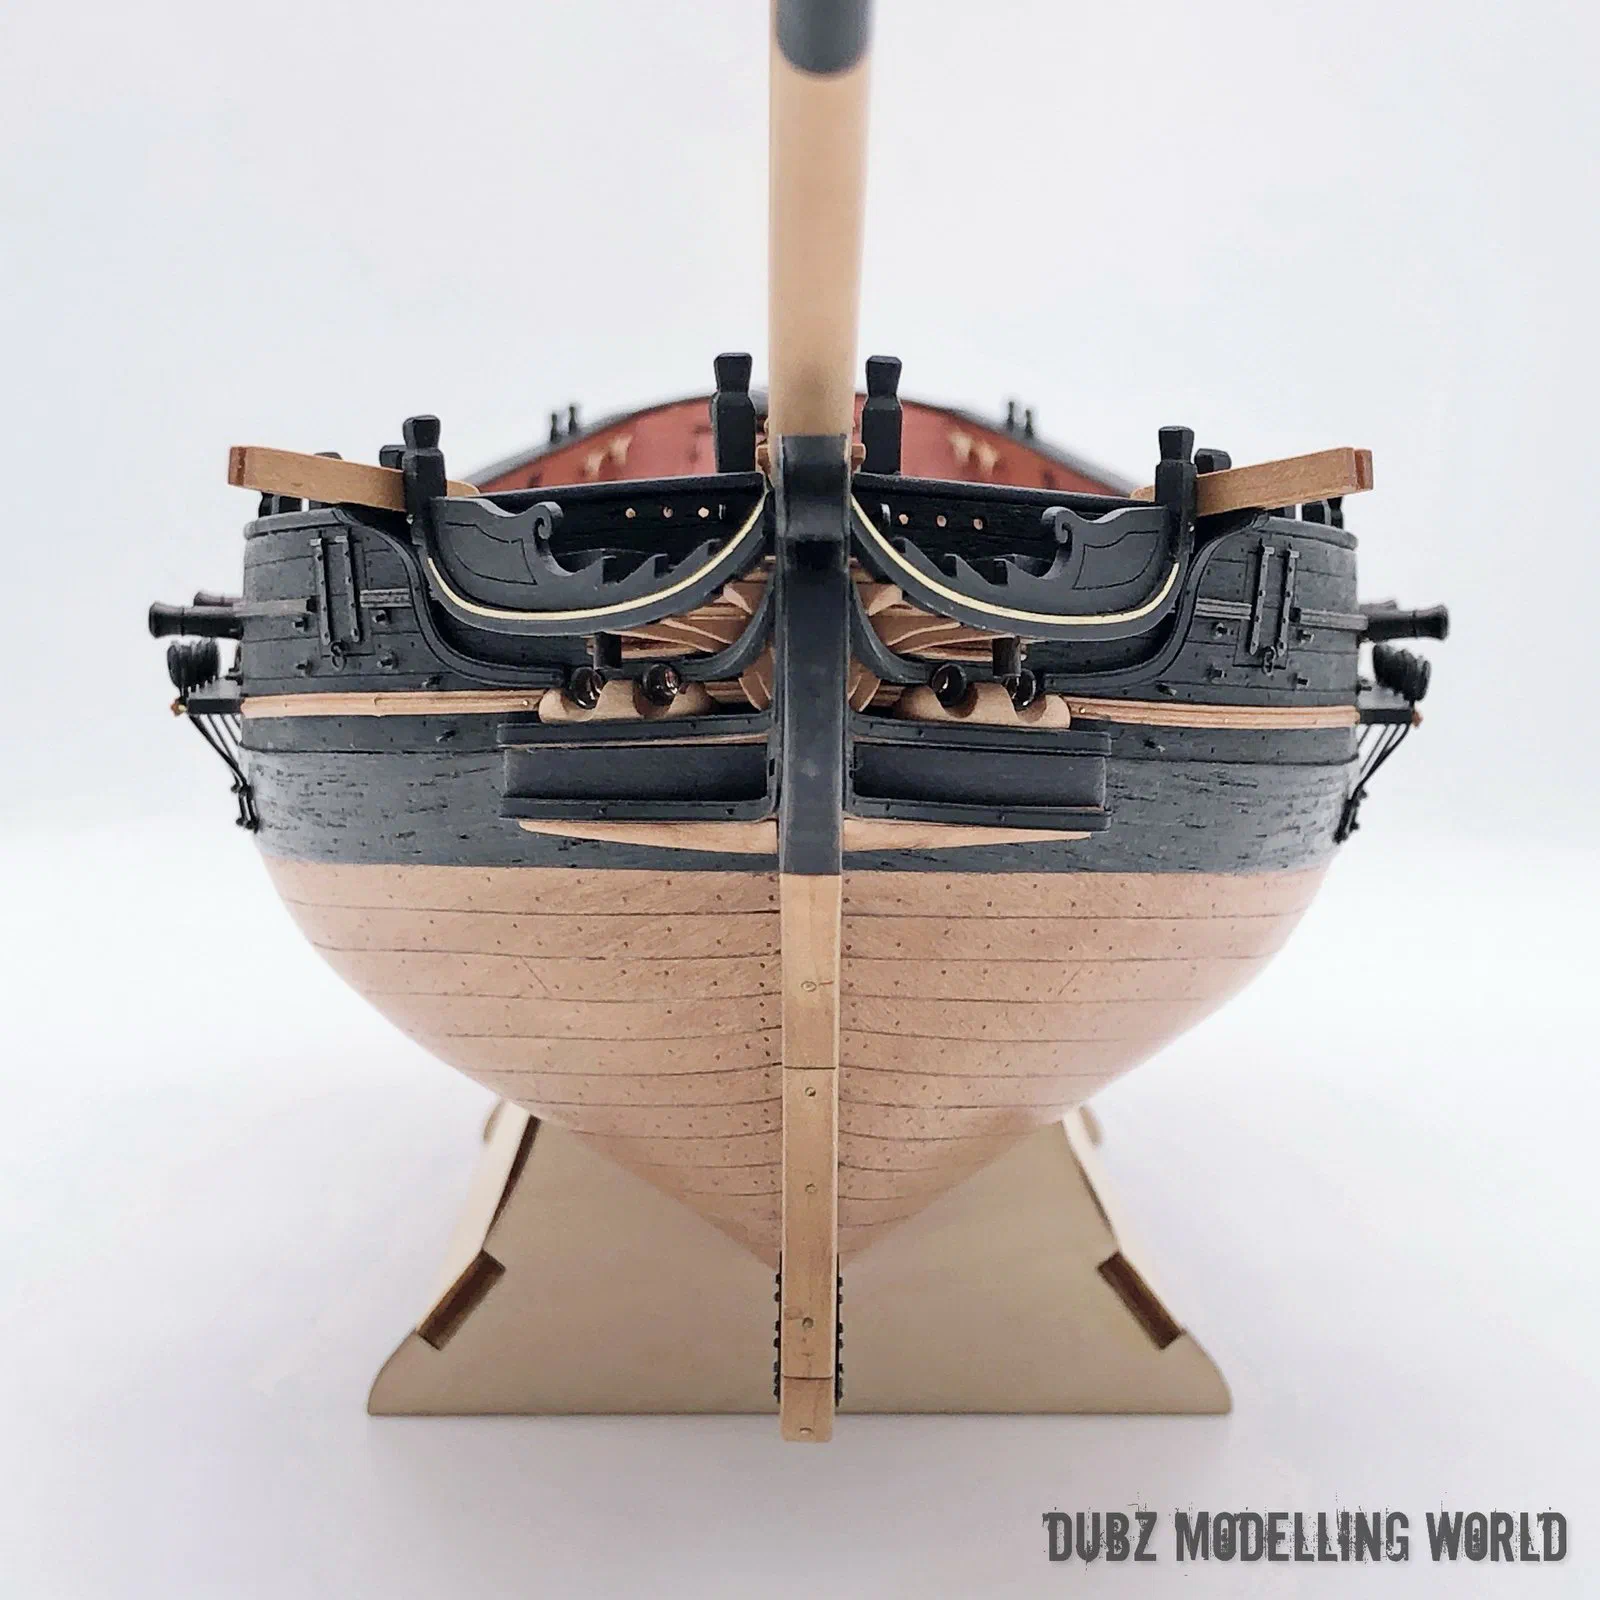
The bulwarks and the taffrail are built over two jigs that Master Korabel supplies, one for the bow and one for the taffrail at the stern. After that the stern had to be shaped with a whole set of filler blocks, carved and sanded until the planks could run over it in a fair curve.
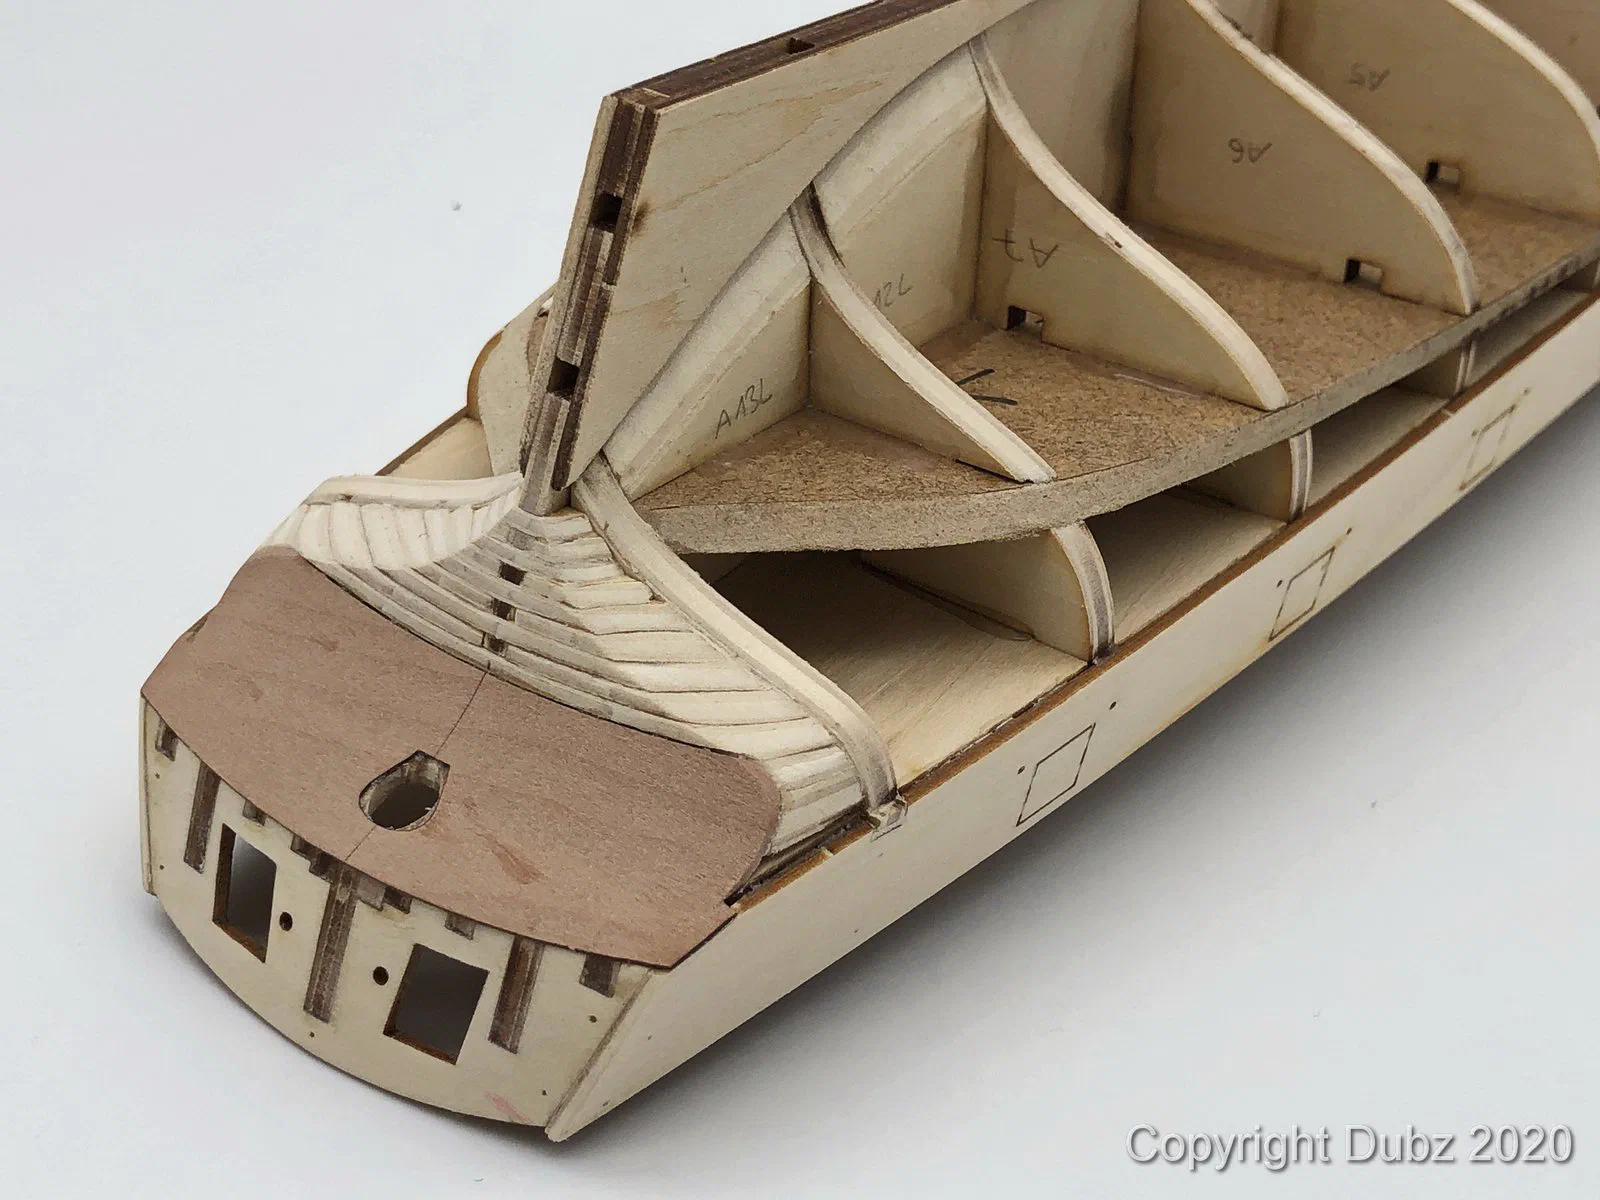
Planking
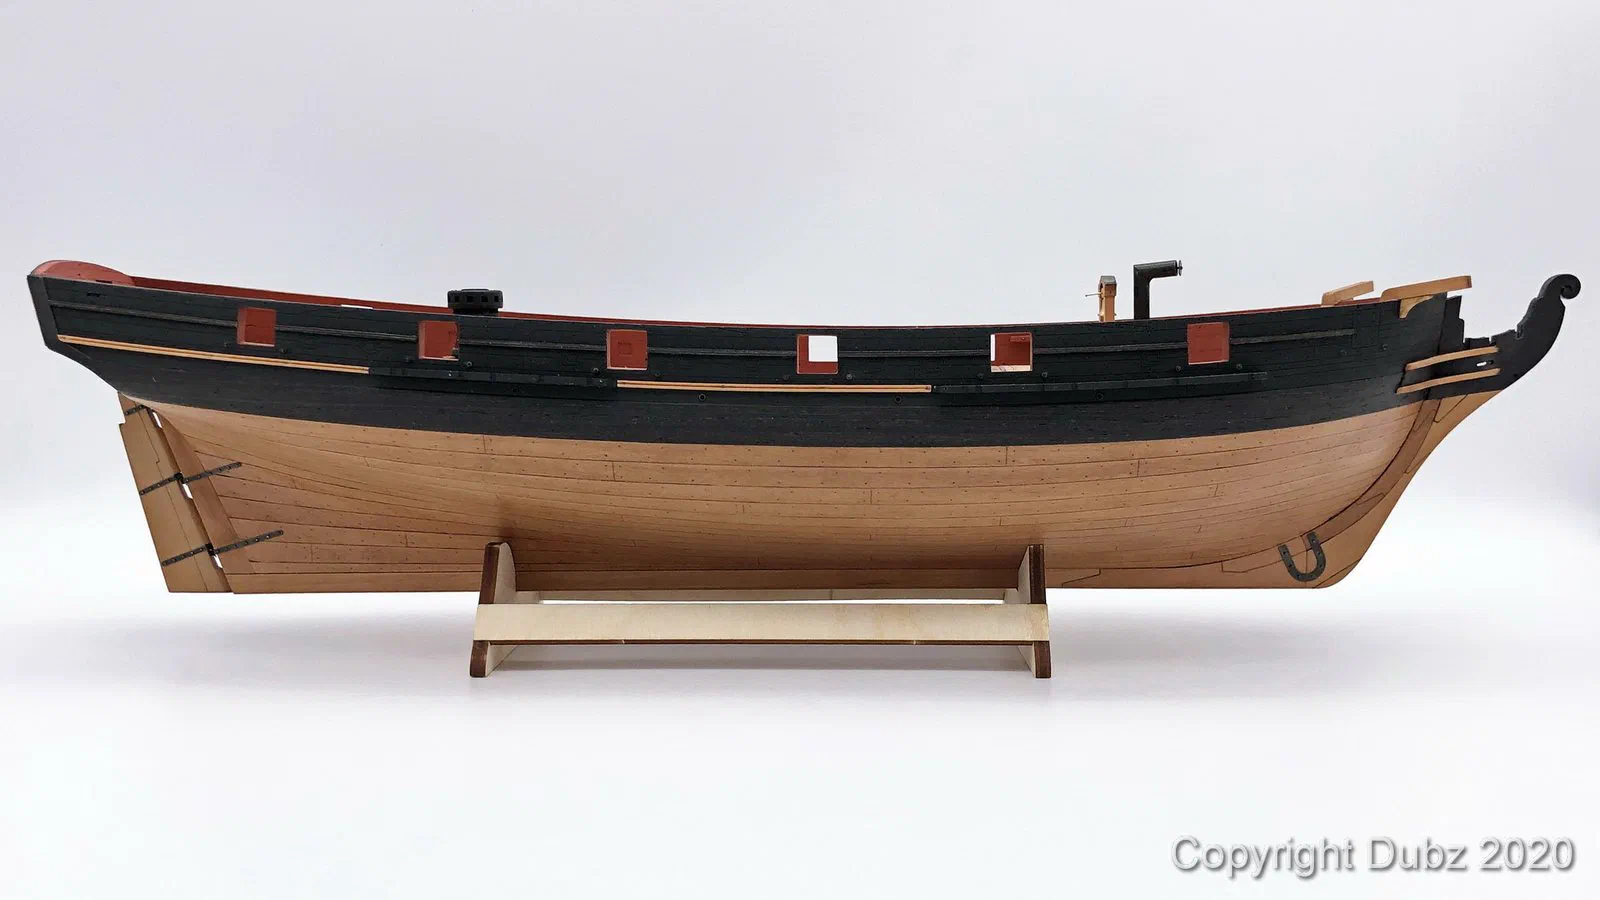
The first layer of planking was easy, because all the planks in this kit come pre-spiled. Once it was on and sanded, the transom was finished and the taffrail received its final layer. Here the forgotten transom showed itself again in a centreline that was slightly off – nothing anyone will notice on the finished model, but I know it is there. Afterwards I removed all the timbers that supported the bulwarks, except those that carry the catheads.
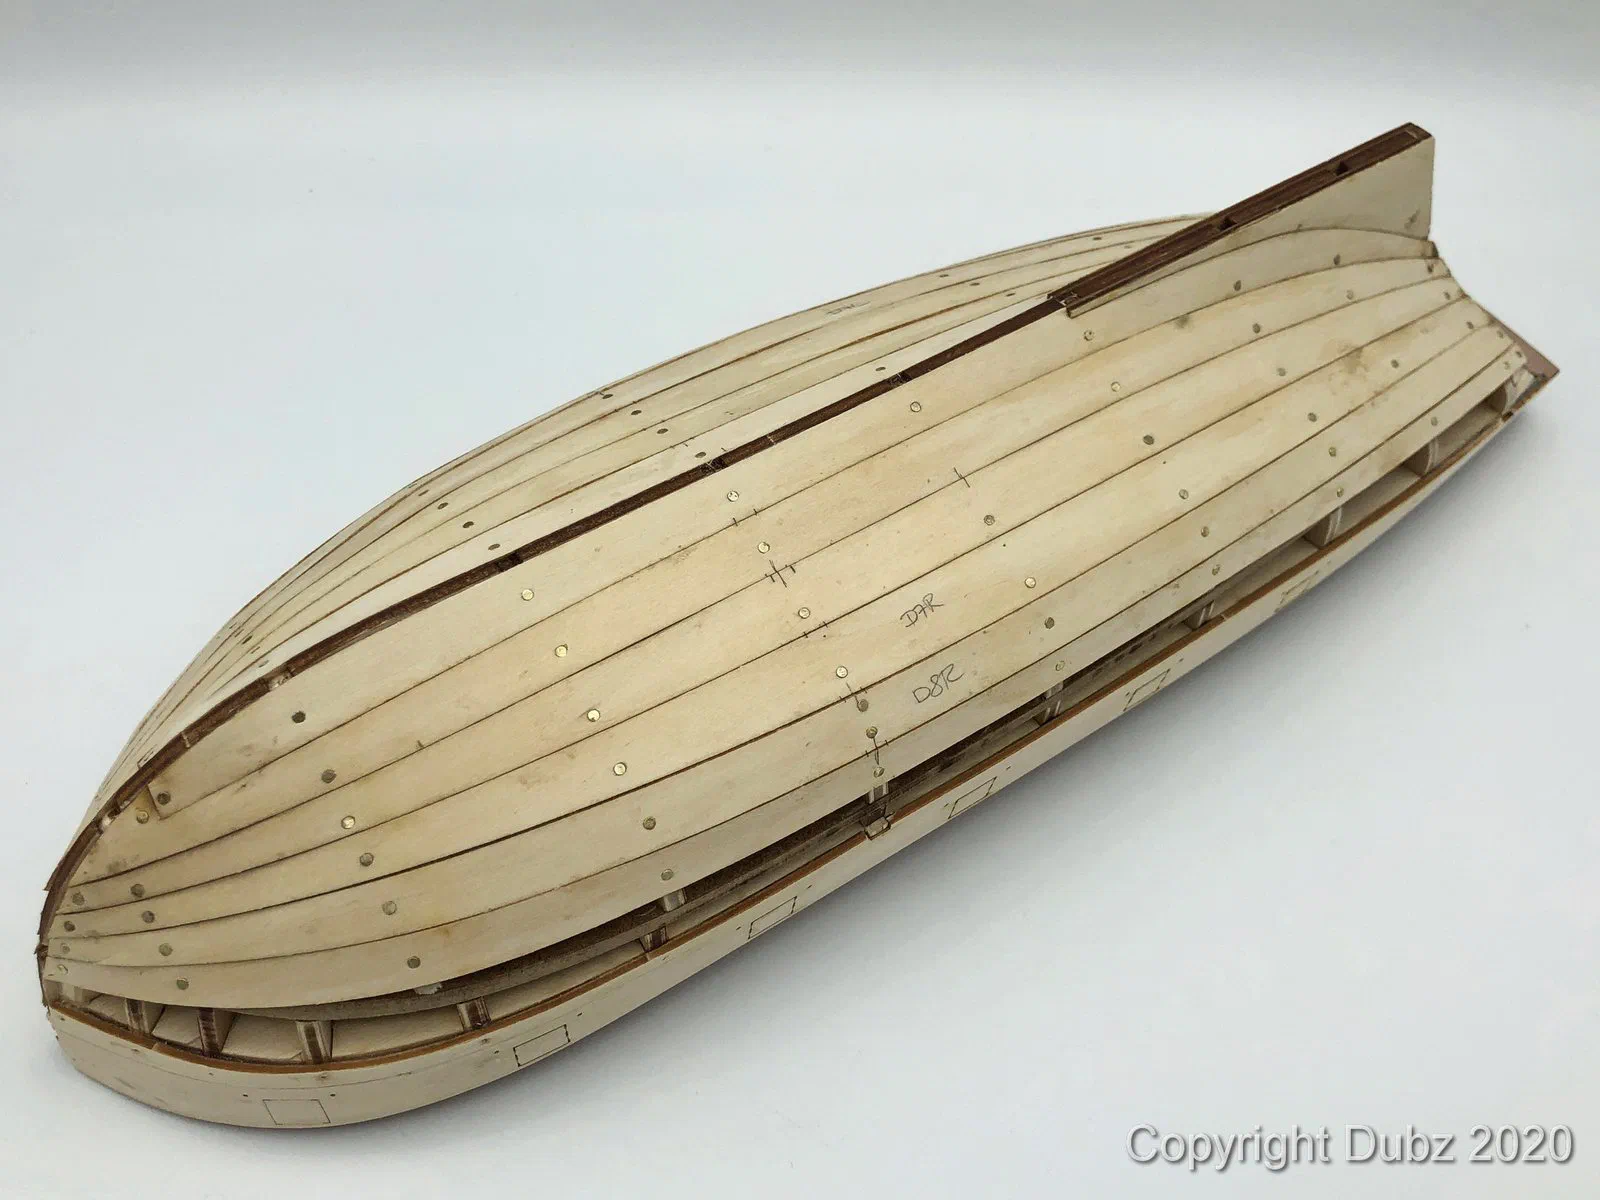
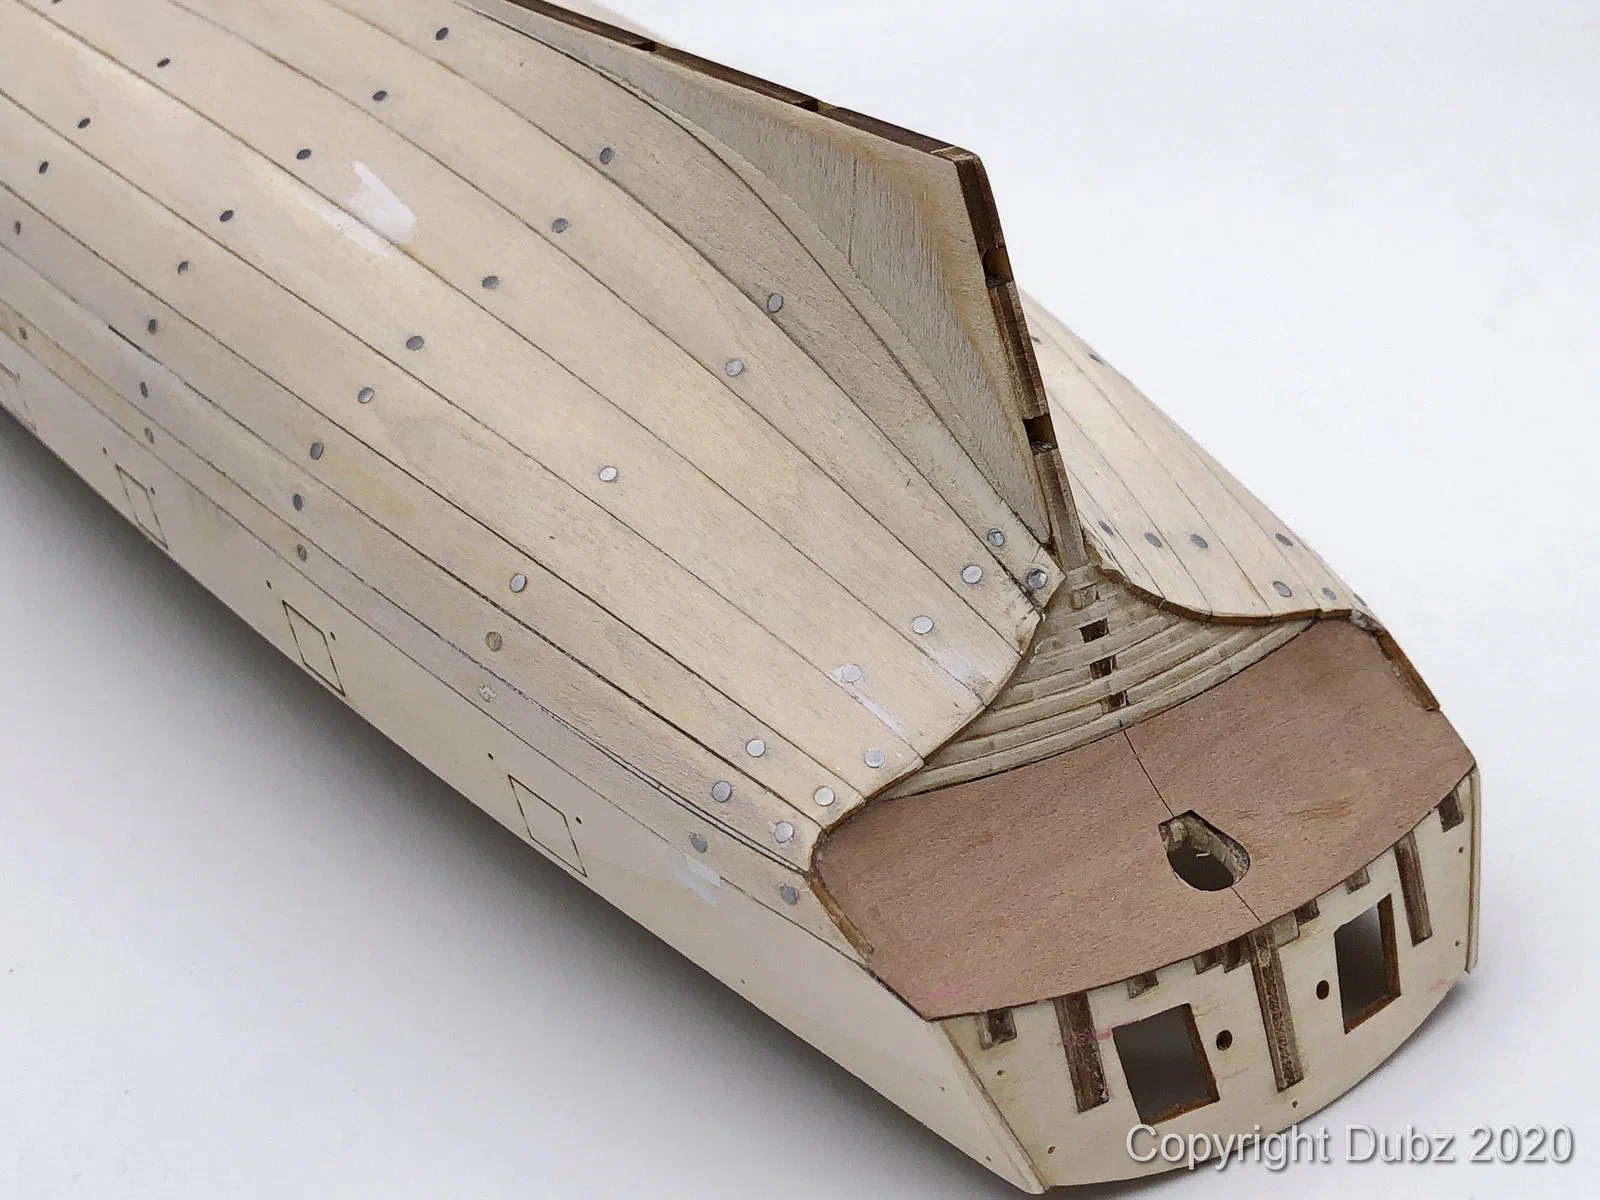
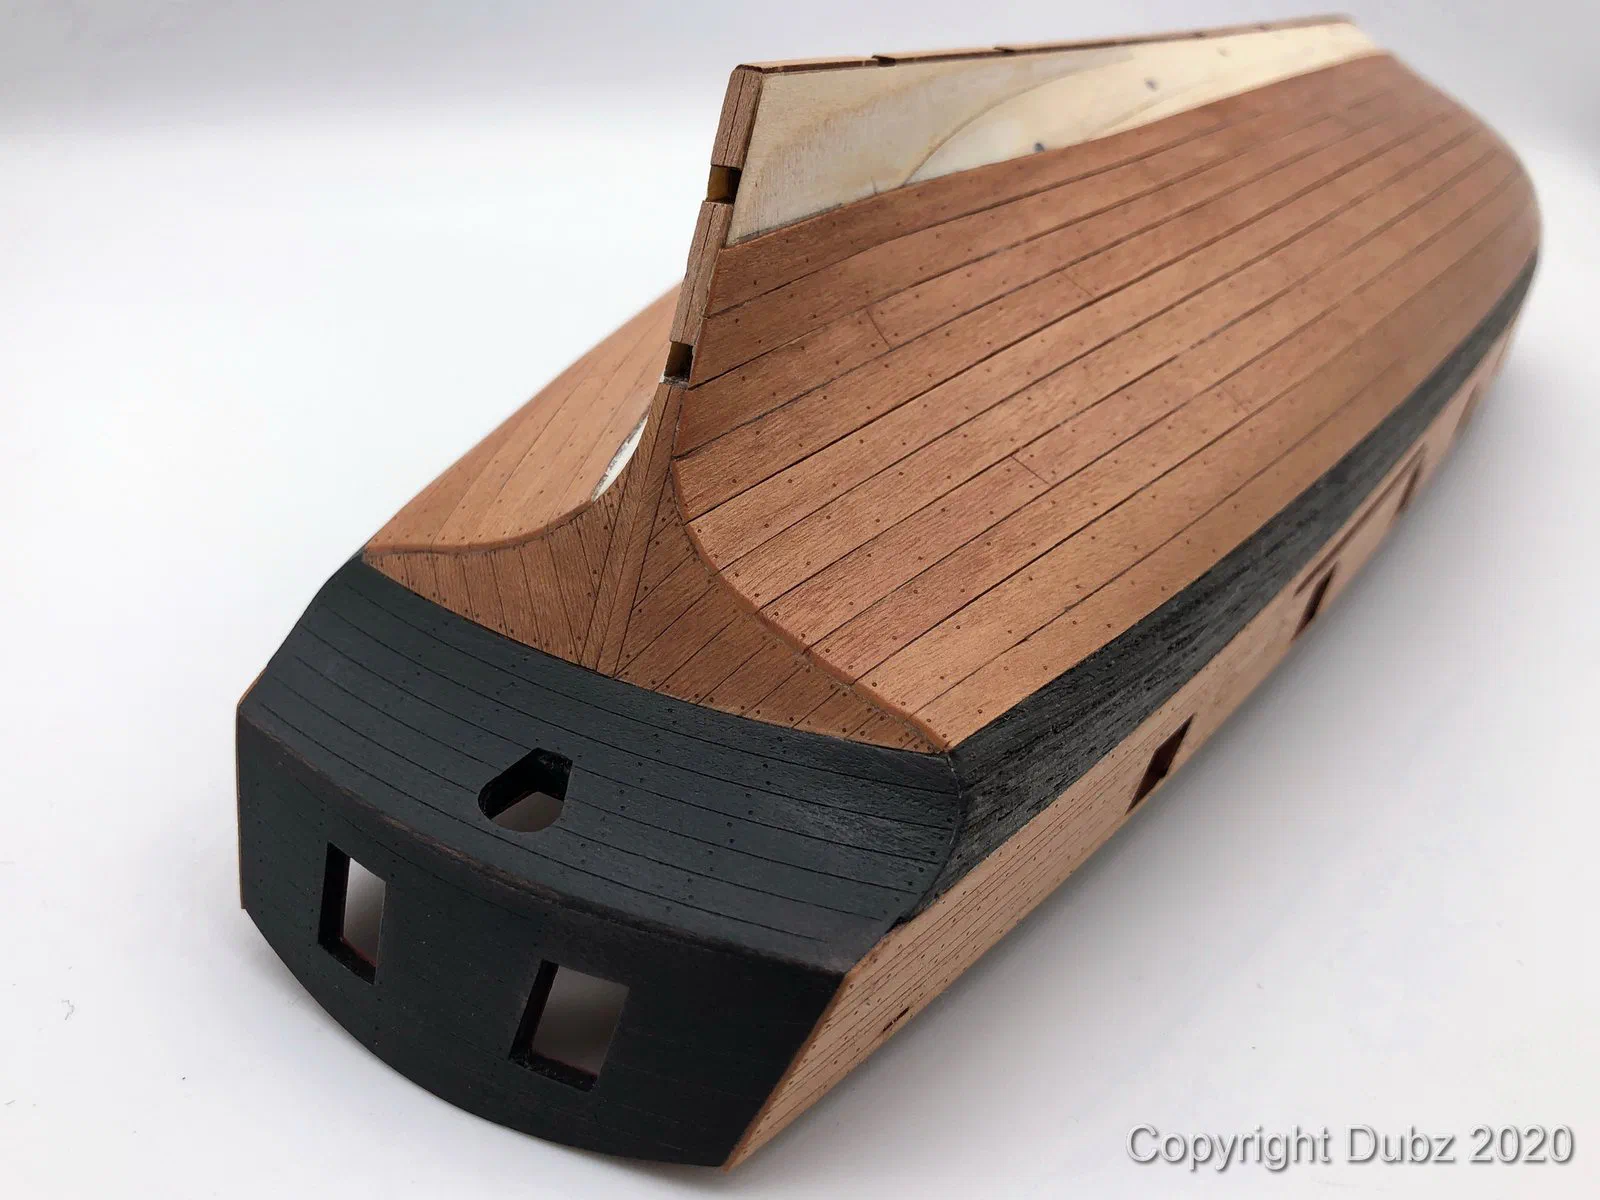
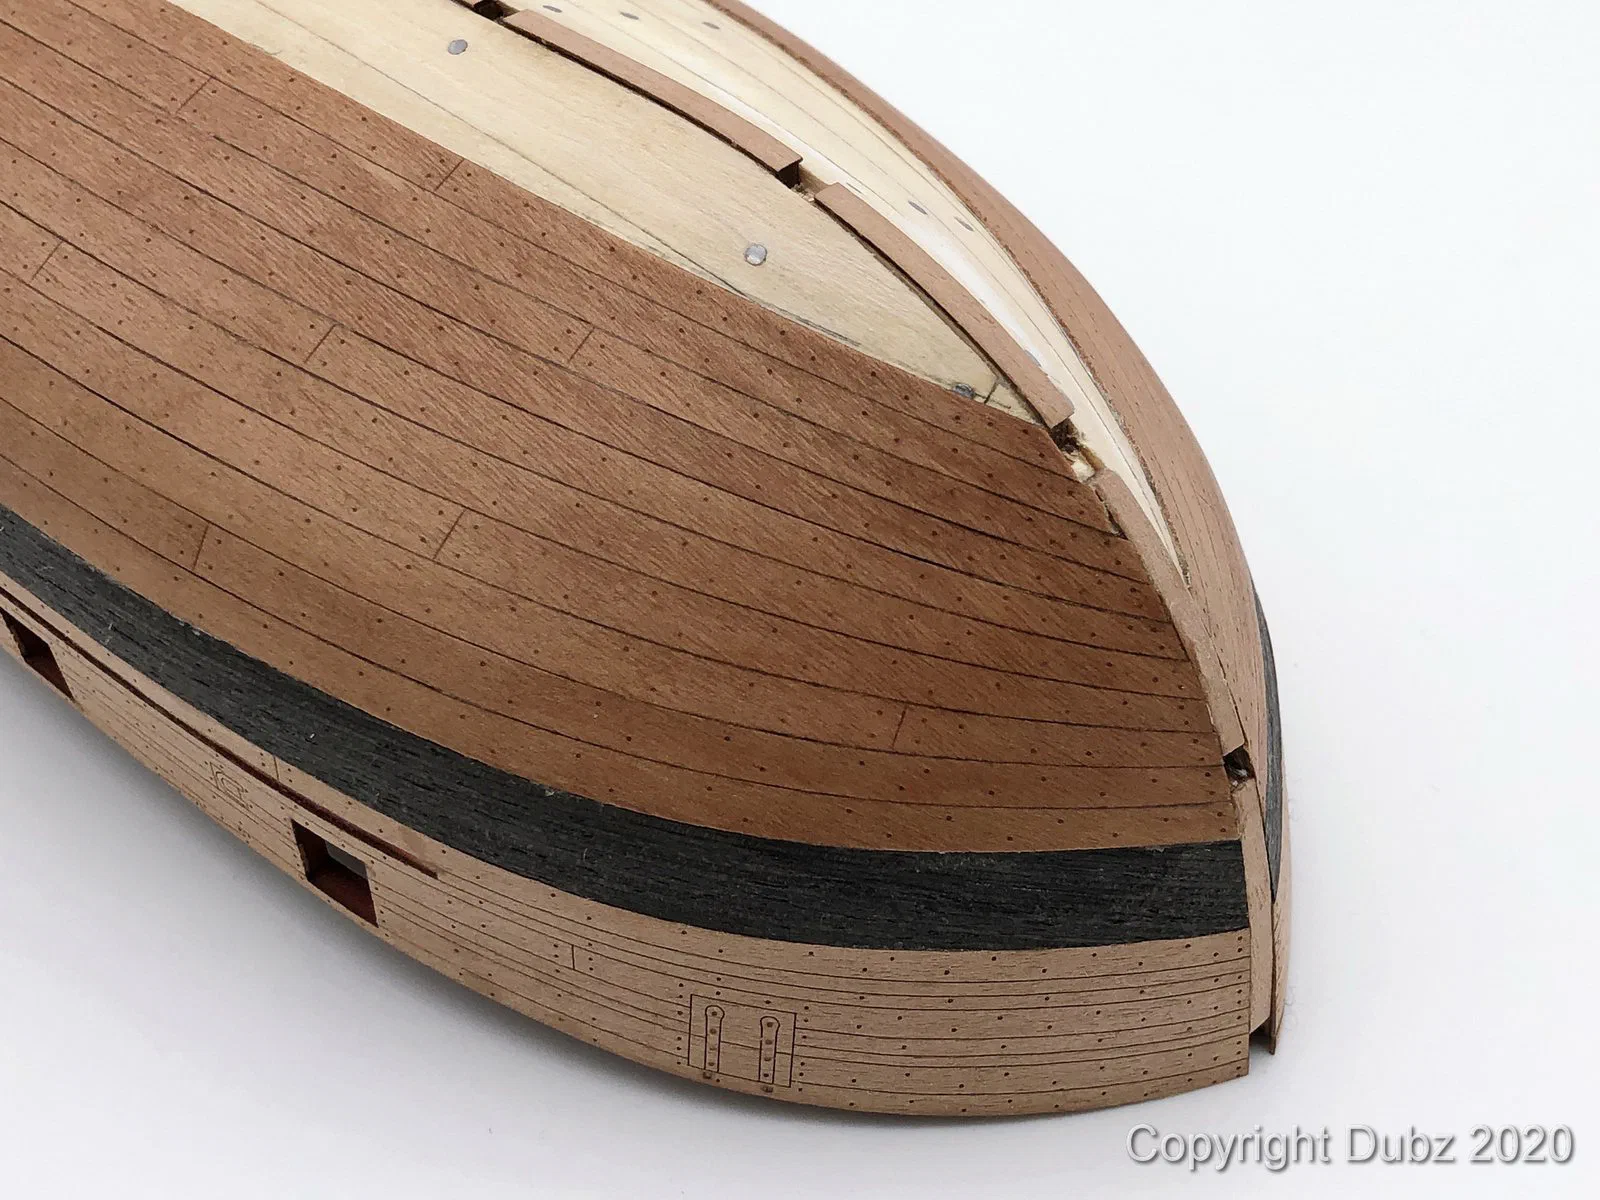
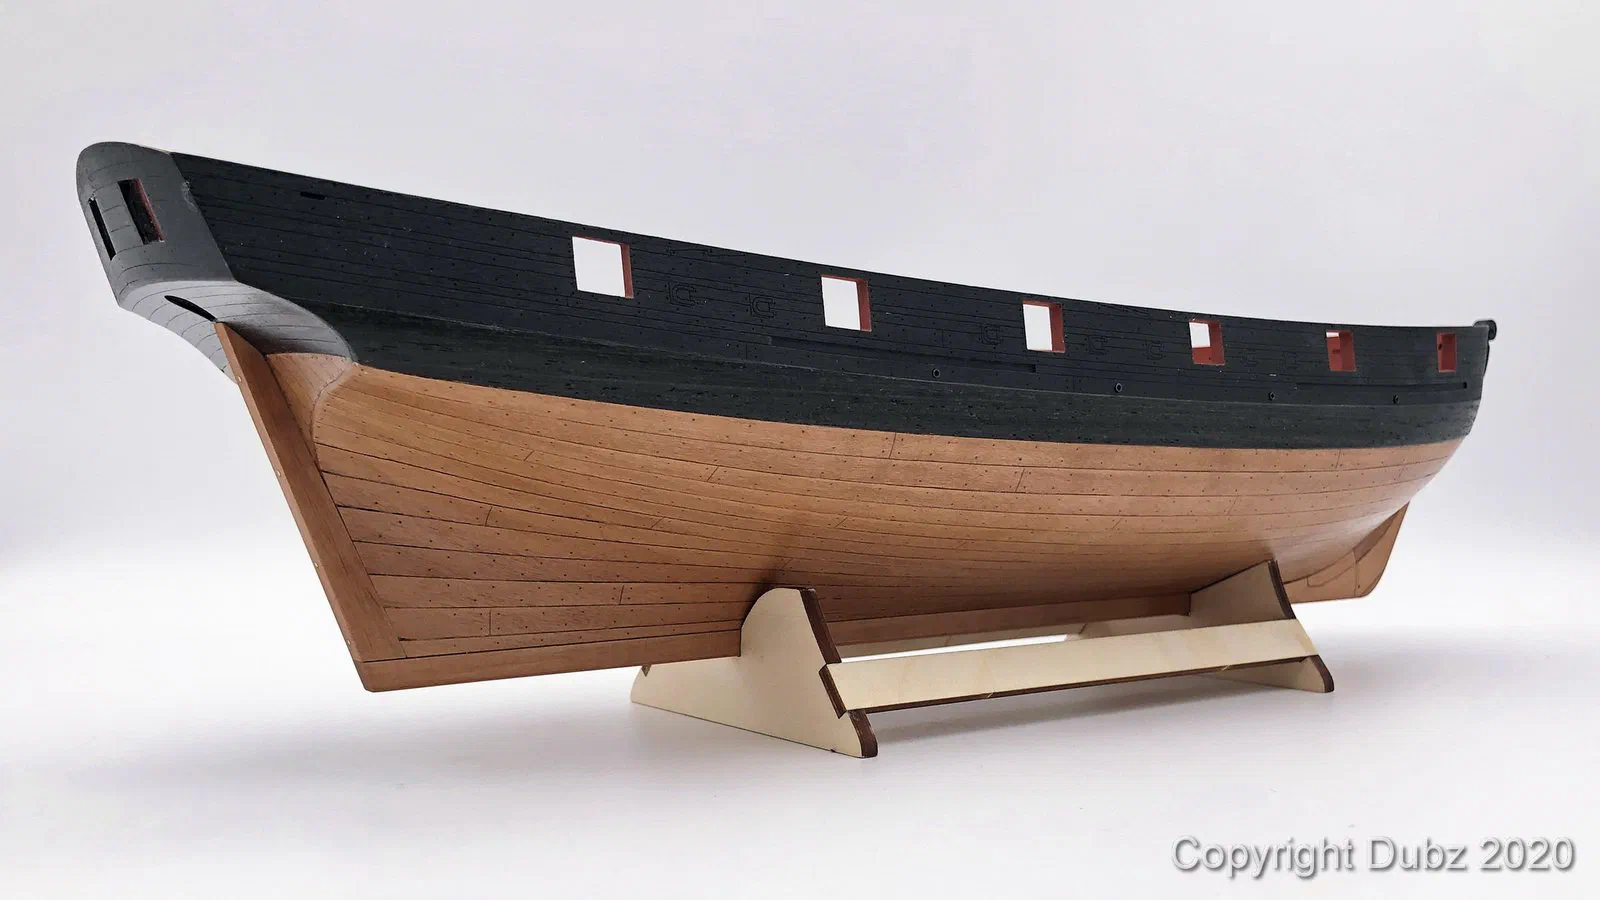
The final outer planking is precut as well. The first strake to go on was the bulwark, followed by the wales in two layers. I oil the wood as early as possible: a sealed surface is protected from glue marks and handling, and the colour of the pear develops early so that I can judge the look while there is still time to change things. With the wales and the scuppers in place – the outboard scuppers will get their lead later – the hull had its character. The wale itself has no engraved plank seams or nails from the kit; that is something I may still add after a few tests.
Bulwarks and deck
The inner bulwark consists of two layers. The first has openings only for the gun ports, the second has additional openings for the oar ports. Together they create the illusion of real oar ports in the thickness of the bulwark. The thin veneers gave me some trouble: PVA dried too fast and the veneer curled. The gun ports needed extra attention because of all the layers; I levelled them with glue and a file until the reveals were smooth. Then the inner bulwark received several coats of red from the airbrush – Admiralty Red Ochre.
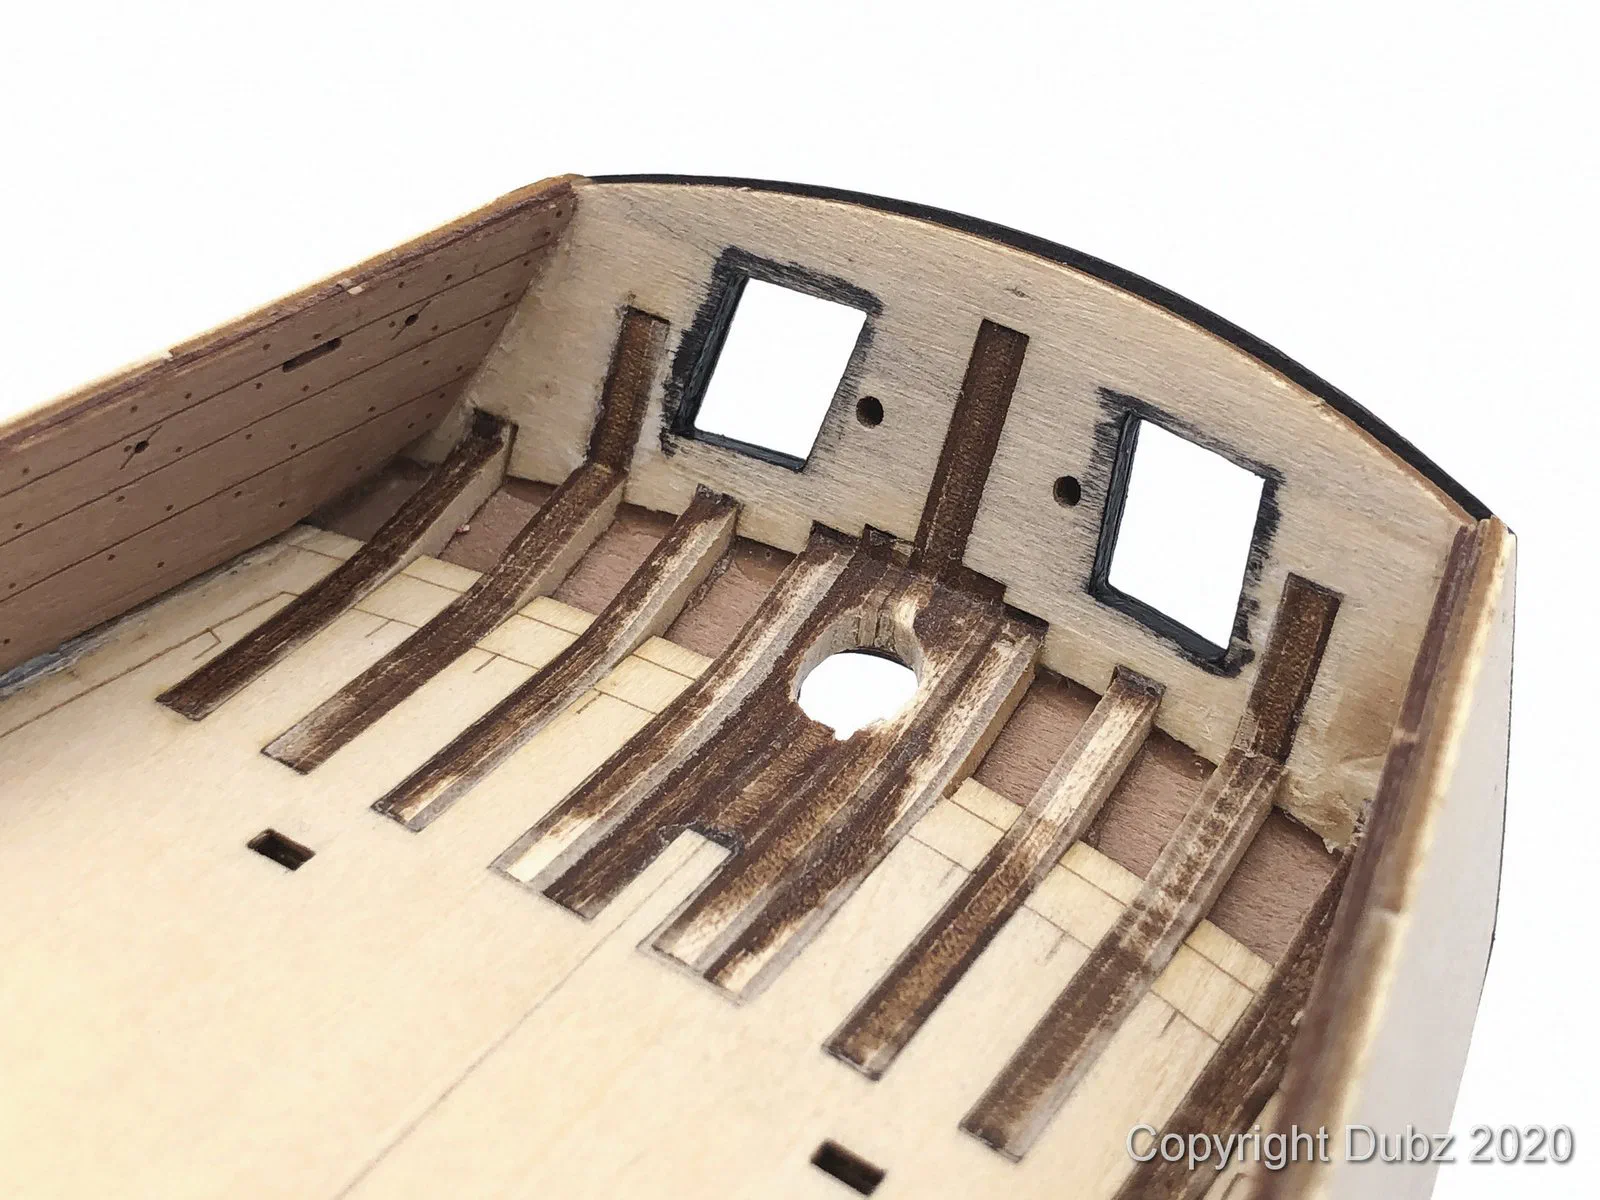
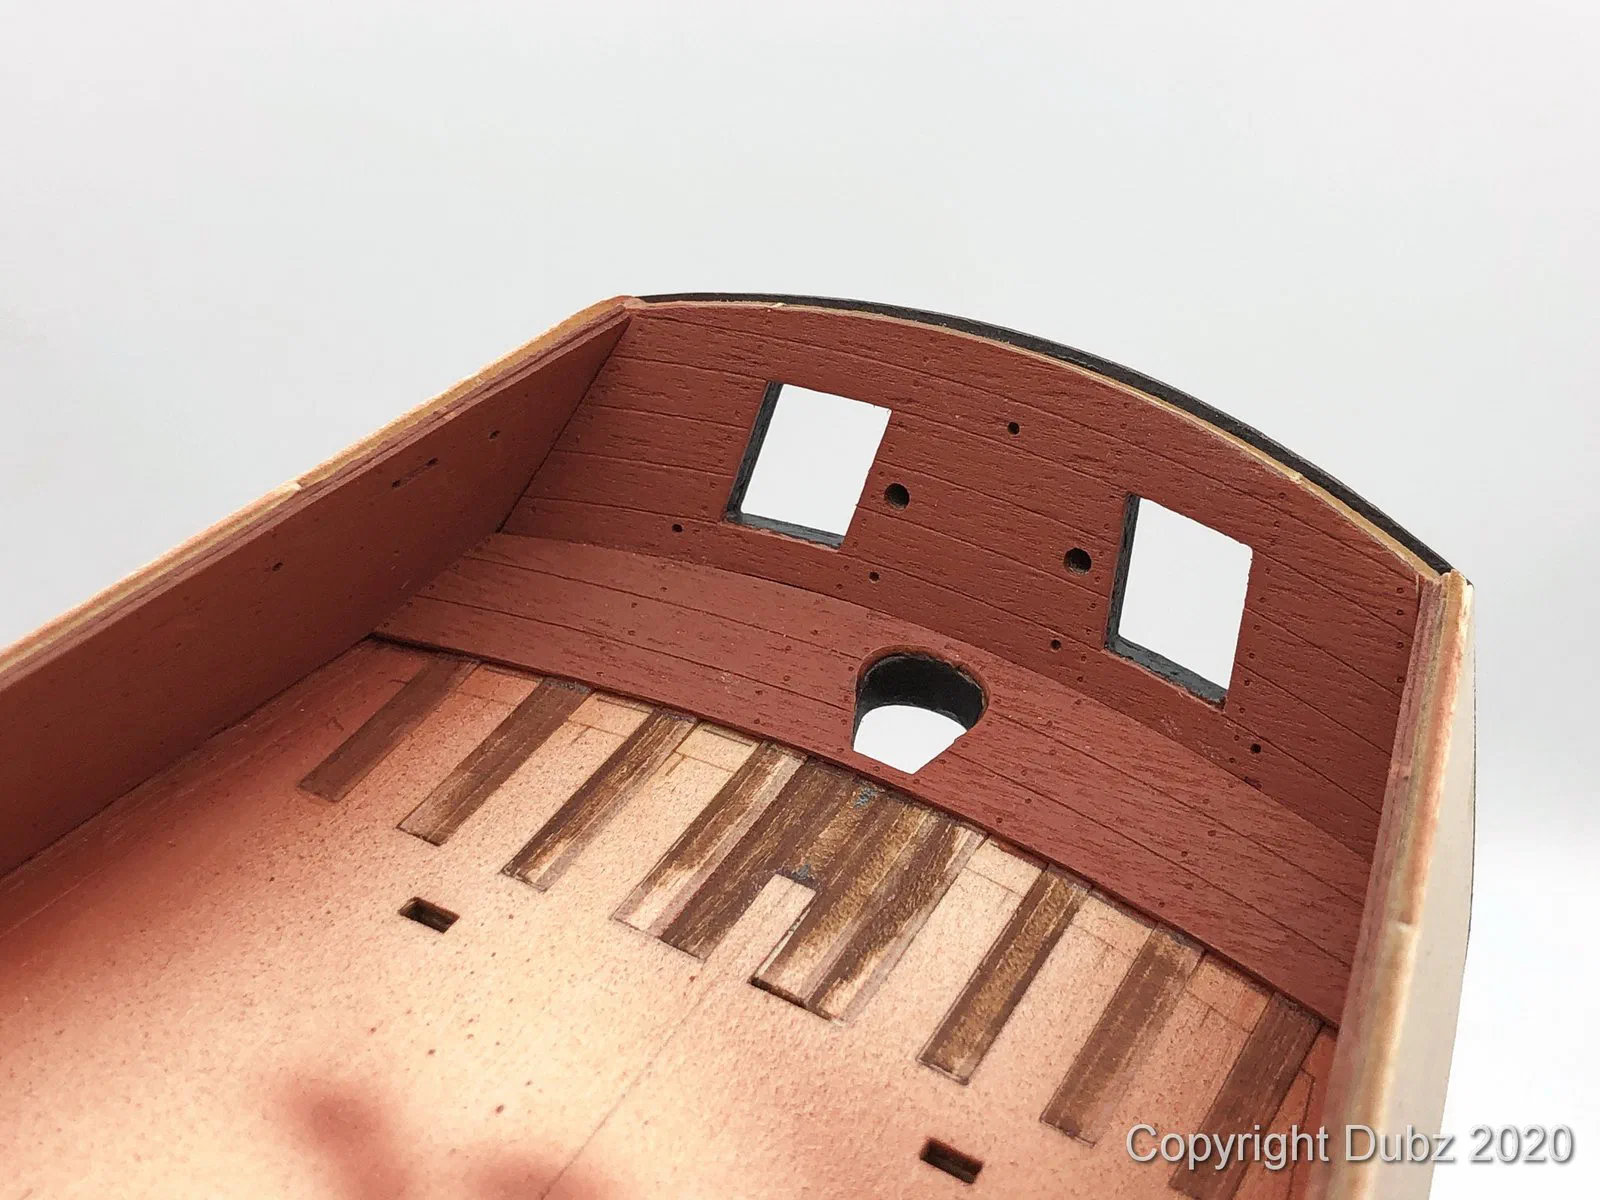
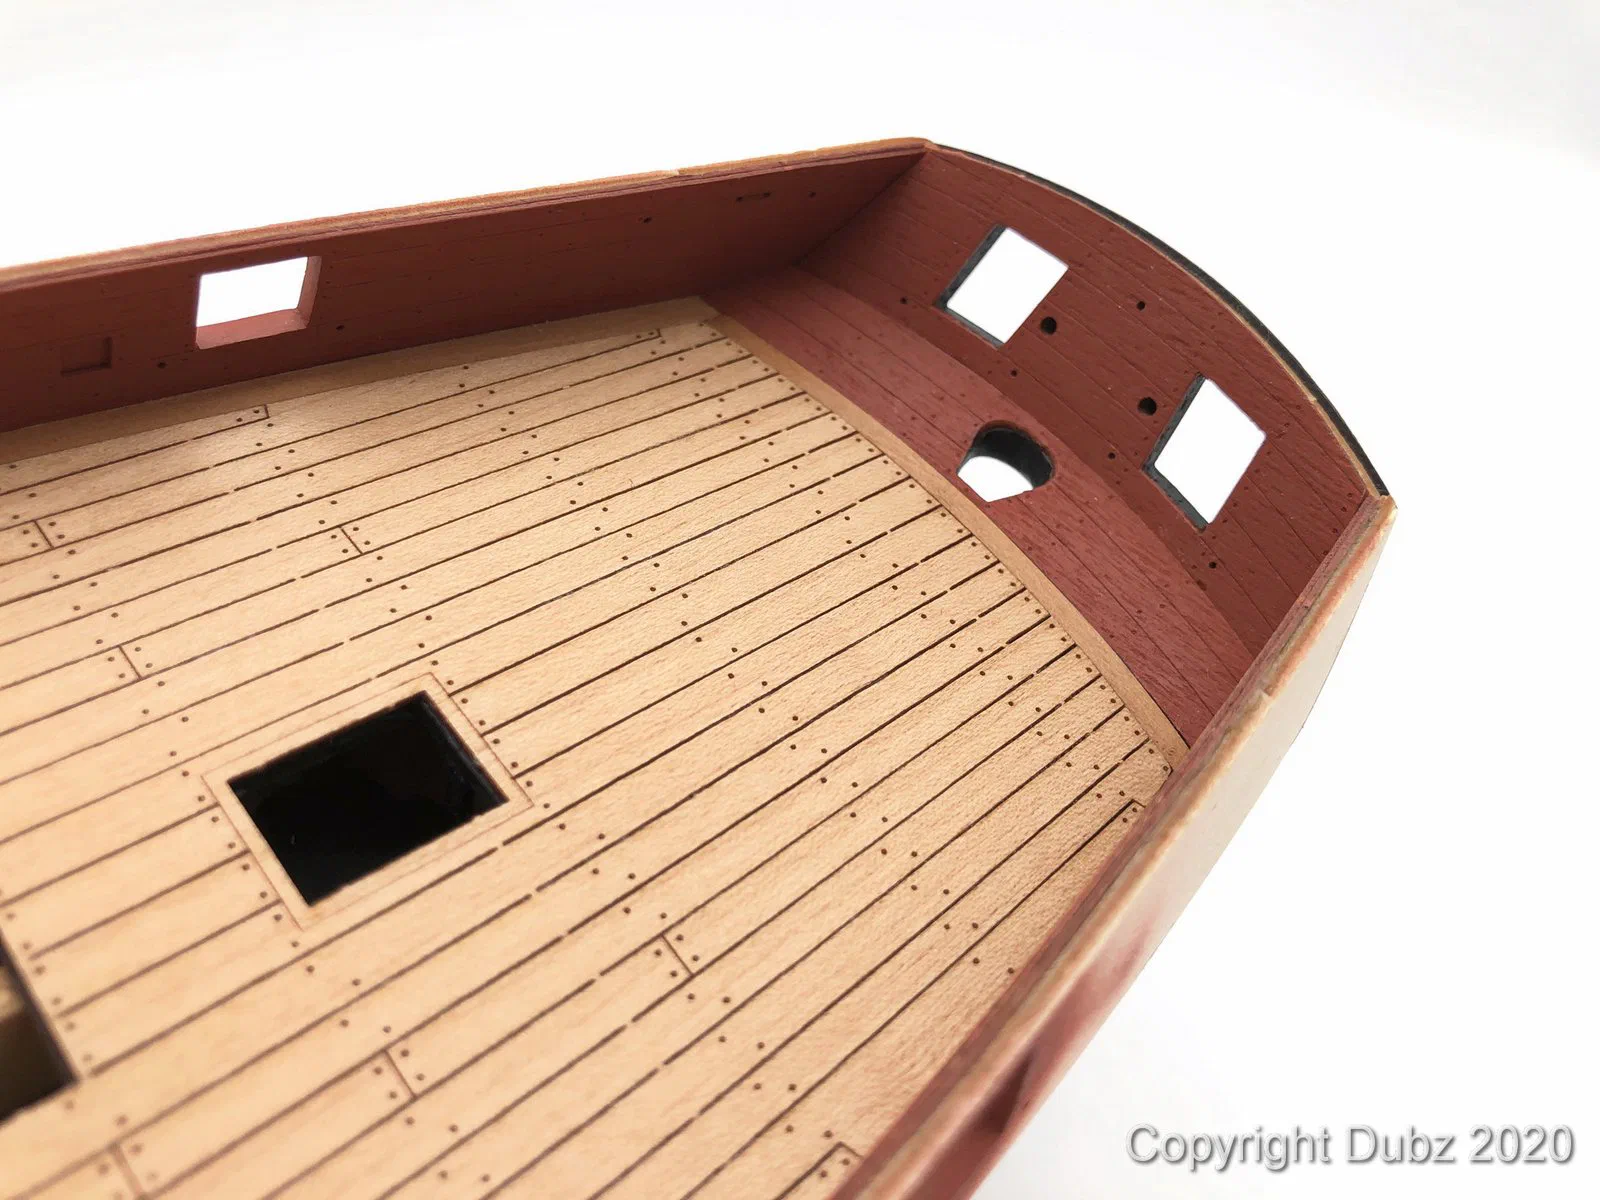
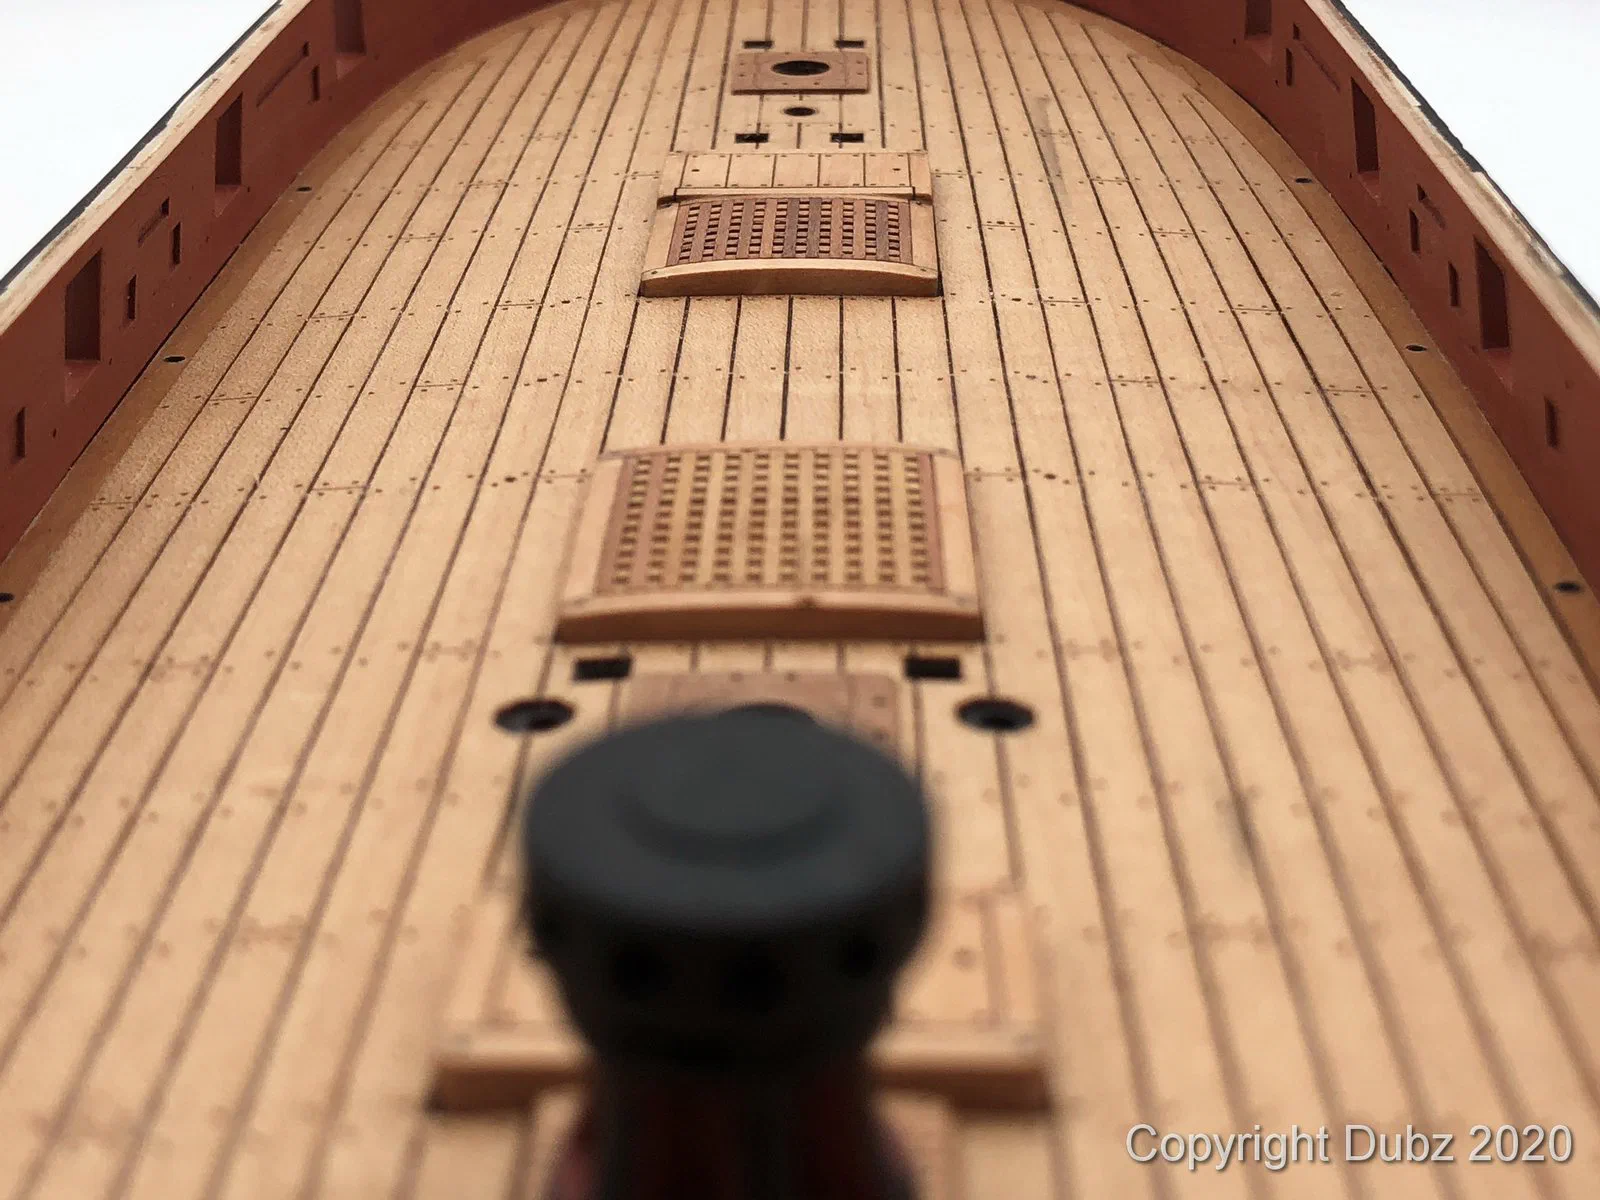
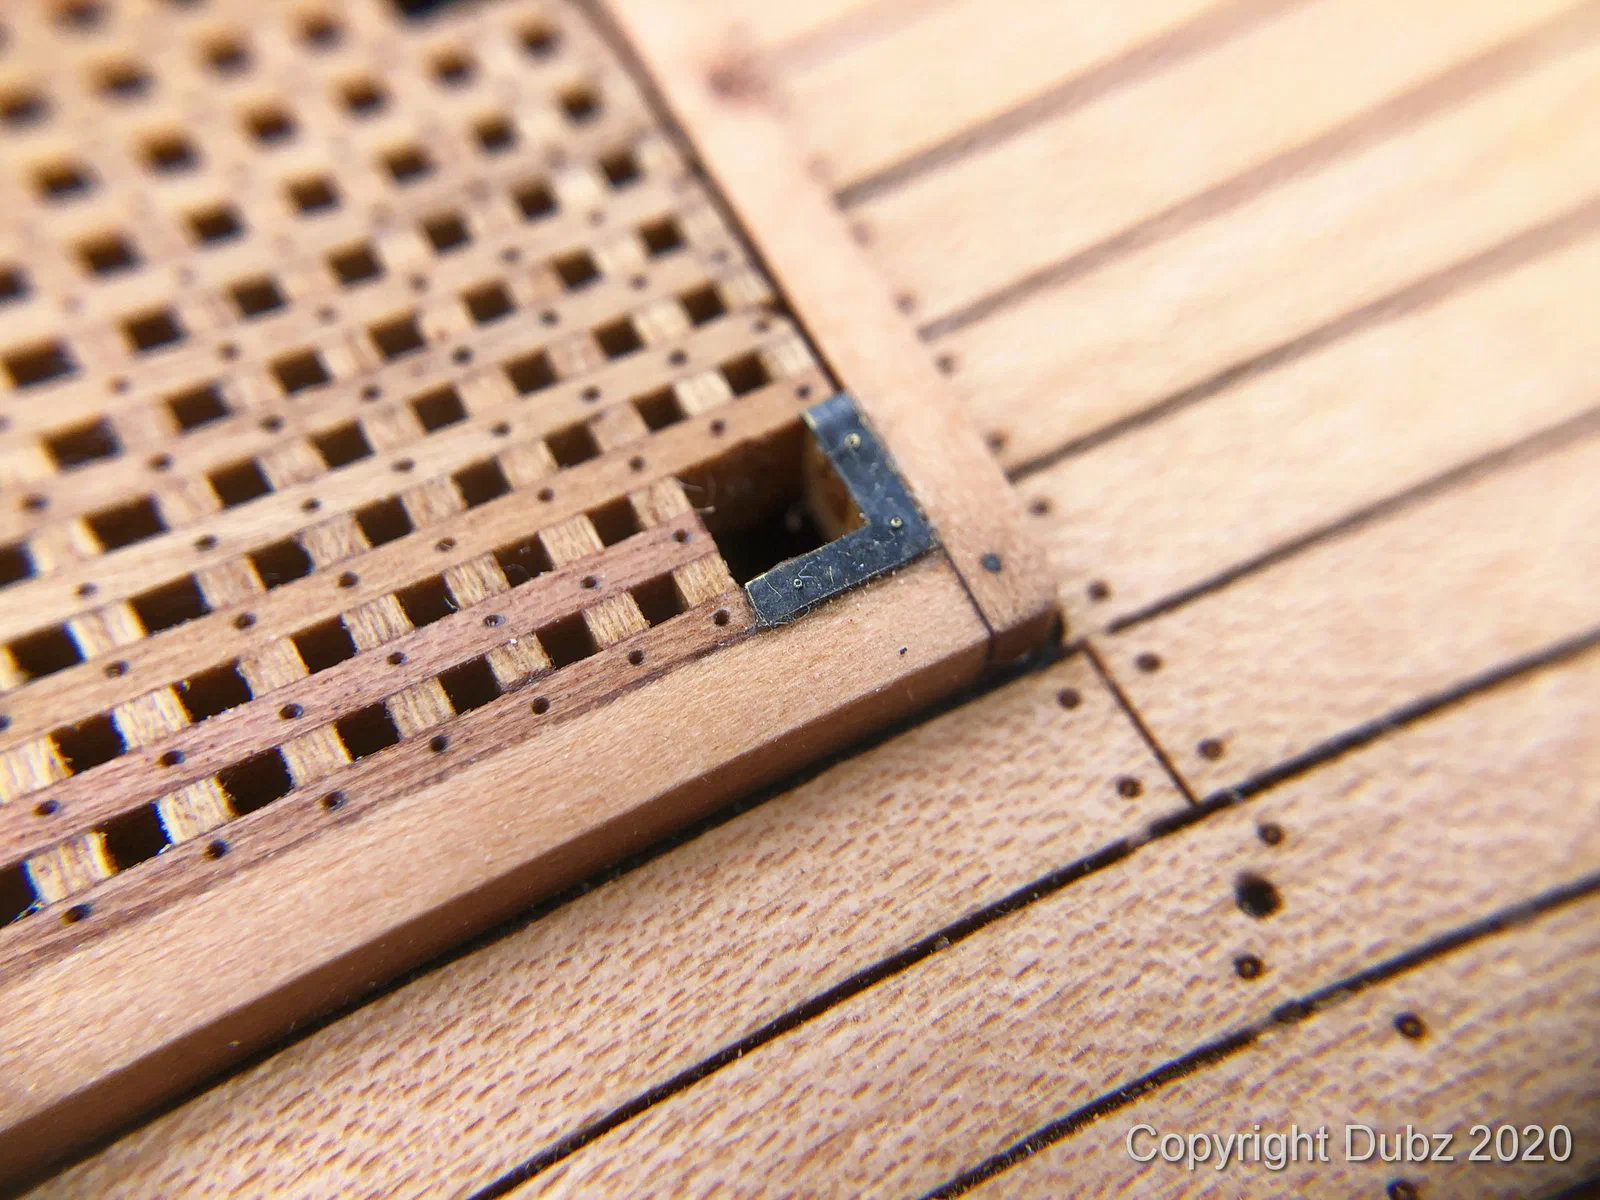
Next came the waterway and the deck. Master Korabel intended the waterway to be bevelled rather than flat, but that detail got lost somewhere between a suboptimal translation and an unfortunate picture in the instructions – and I am not the only builder who missed it. I am also not entirely happy with the deck itself: the planks are cut right through by the laser instead of being merely hinted at, which leaves small bridges that are hard to clean out. Still, the overall impression is good. The deck was finished with Danish oil.
Keel, stem and rudder
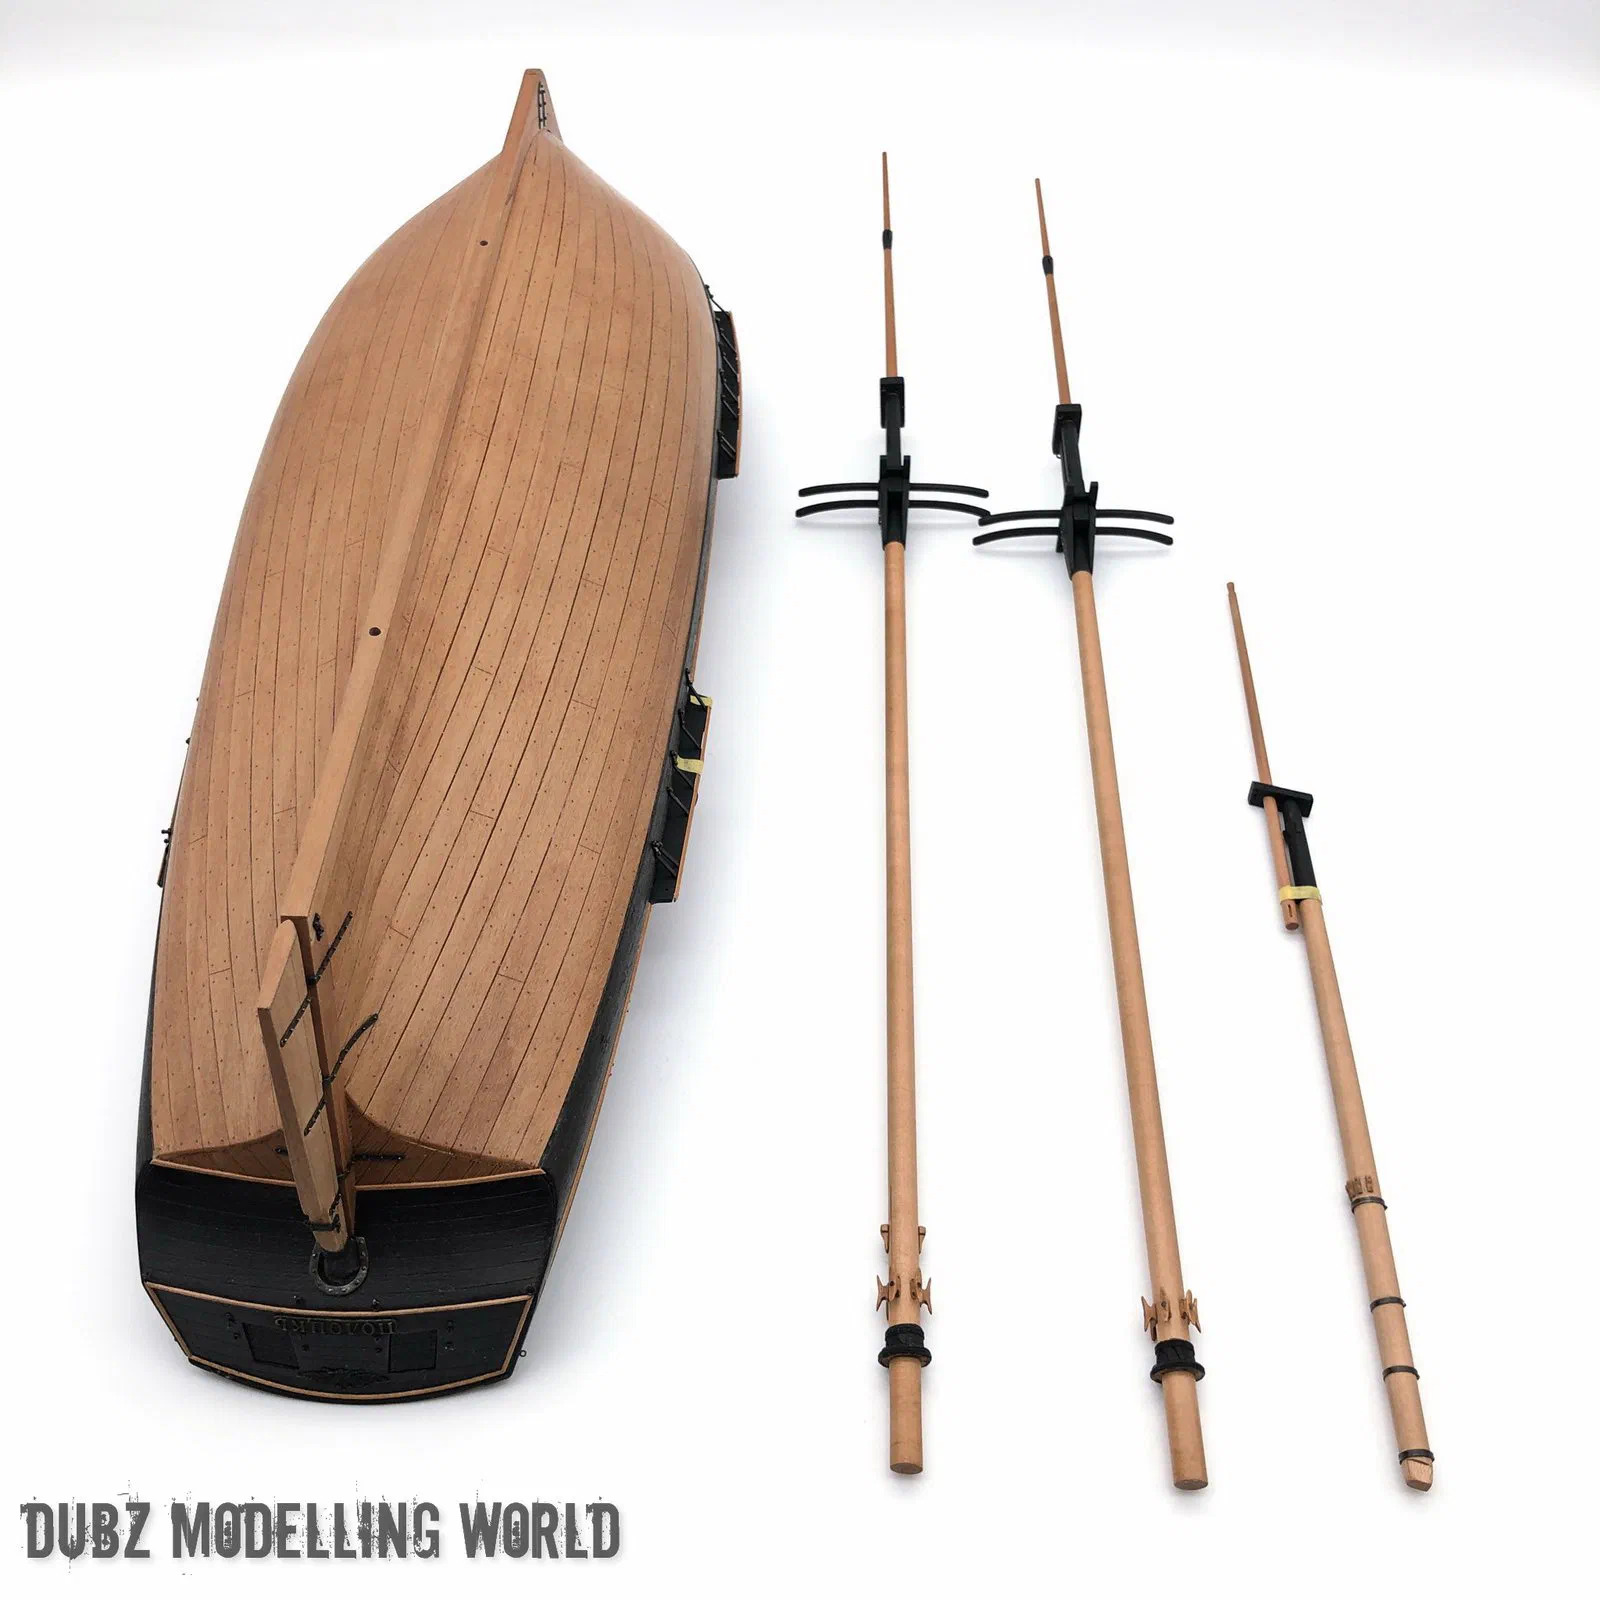
The sandwich construction of the keel works very well in principle, but the veneer supplied for it was too grainy for my taste, so I built the keel from solid pear. With the stern post, keel, false keel and stem in place the hull was complete in early December 2020.
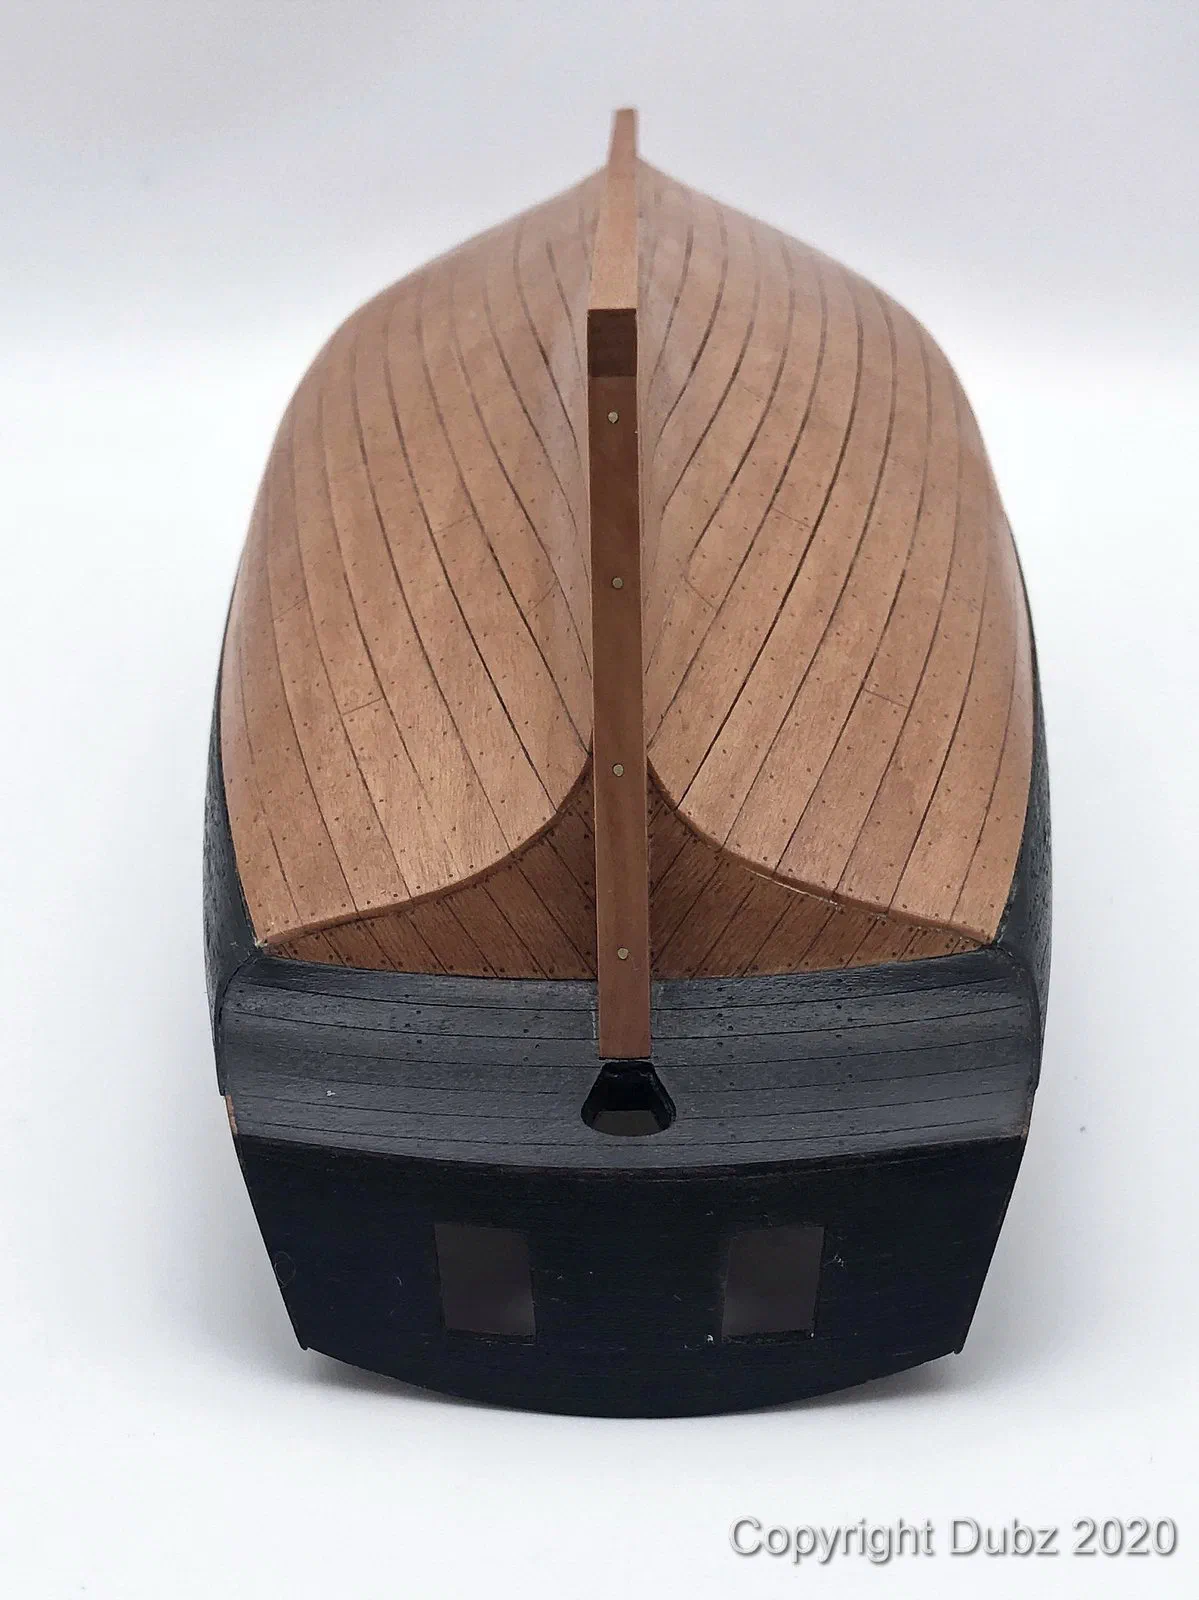
The rudder followed, together with the horseshoe plate. The hinges are probably the worst I have ever built – but they work, and at 1:72 you have to look very closely to see it. The tiller and its block came later; I redid the tiller block in August 2021.
Deck fittings
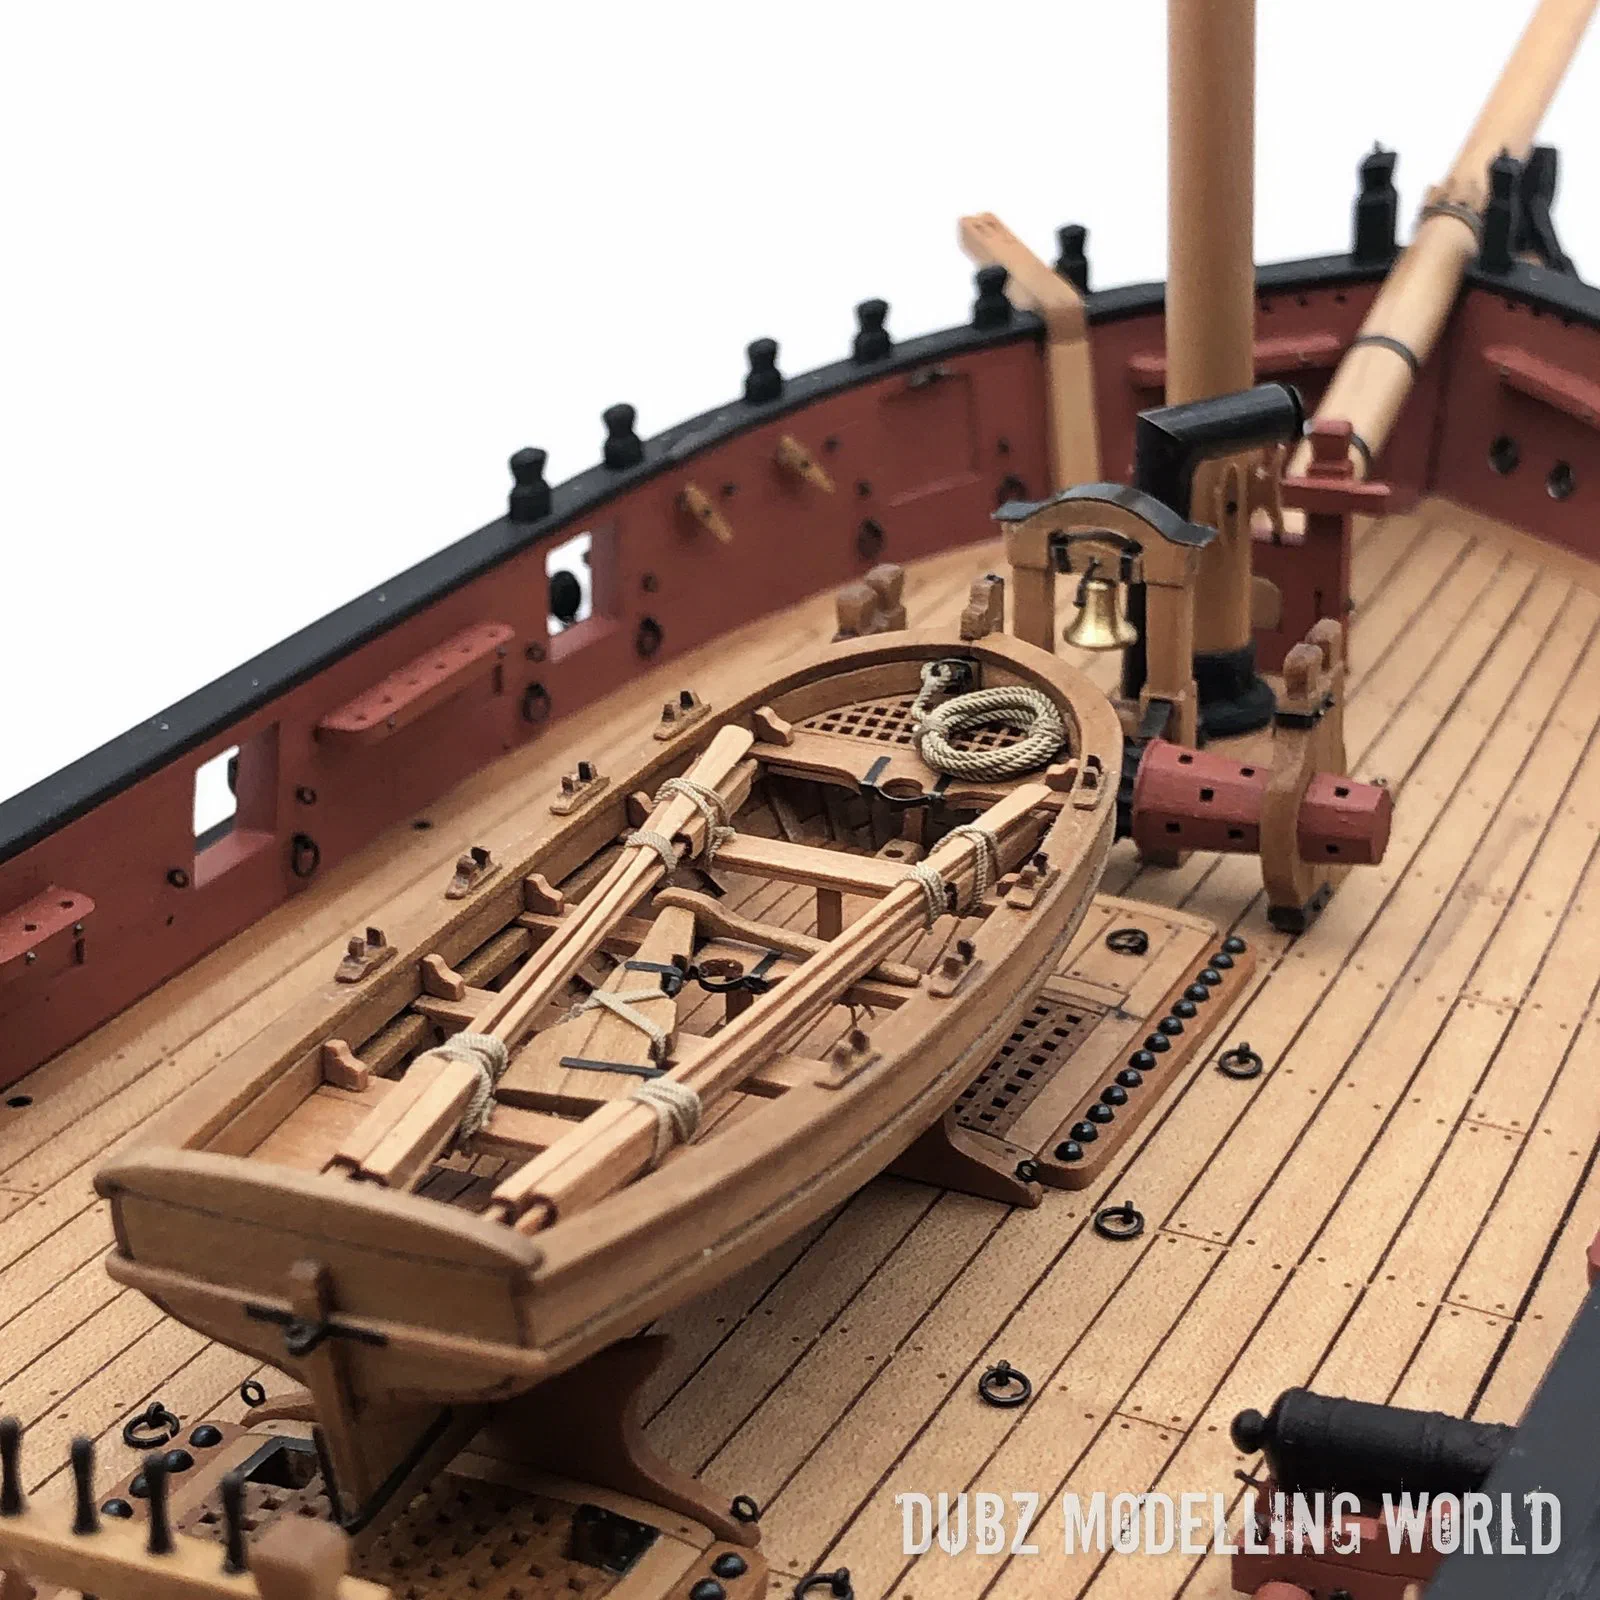
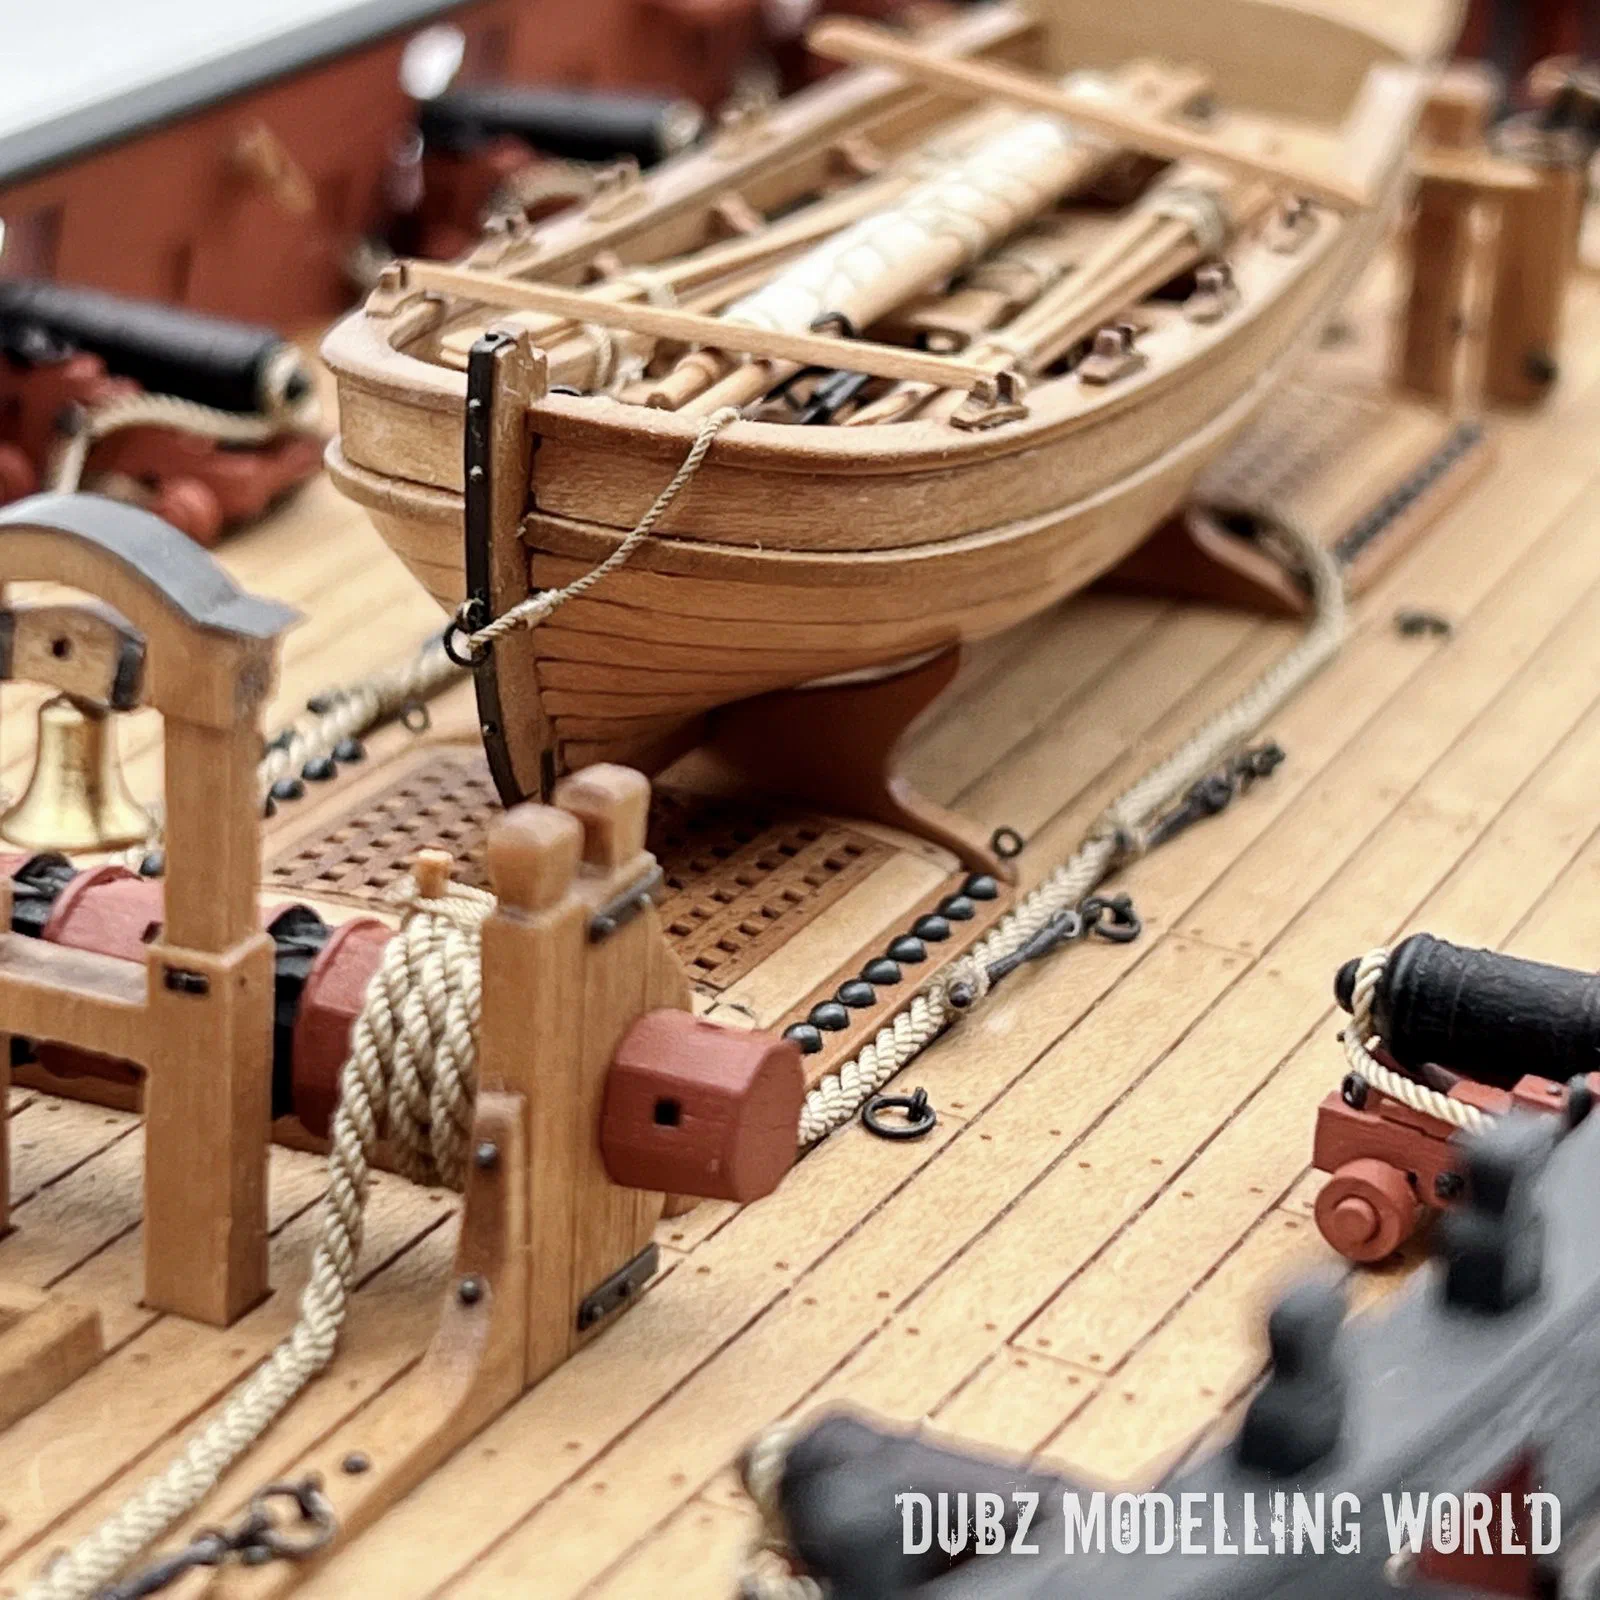
Once the hull was closed, the deck could be furnished. The capstan was the first piece, followed by the gratings, which received a long series of tiny nails. The hatch covers were rounded to match the camber of the gratings. Then came the pawls, the protection for the anchor cable, the bell and the galley stack, the pin rails – with smaller belaying pins than those in the kit – and the windlass.
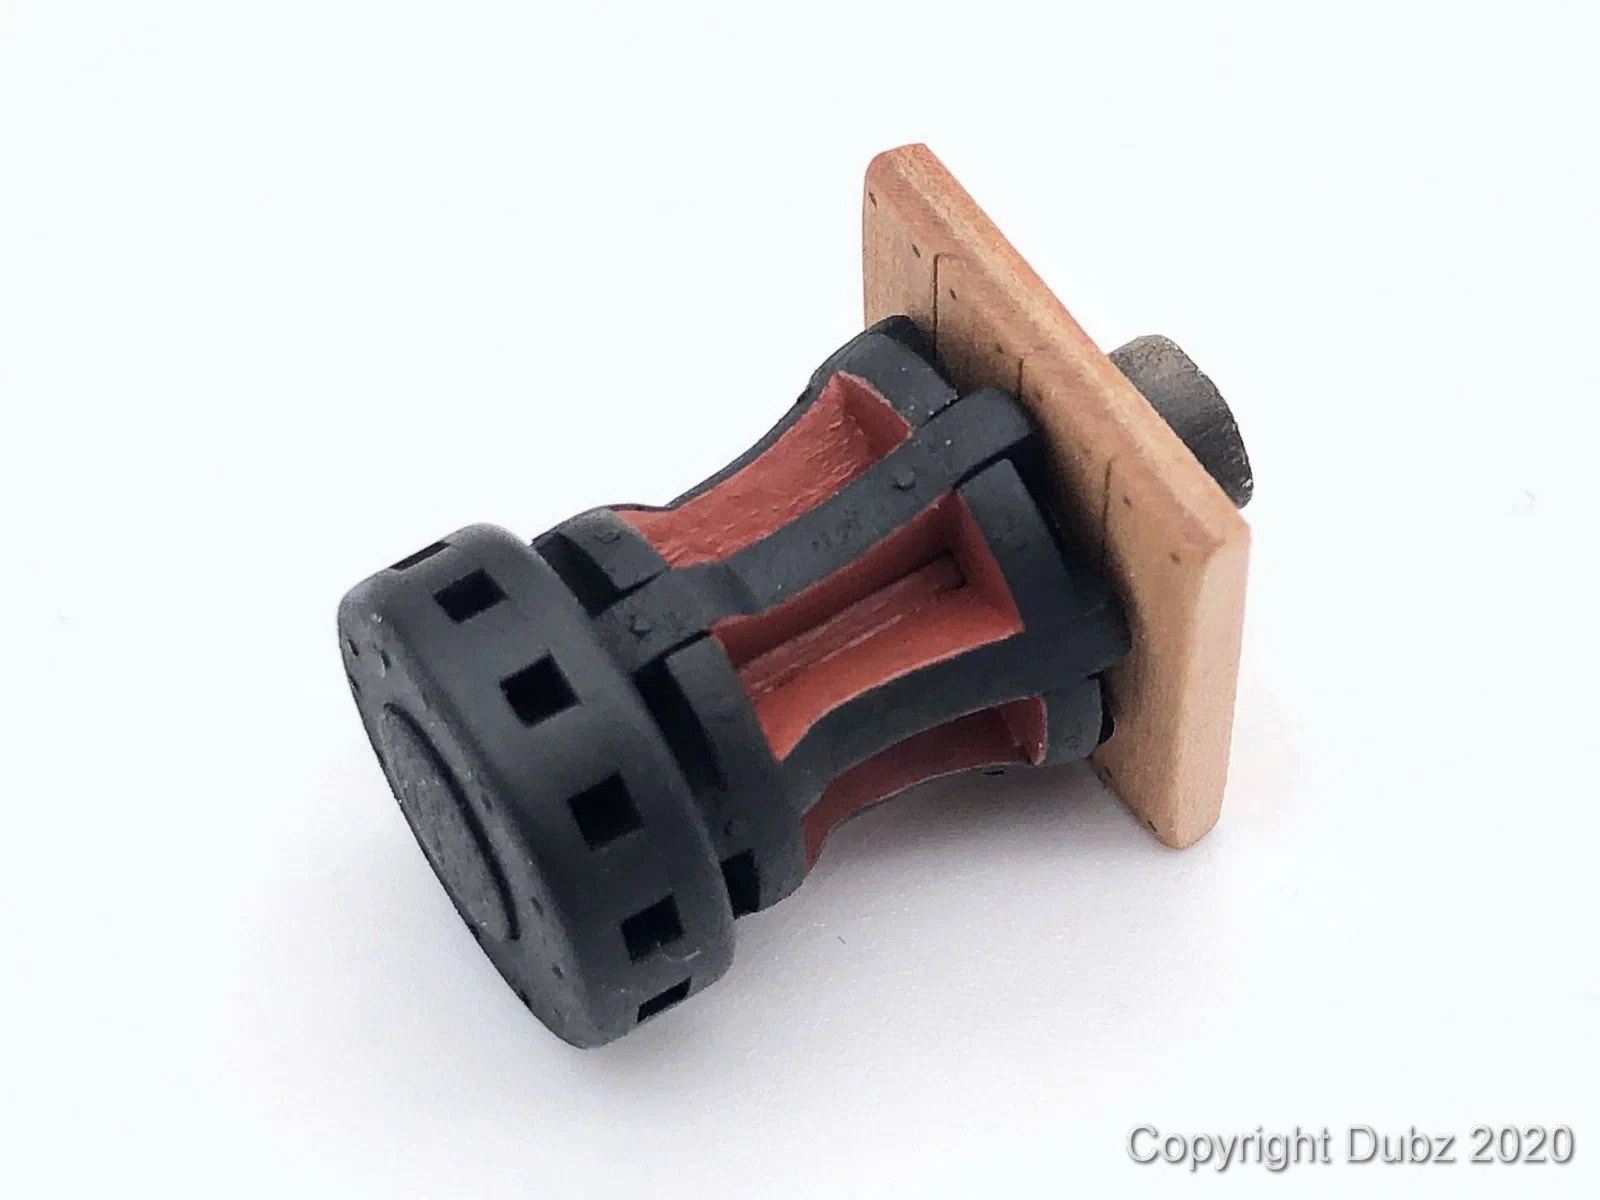
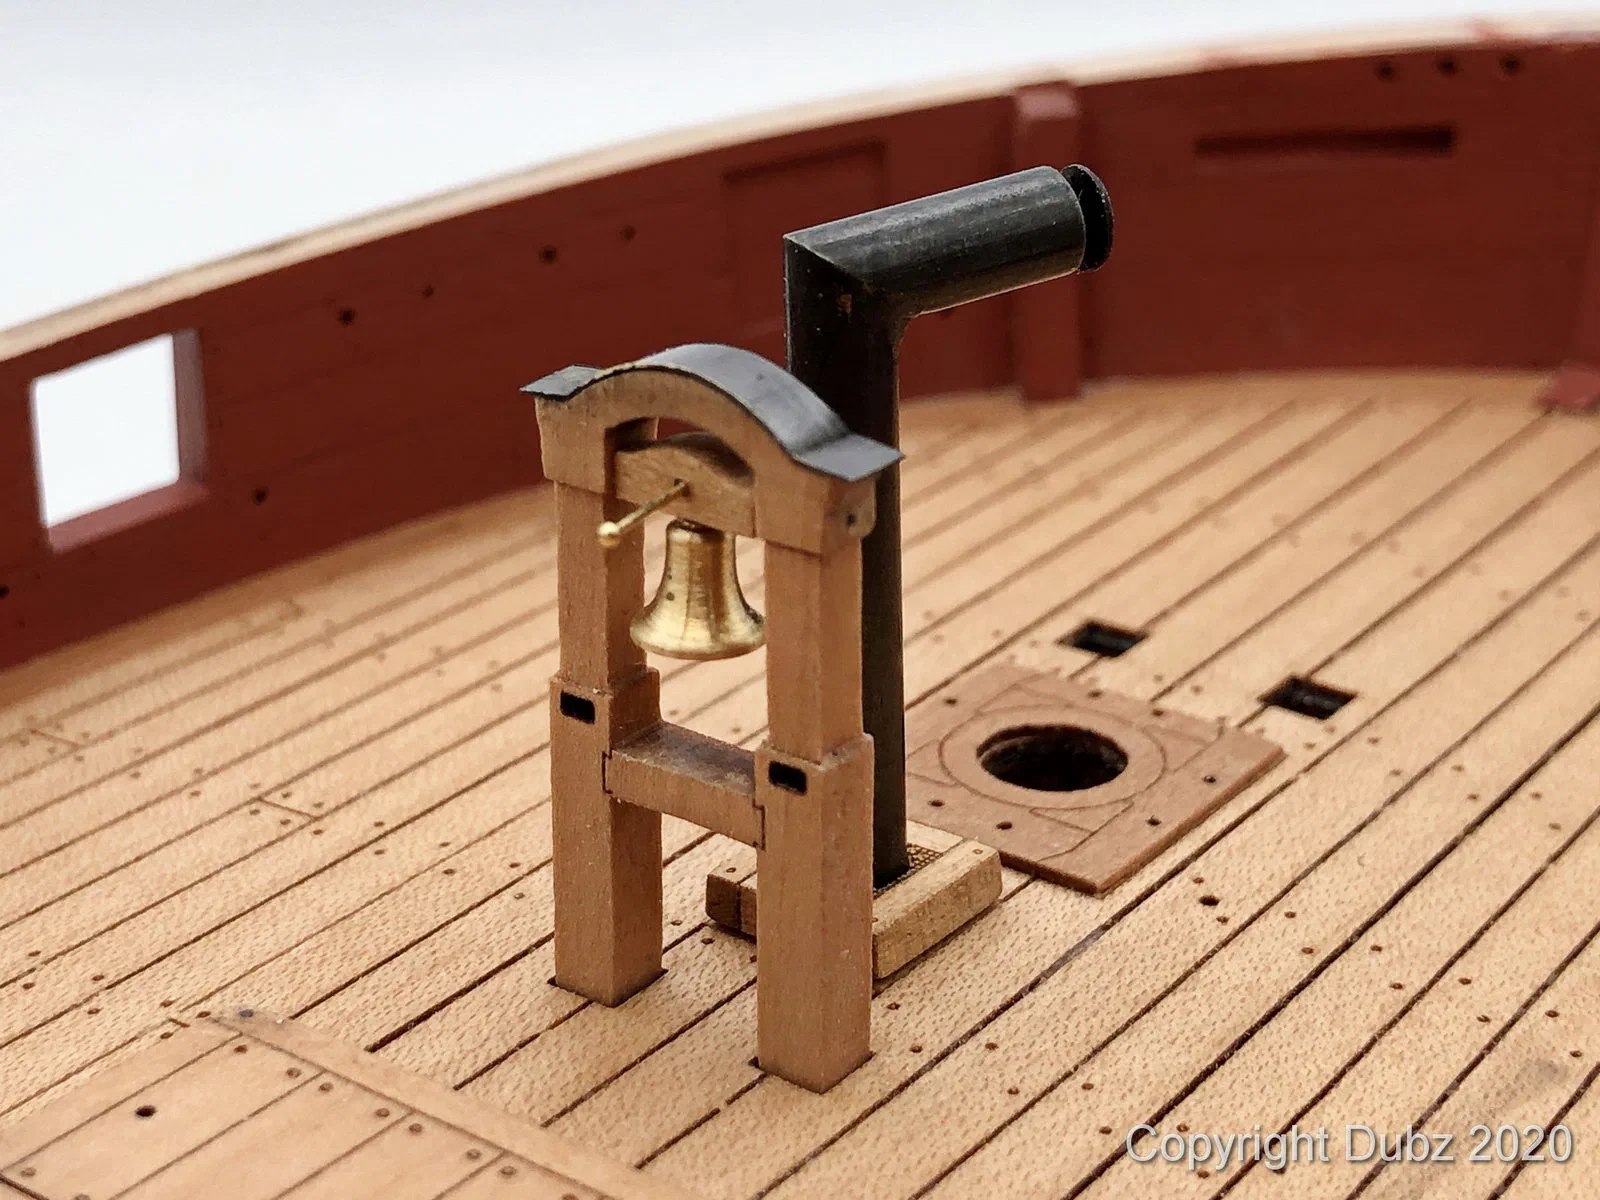
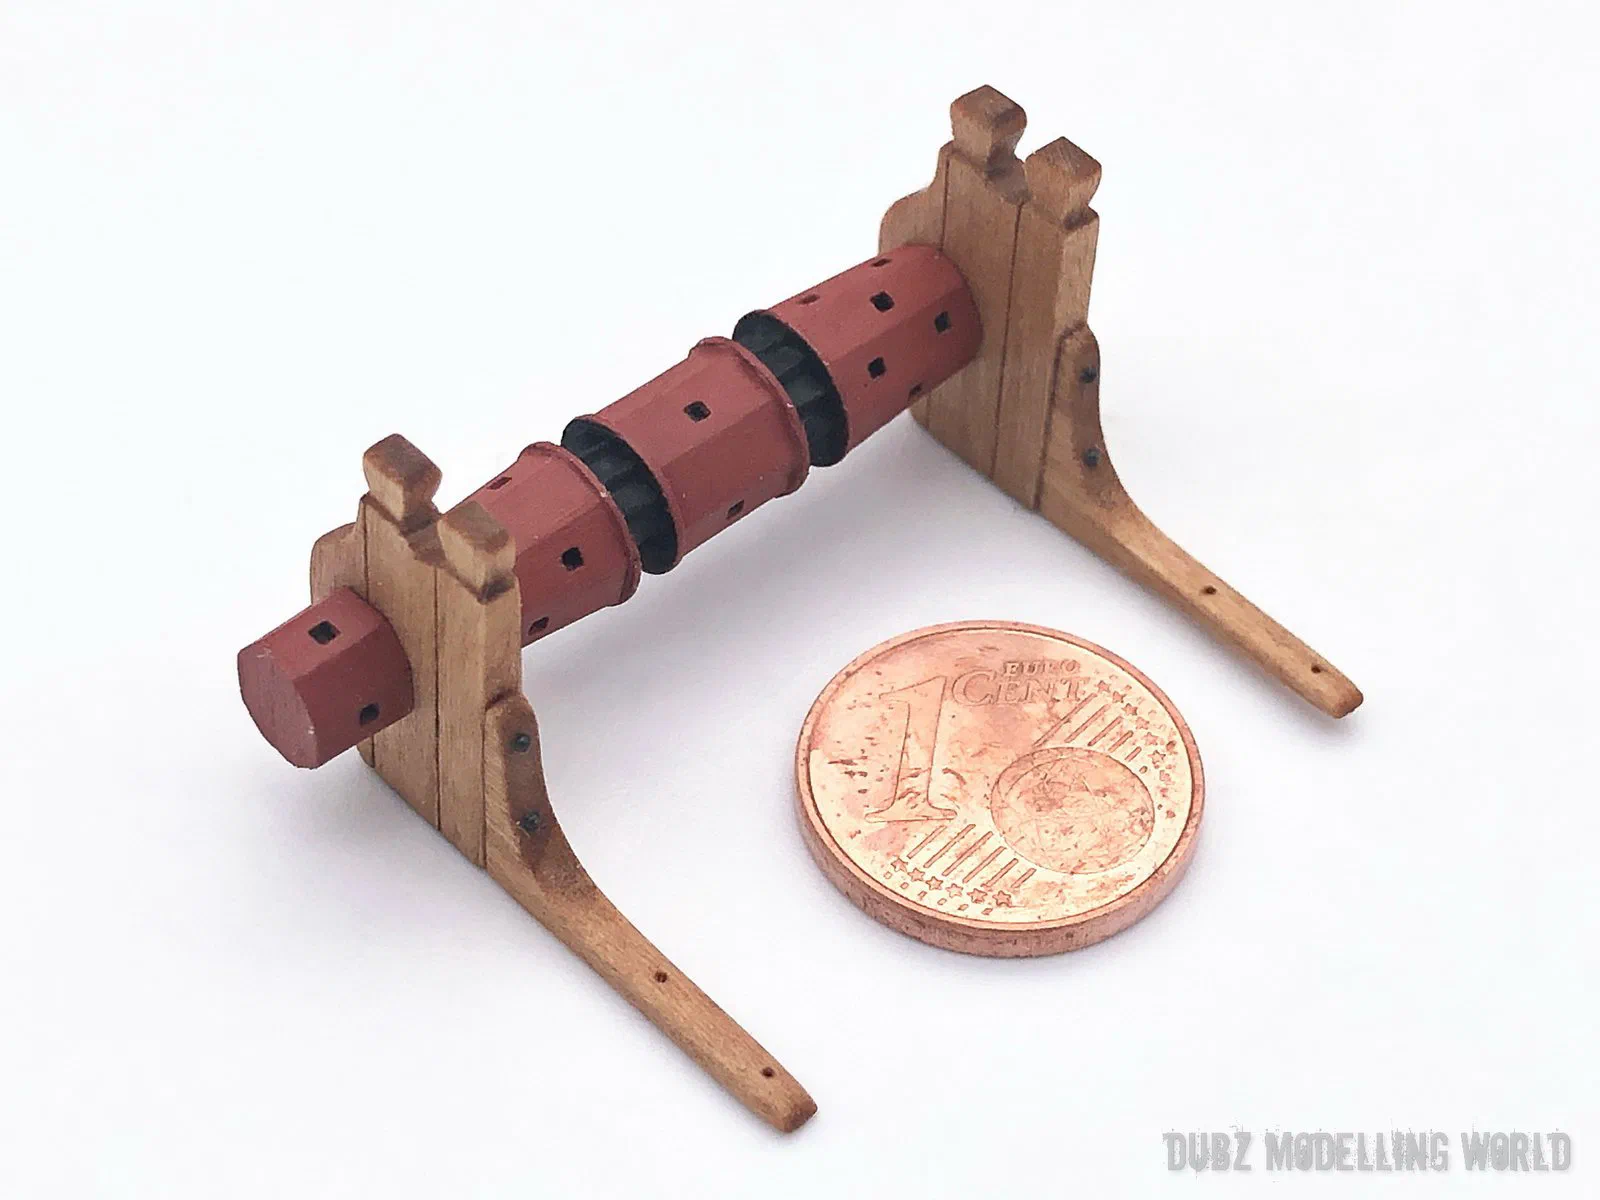
The elm-tree pumps were made from new wood but with the kit’s photo-etched parts, which I soldered and filed into clean, solid fittings. At the same time I prepared the eyebolts with rings for the breeching ropes and fitted eyebolts and cleats on the inboard and outboard sides of the bulwarks.
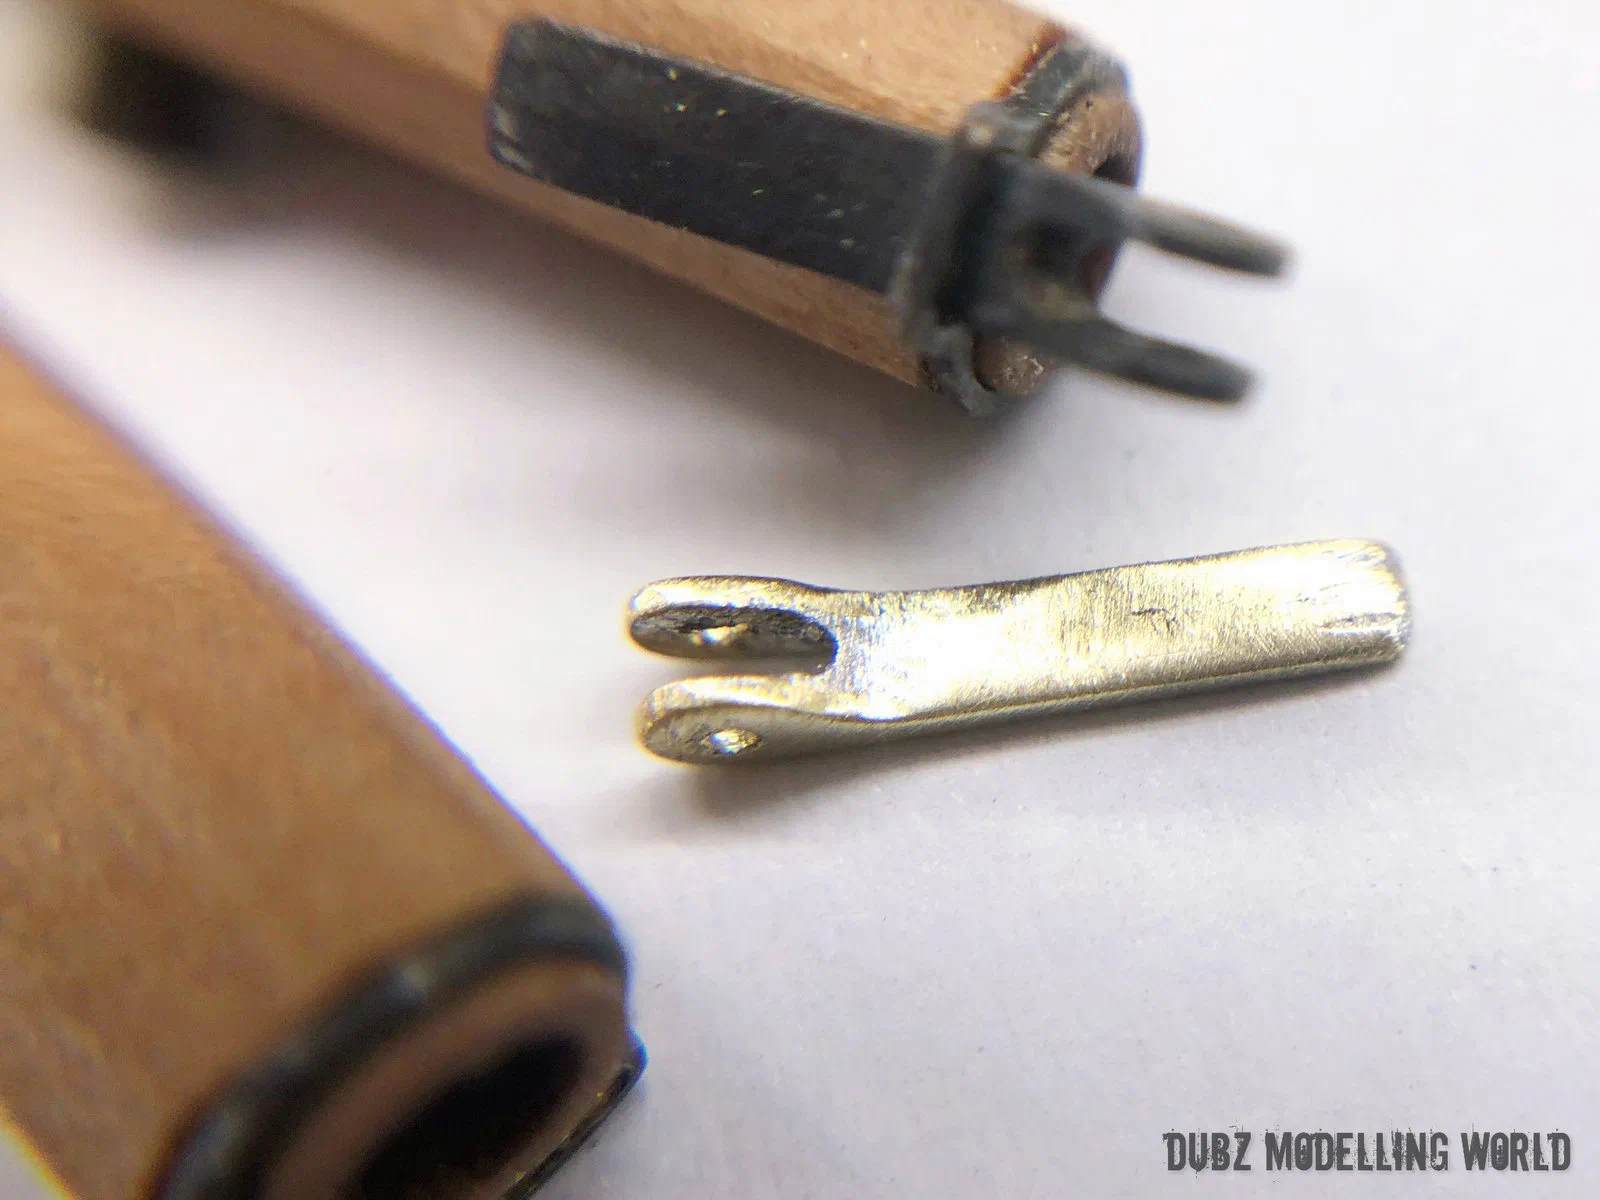
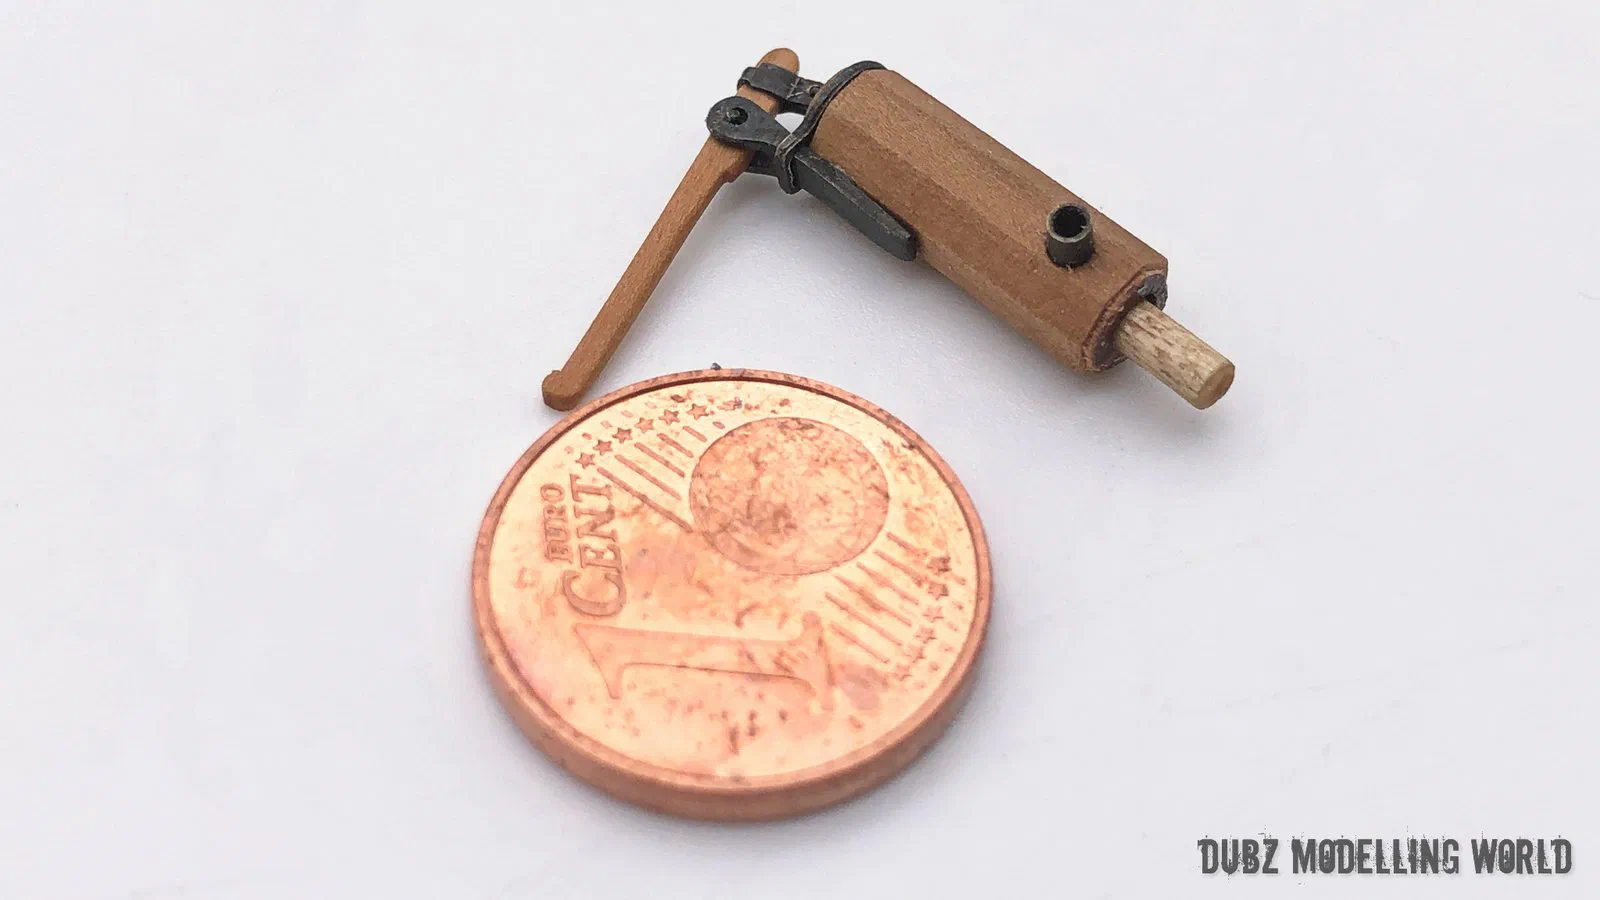
A small tool deserves a mention here because I used it everywhere on this model: a set of Selva miniature hand reamers from 0.15 to 1.40 mm. Whenever a hole in a block, in plastic or in metal needs to be enlarged, or a hole has to be made in the smallest brass strip – punched in with a pin and a hammer, then opened up with the reamer – these little tools are indispensable.
Head, catheads and hawse holes
Not everything went smoothly. The lower part of the cathead supports was too short; it is a part where I think the kit should be oversized to give some building tolerance. I removed and replaced it in a small surgery, only to find that the angle of the upper part was too low, so it had to come apart once more. In the end the angle was right and the knee was installed. The cathead is a single piece of wood, so the seam can disappear under red paint, even though I rather like the two tones of the pear.
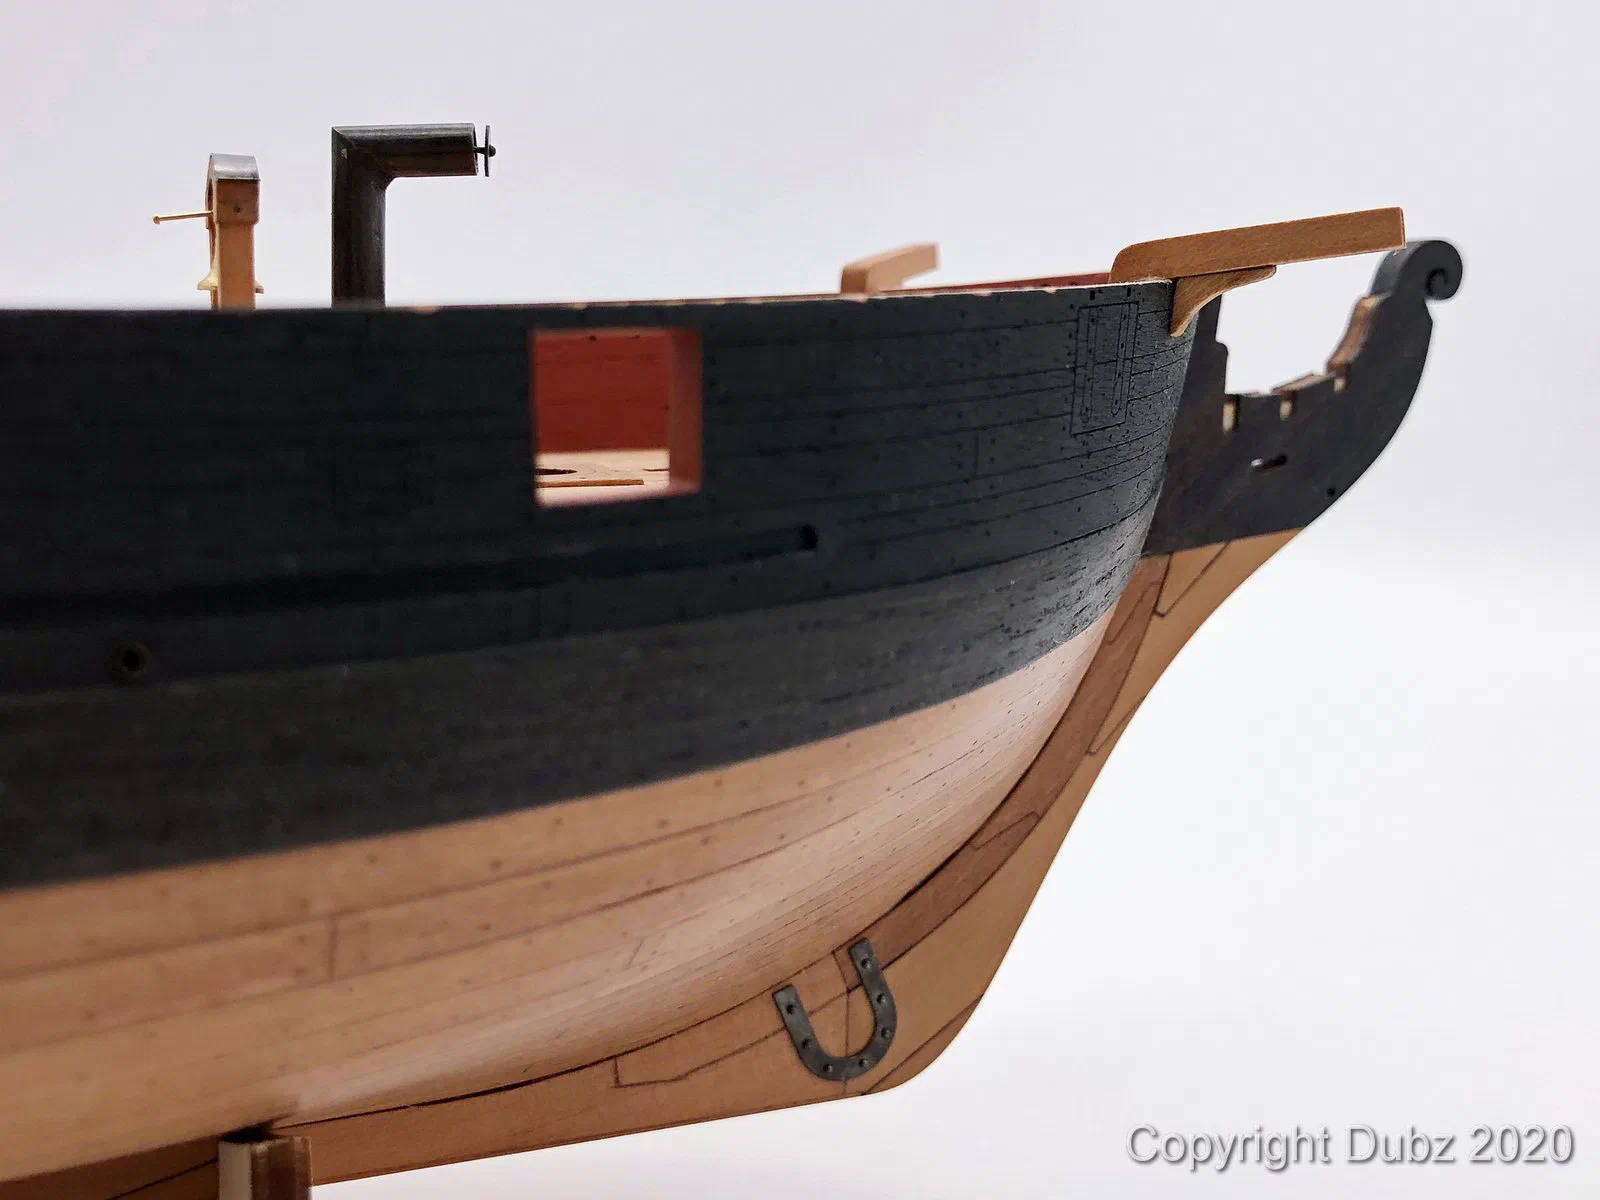
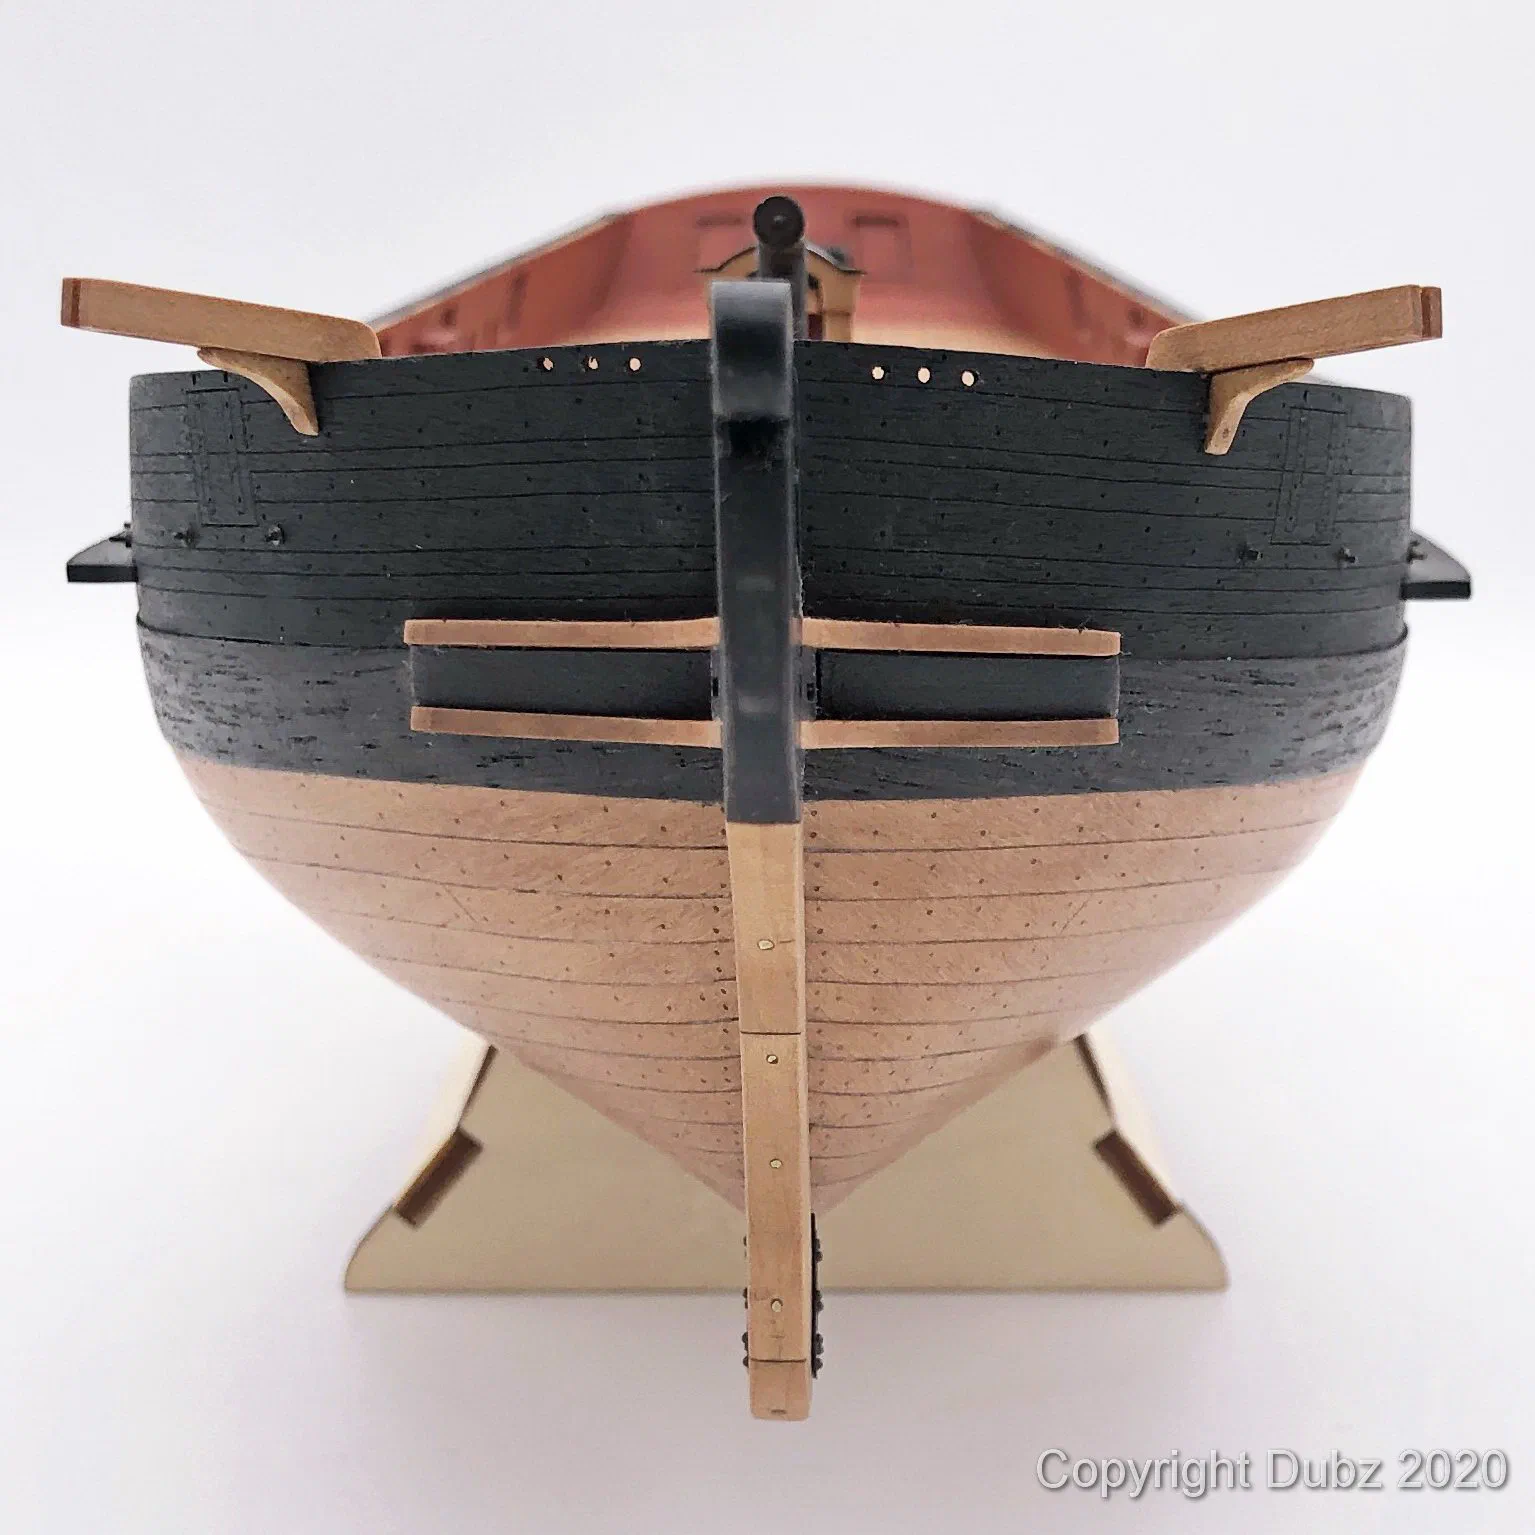
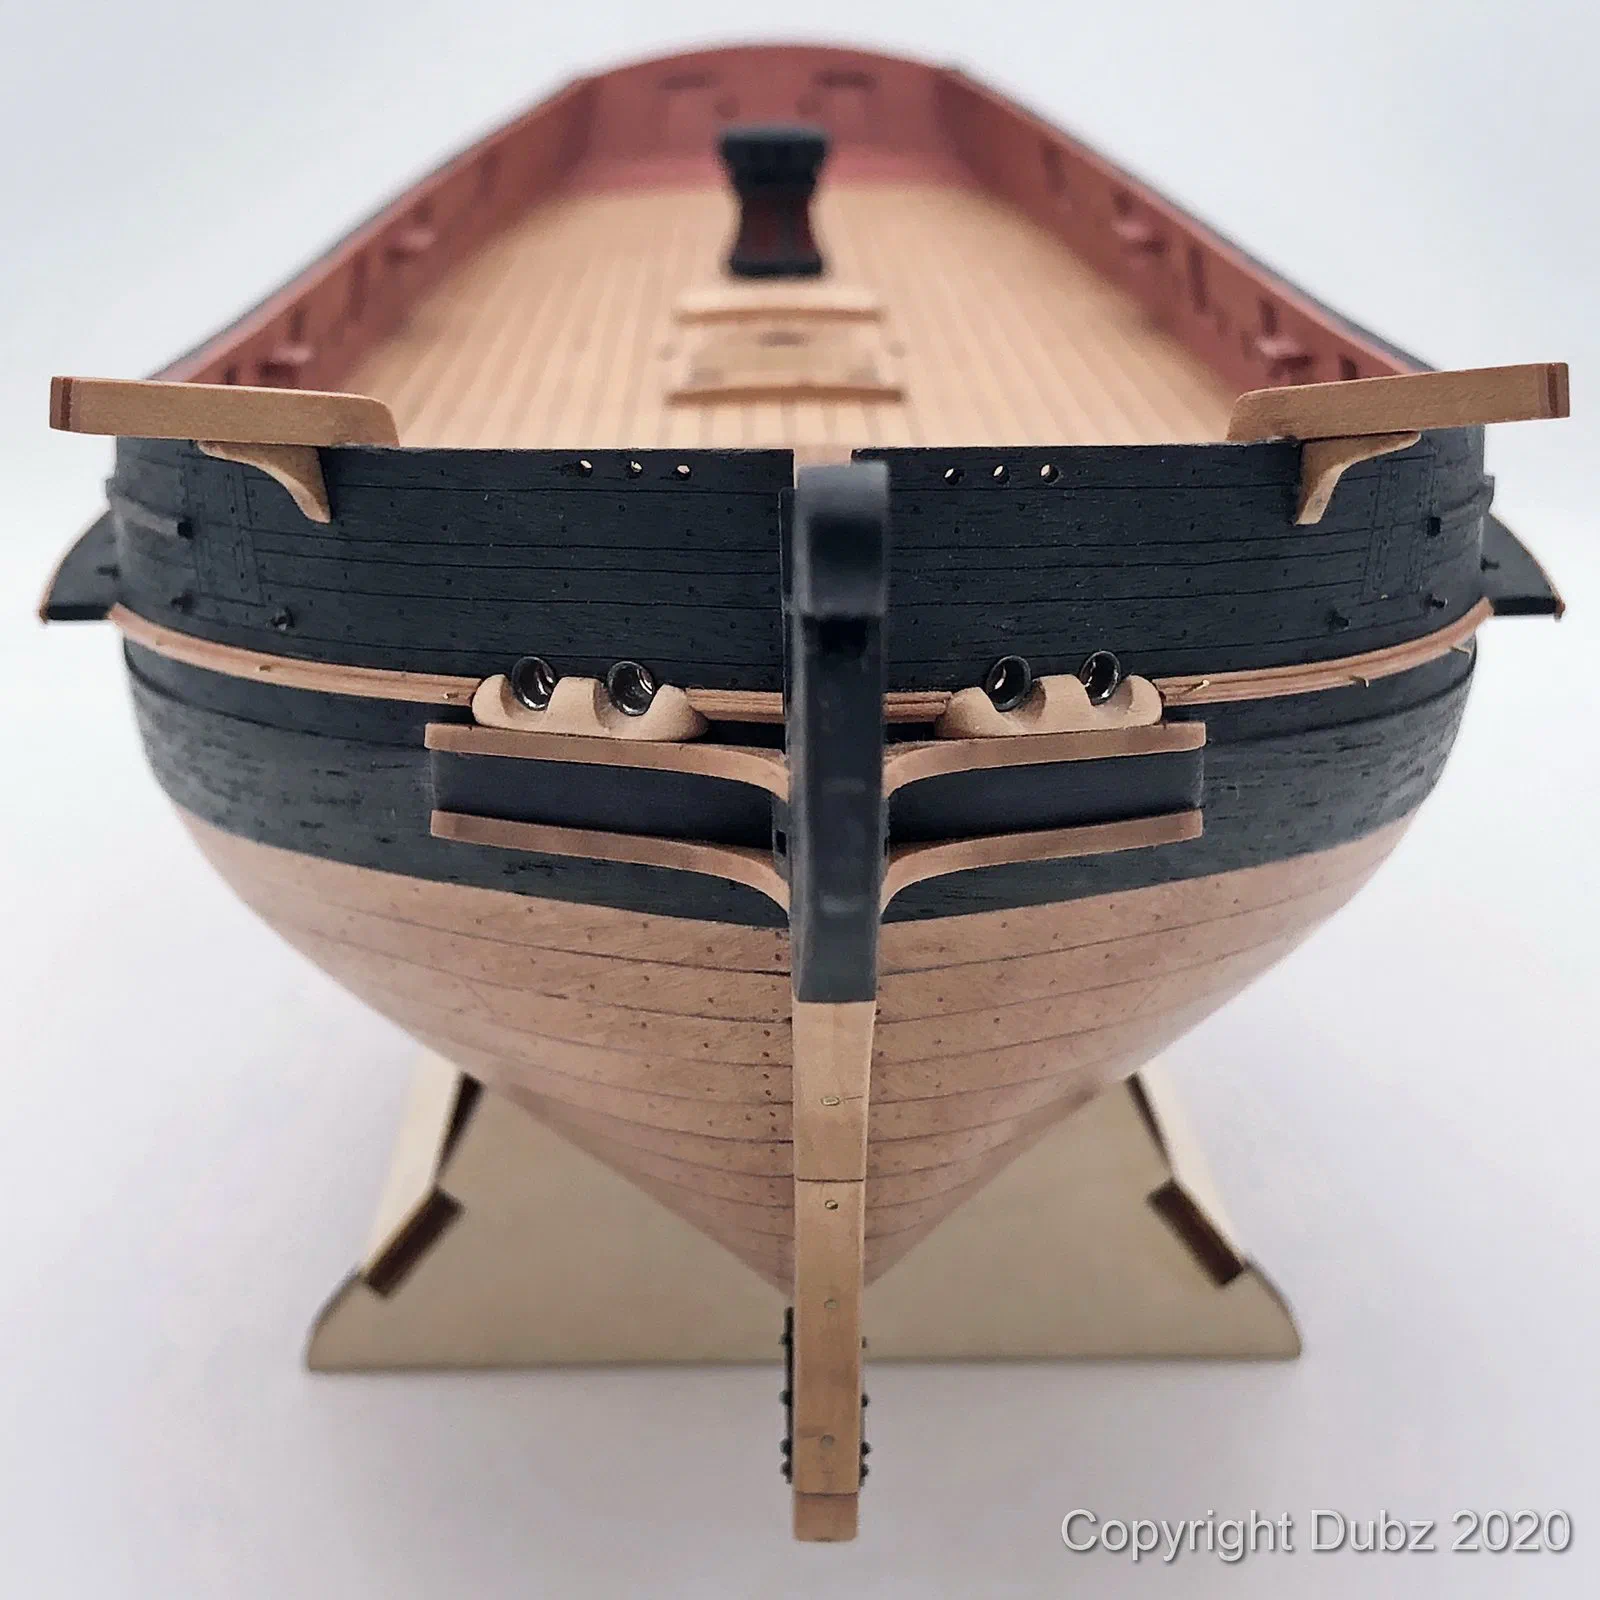
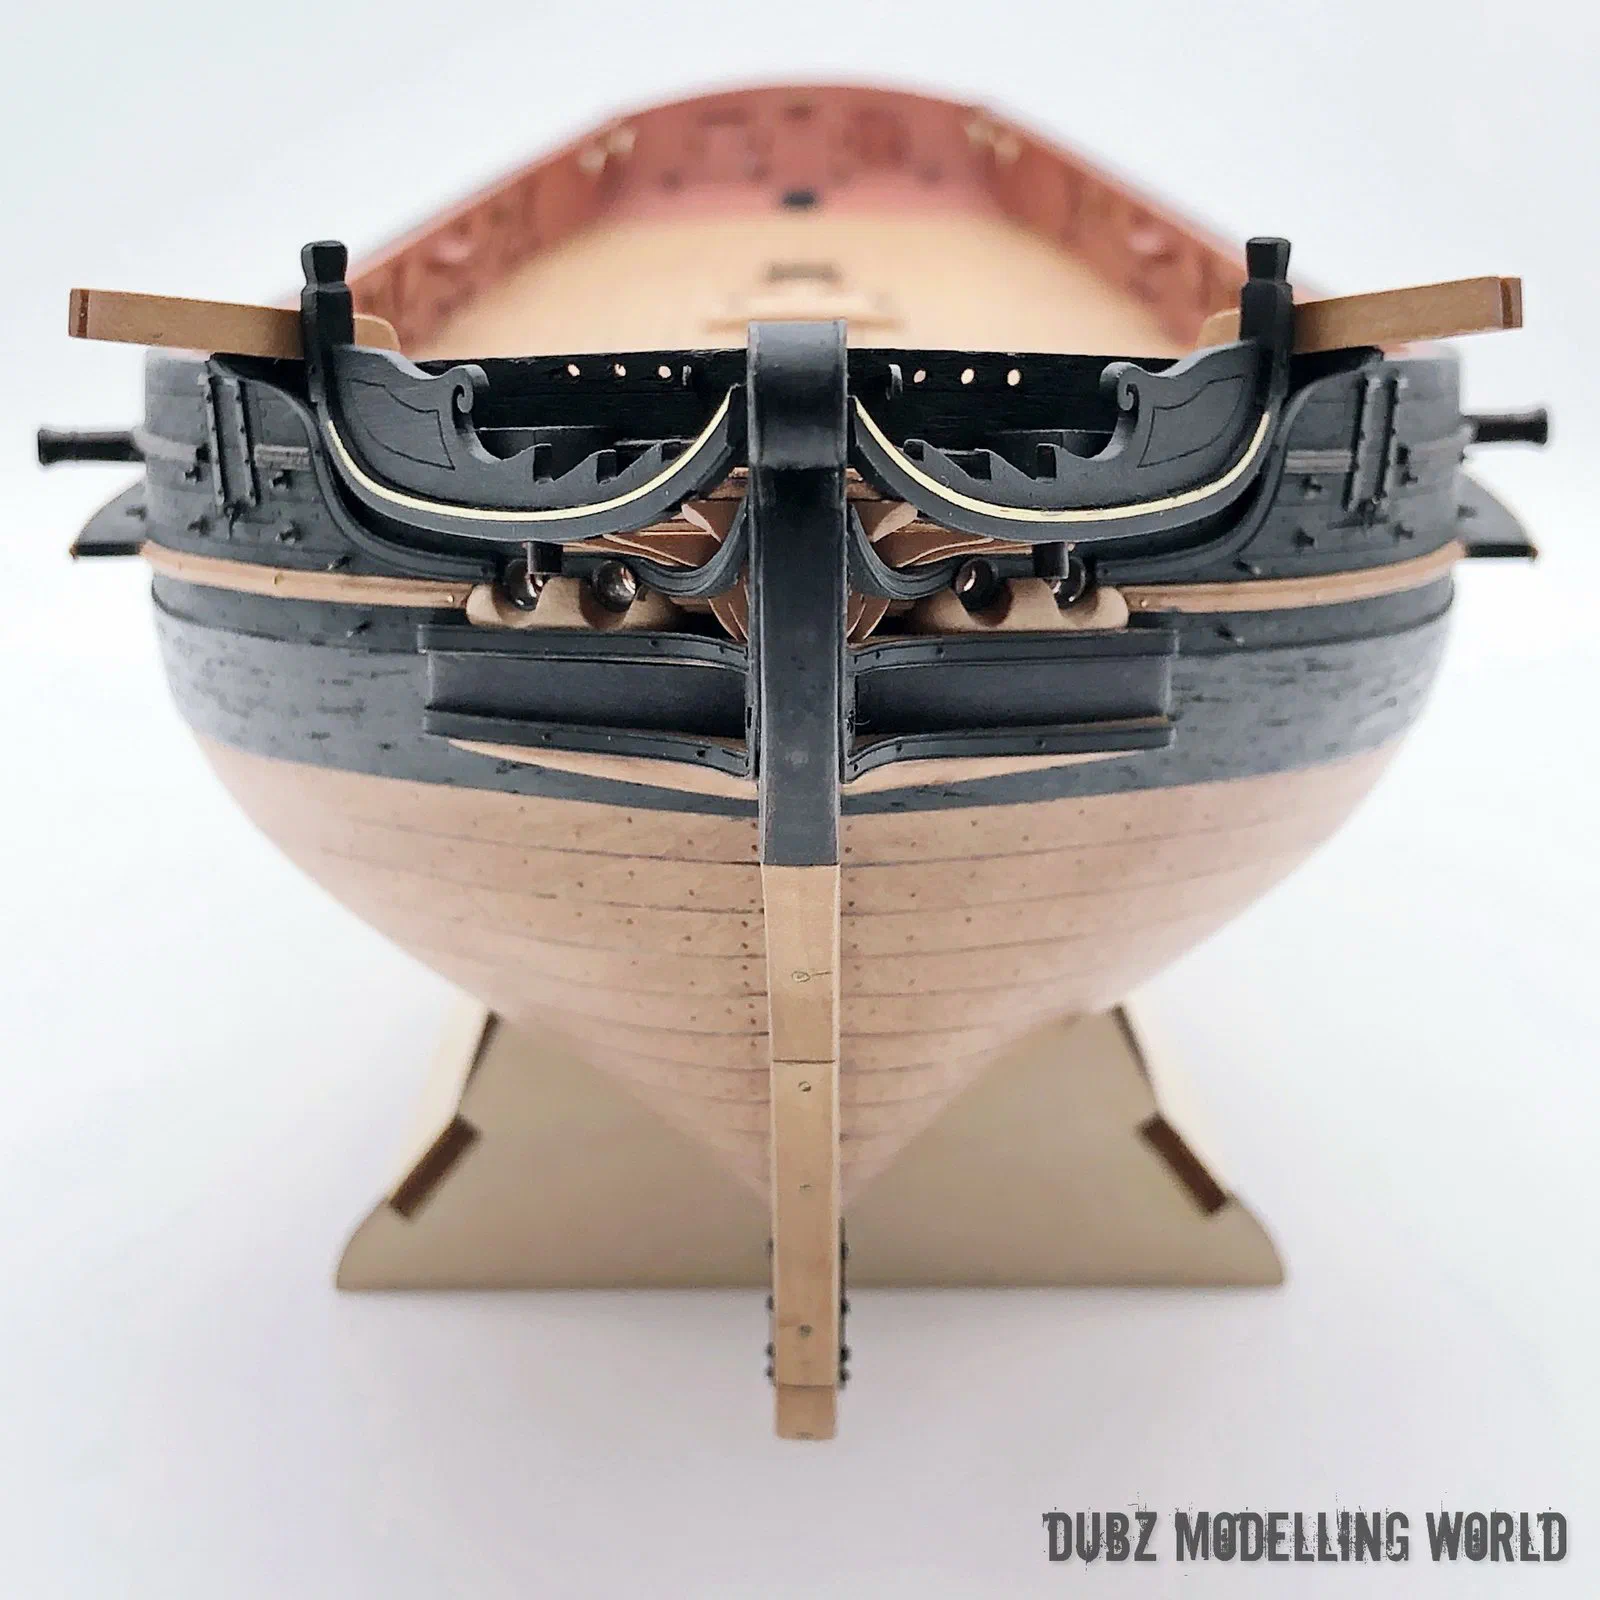
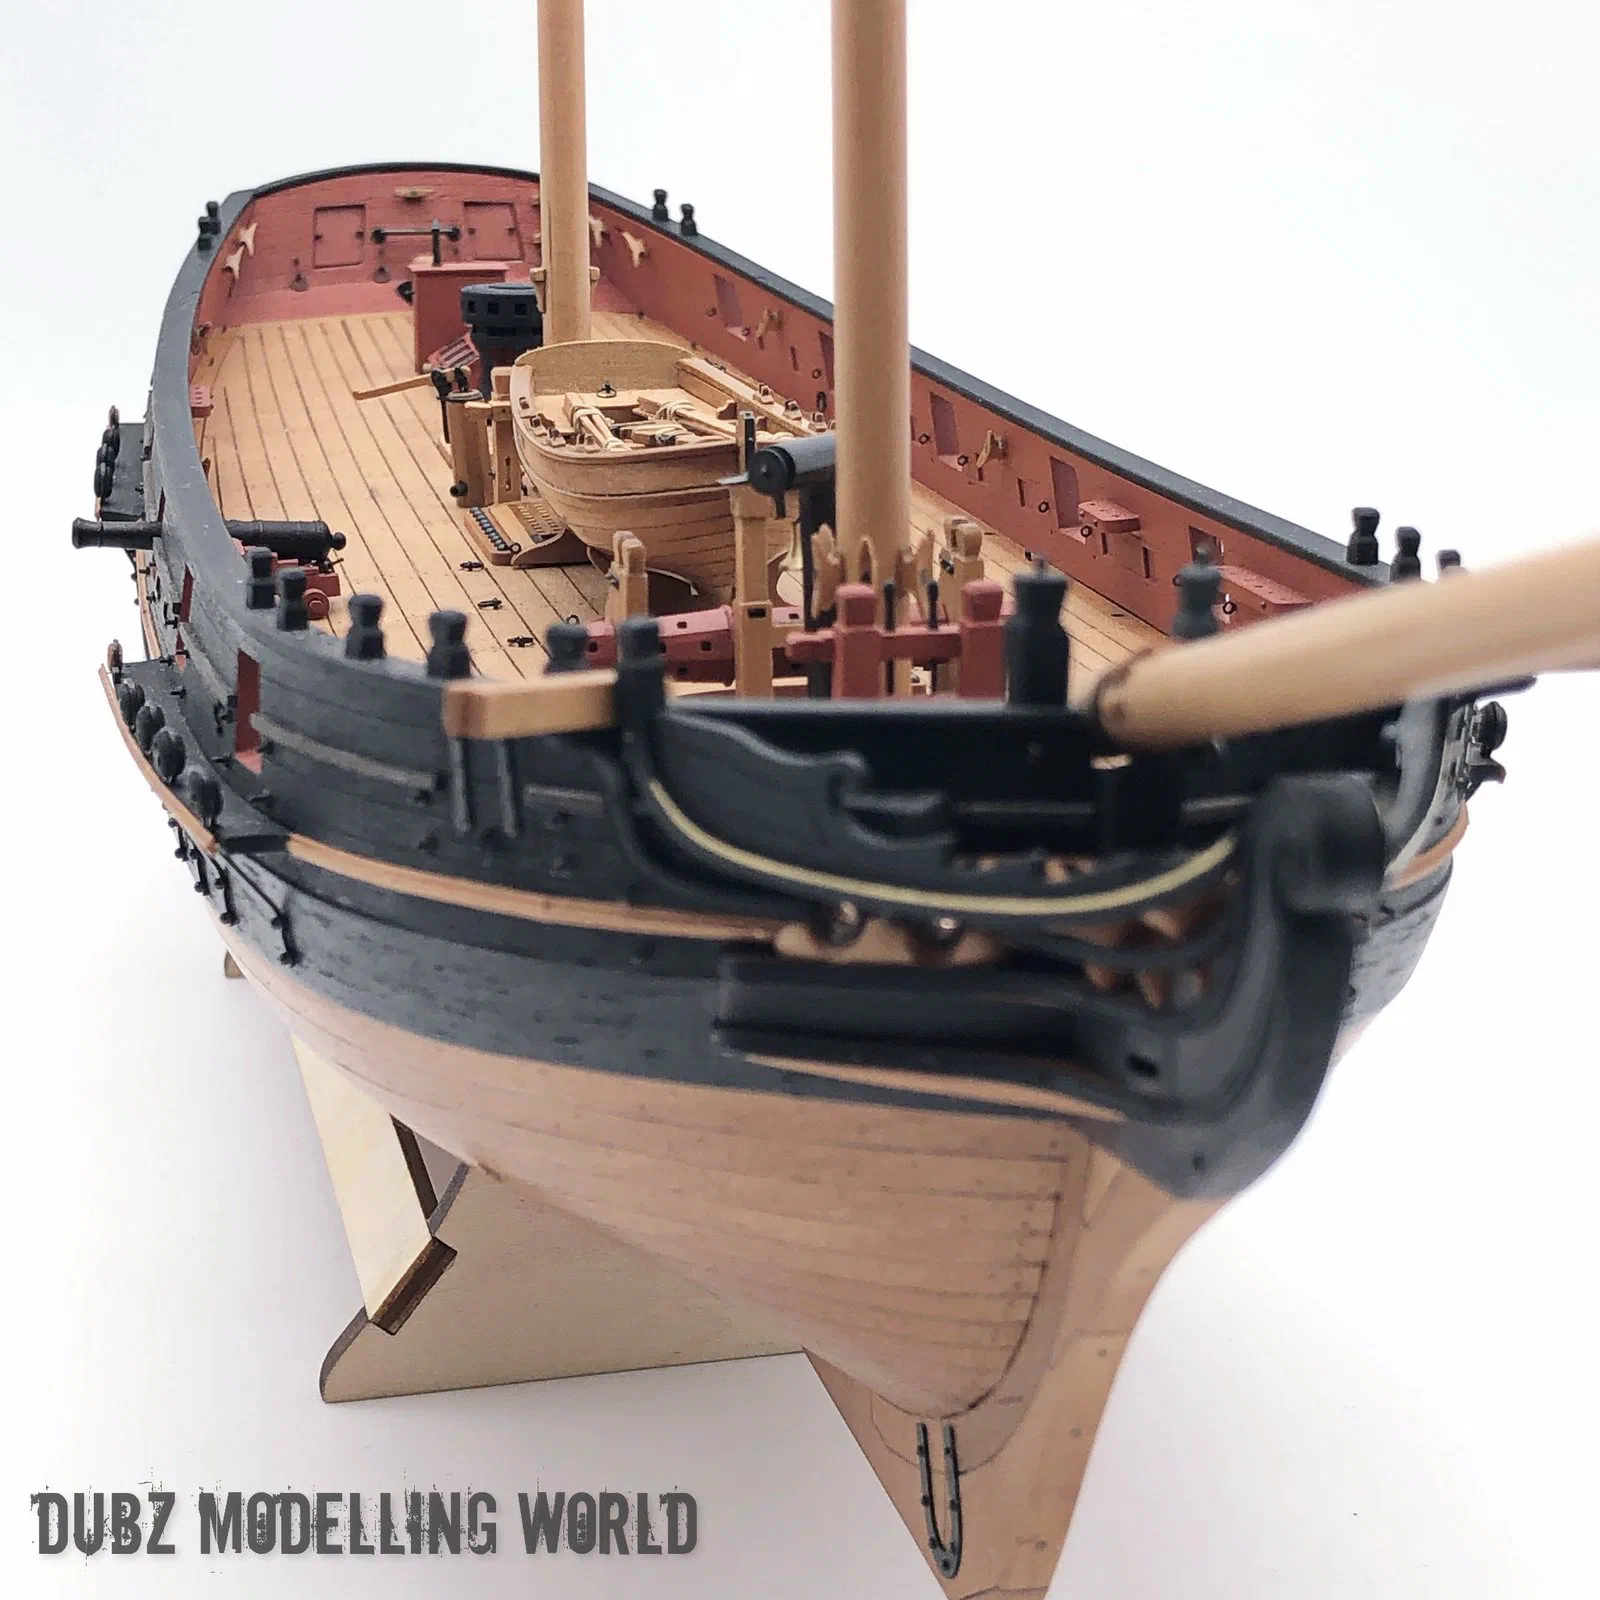
At the stern I did not use the large photo-etched part but made the piece from pear instead. At the bow I started the head and drilled the bolt heads that show on the outside of the hull – through-bolting is typical for Russian ships, as it is for French ones. The hawse holes received a simulated inner lead. In February 2021 Master Korabel lasered a few new parts in pear for me, and with those I could finish the head.
Channels, rails and the details outboard
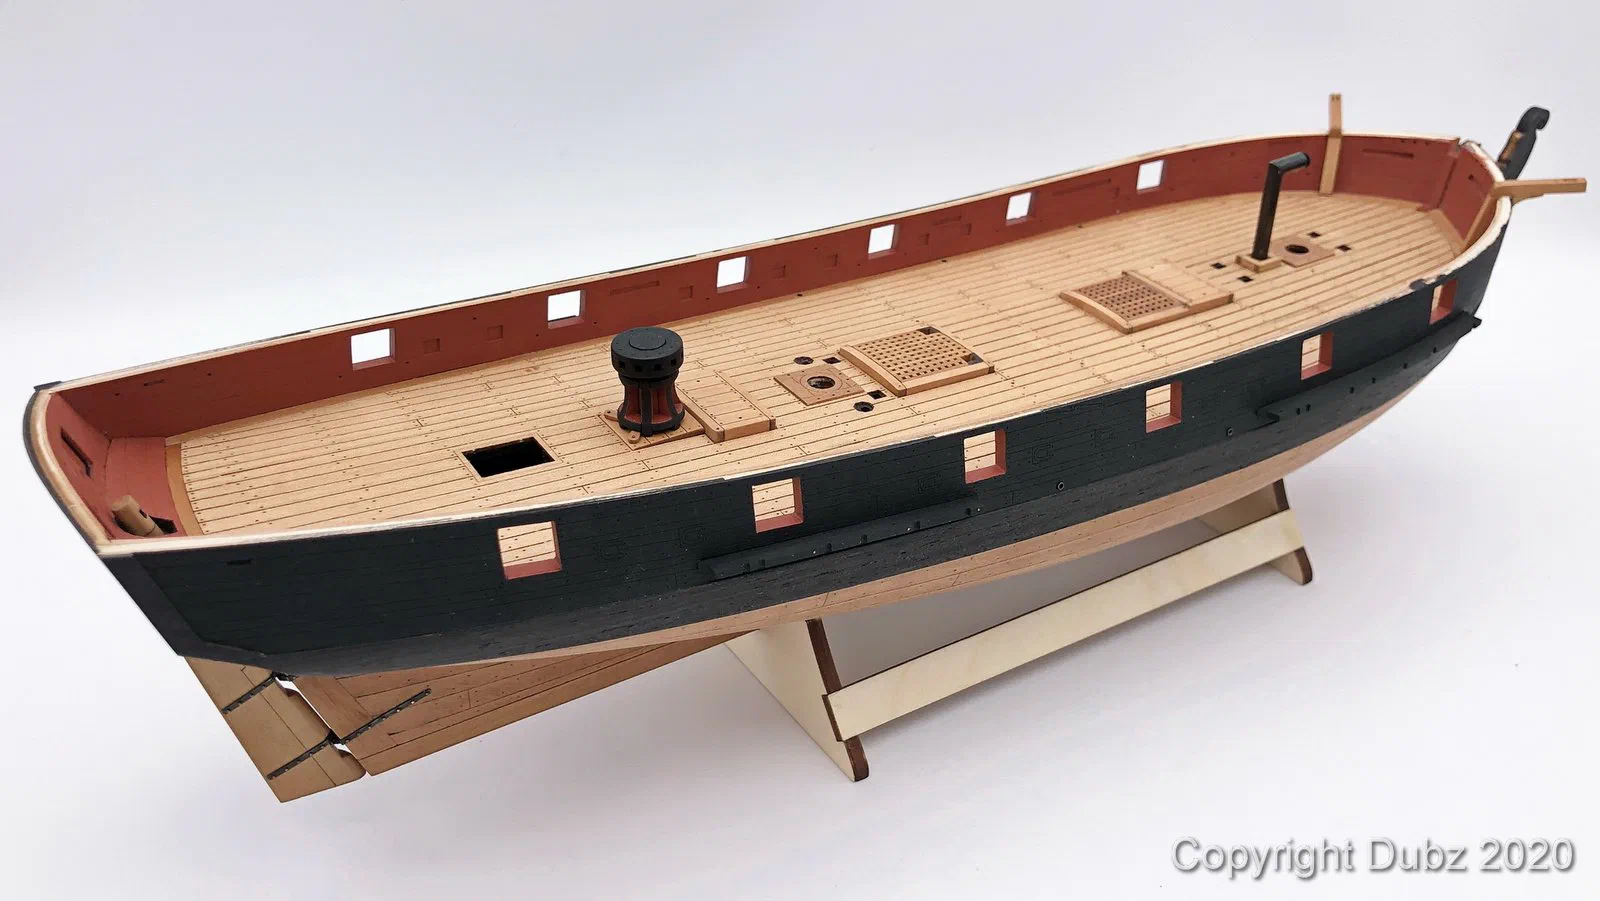
The channels were painted and installed without glue, held only by their pins. The mouldings took more thought. The upper moulding, lasered in black in the kit, went on as intended; the lower one I rebuilt to my own taste and pinned without glue. I considered bringing in a light colour, as on my gunboat, and giving the channels a matching cover so that the line would run through – and then decided against it. I was not happy with the profile of the sheer rail either, especially where it runs over the channels, so I changed to another profile. Two steps forward, one step back: deconstruction is part of this hobby.
The upper and lower cheeks are made from photo-etched parts, which I painted black. I also added the missing bolts with washers for the eyebolts that will take the gun-tackle hooks, the missing rail parts at the bow, the photo-etched lids for the oar ports and finally the deadeyes and chain-plate assemblies.
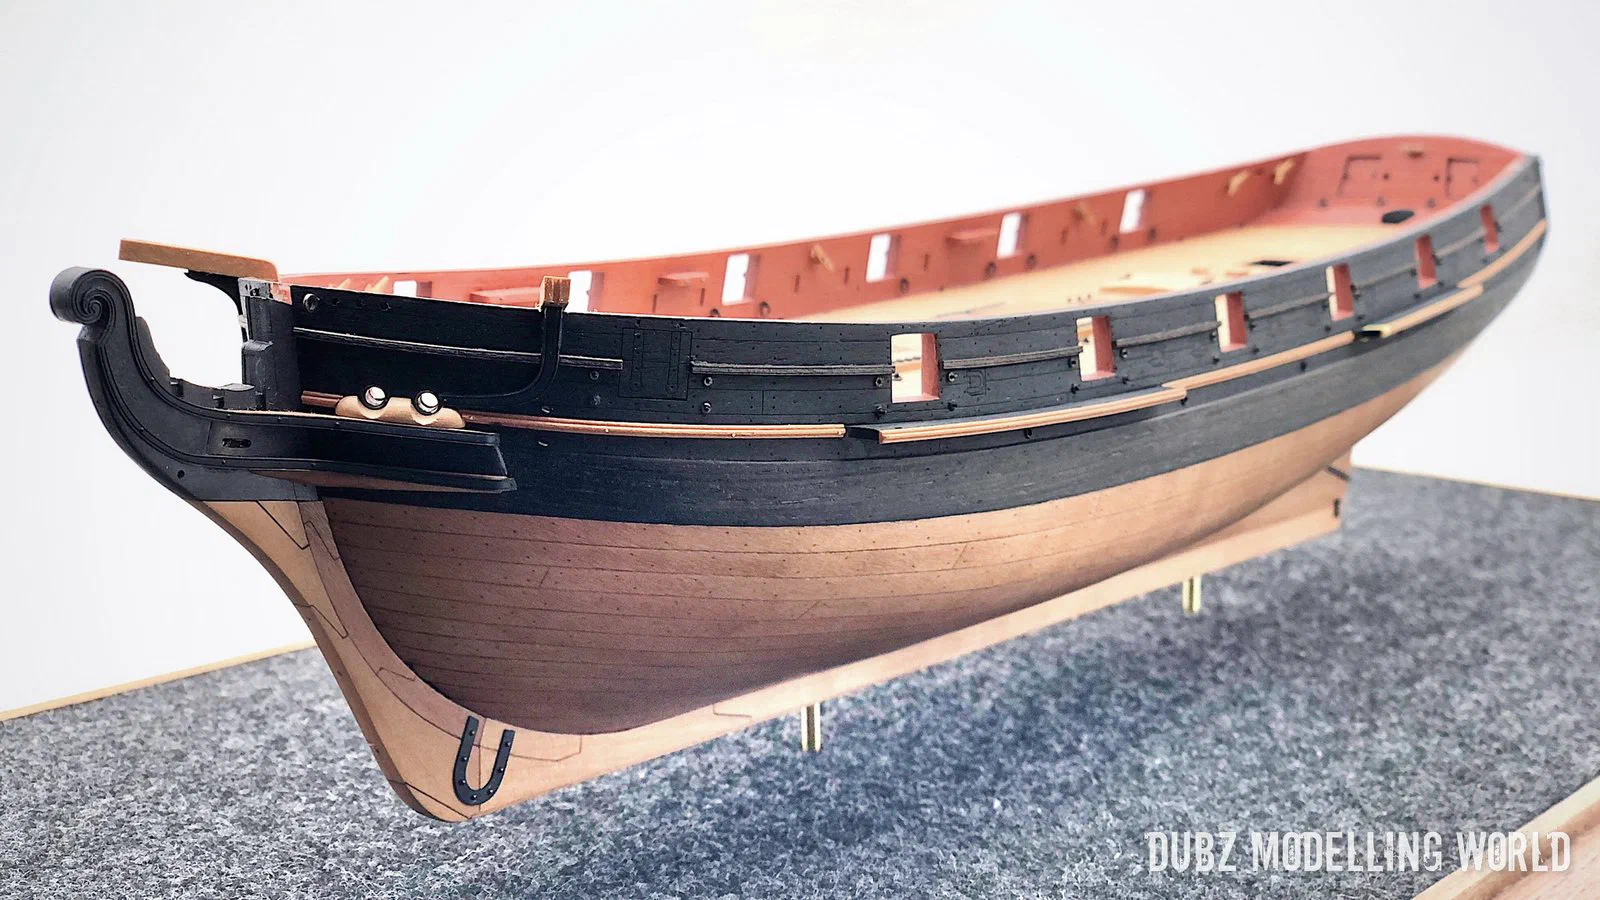
The handrails are lasered in a dark wood in the kit, which is very rough in this place, so Master Korabel lasered them in pear for me. I was torn between leaving them natural and painting them black, which is certainly more correct historically. Black won.

Guns
The guns started with a master that I built and checked against the deck before making the rest. For the barrels Master Korabel sent me their new 3D-printed barrels, which are now included in their kits. The print quality is excellent: only six support points had to be sanded away carefully, and a coat of black from a permanent marker gave them a slight metallic sheen. In a macro shot you can still see the faint structure of the print, but at normal viewing distance they look very convincing.
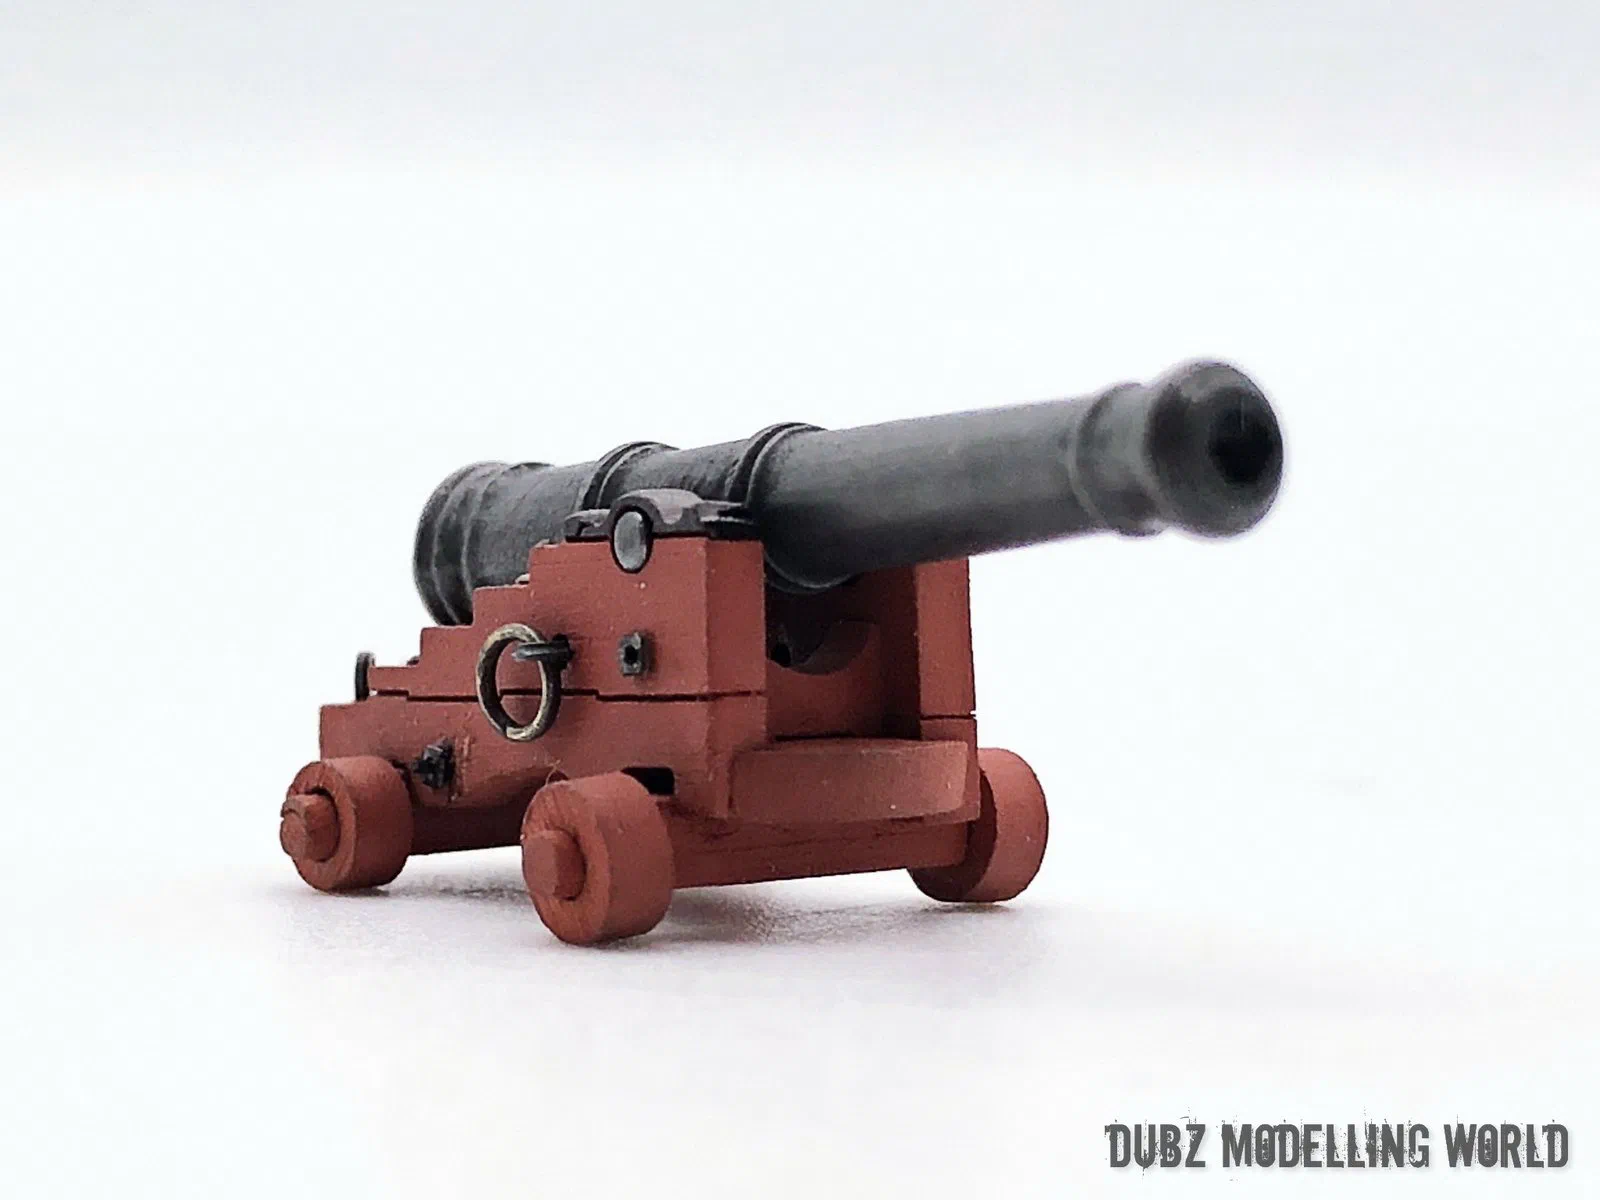
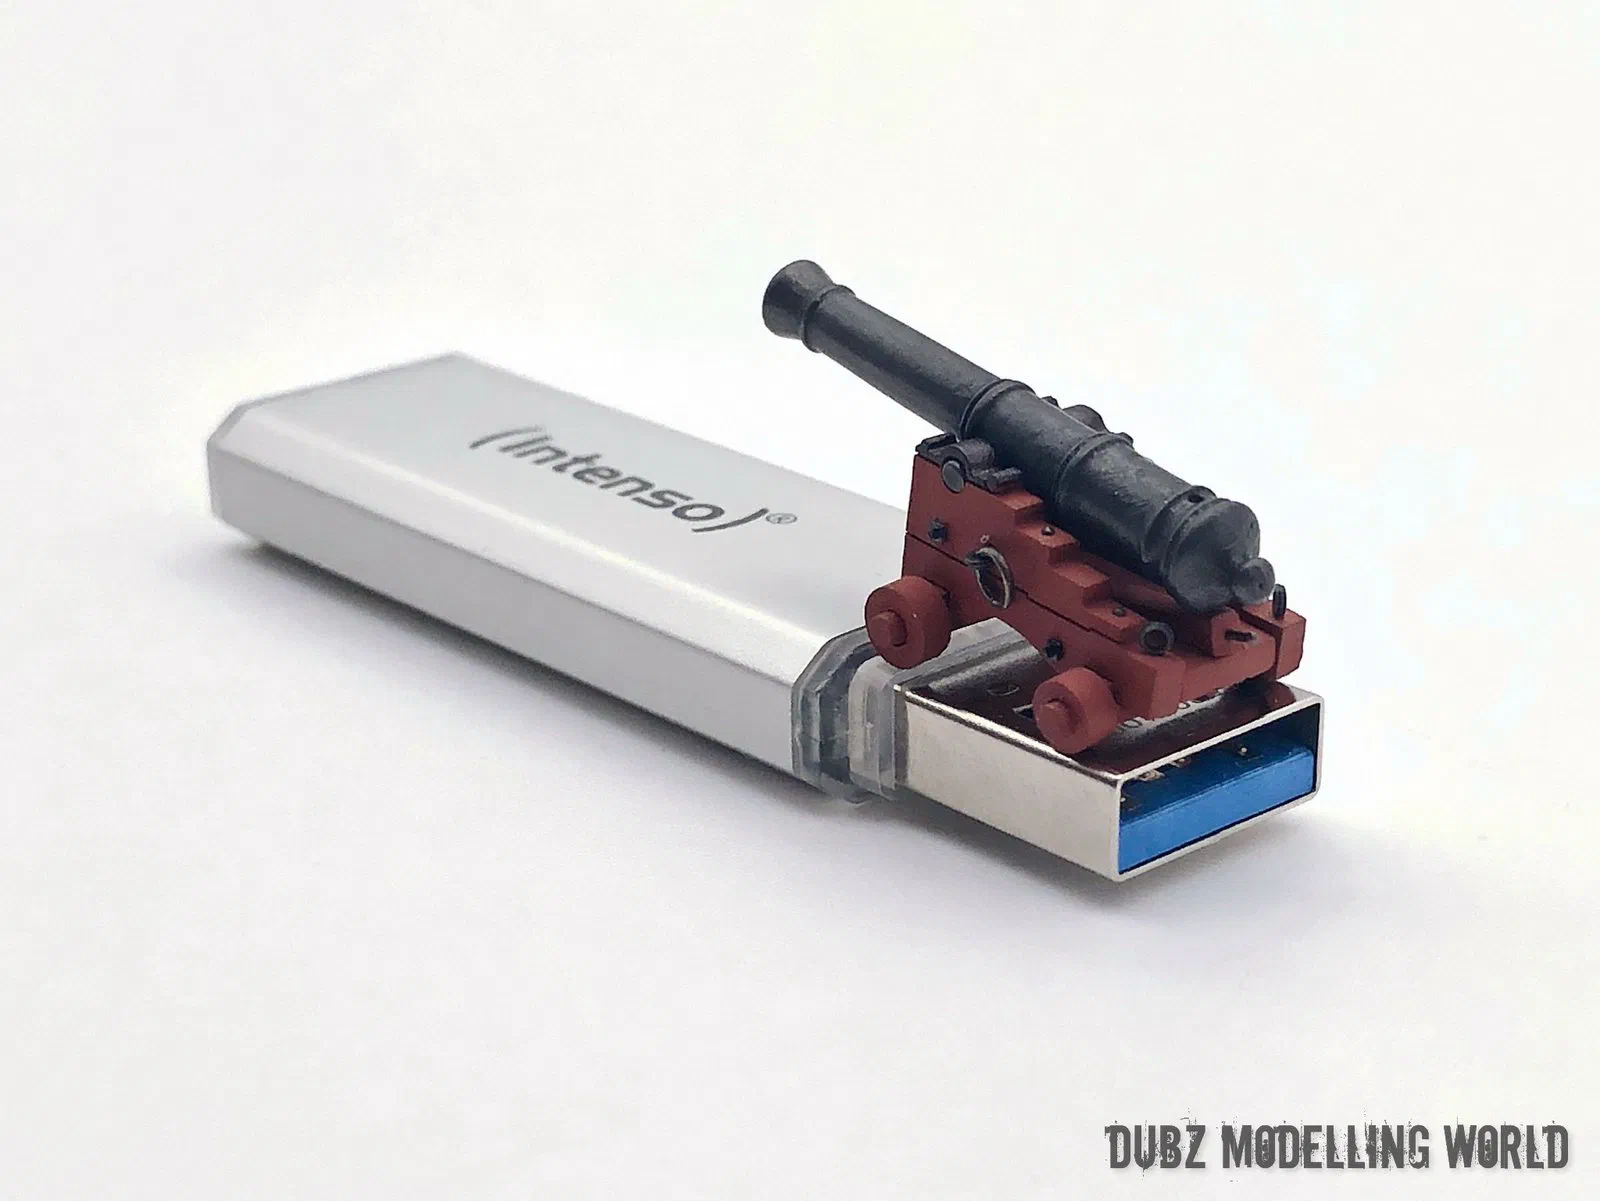
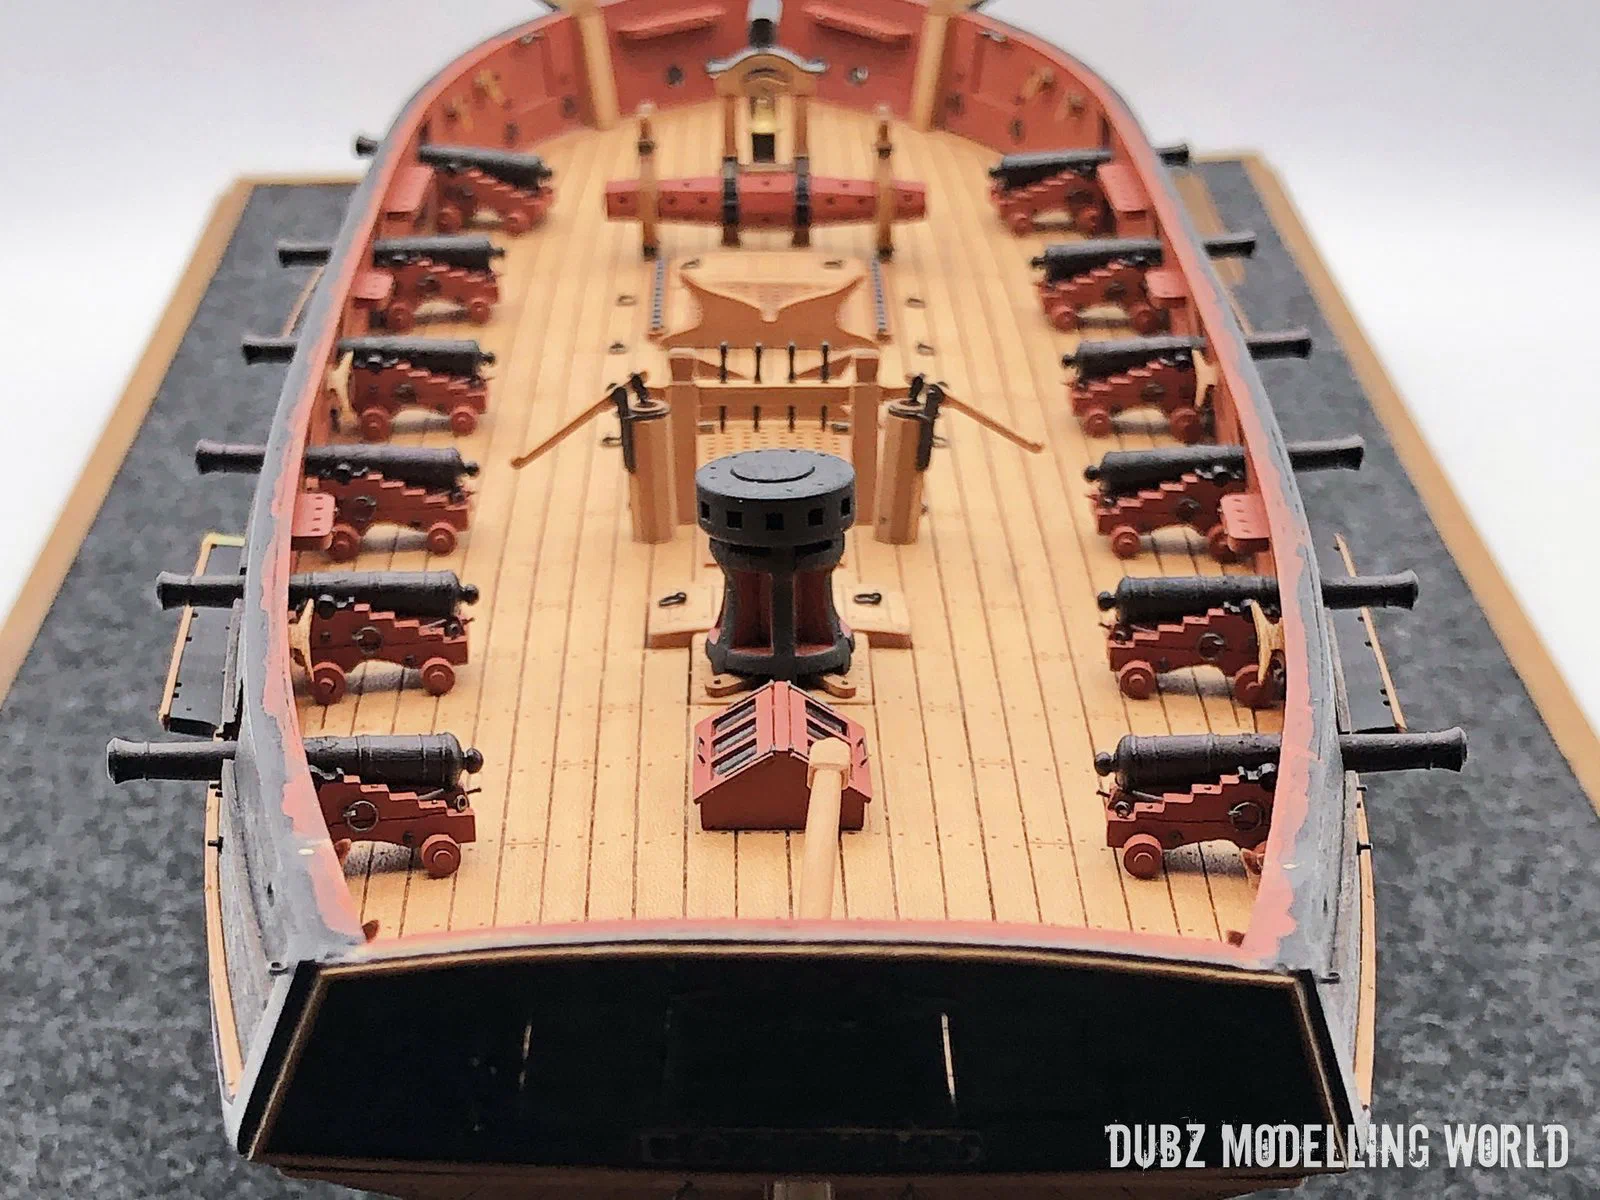
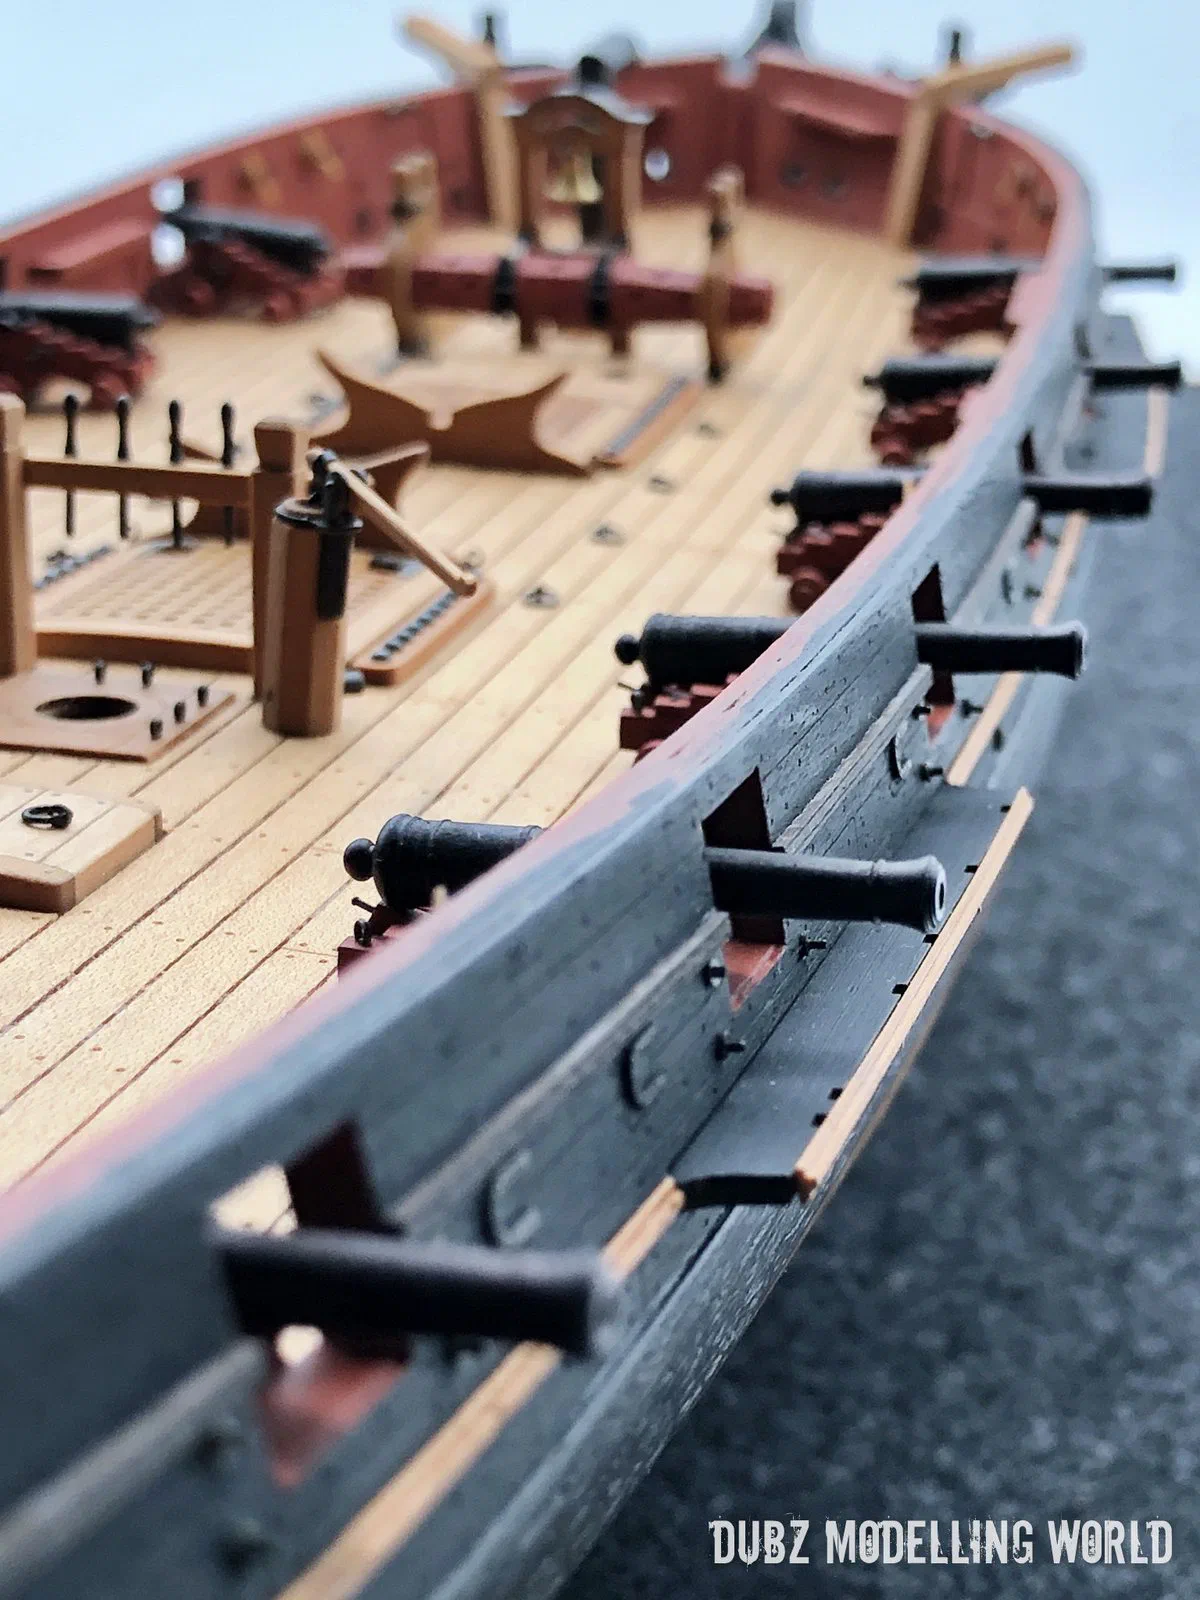
The breeching ropes are made from my own rope, and the hooks are photo-etched parts by dafi – the best and shortest hooks I know. I have to admit that the gun rigging slowed me down a lot – it is the kind of repetitive work that tests your motivation – but by October 2021 all the breeching ropes were done.
A binnacle in three attempts
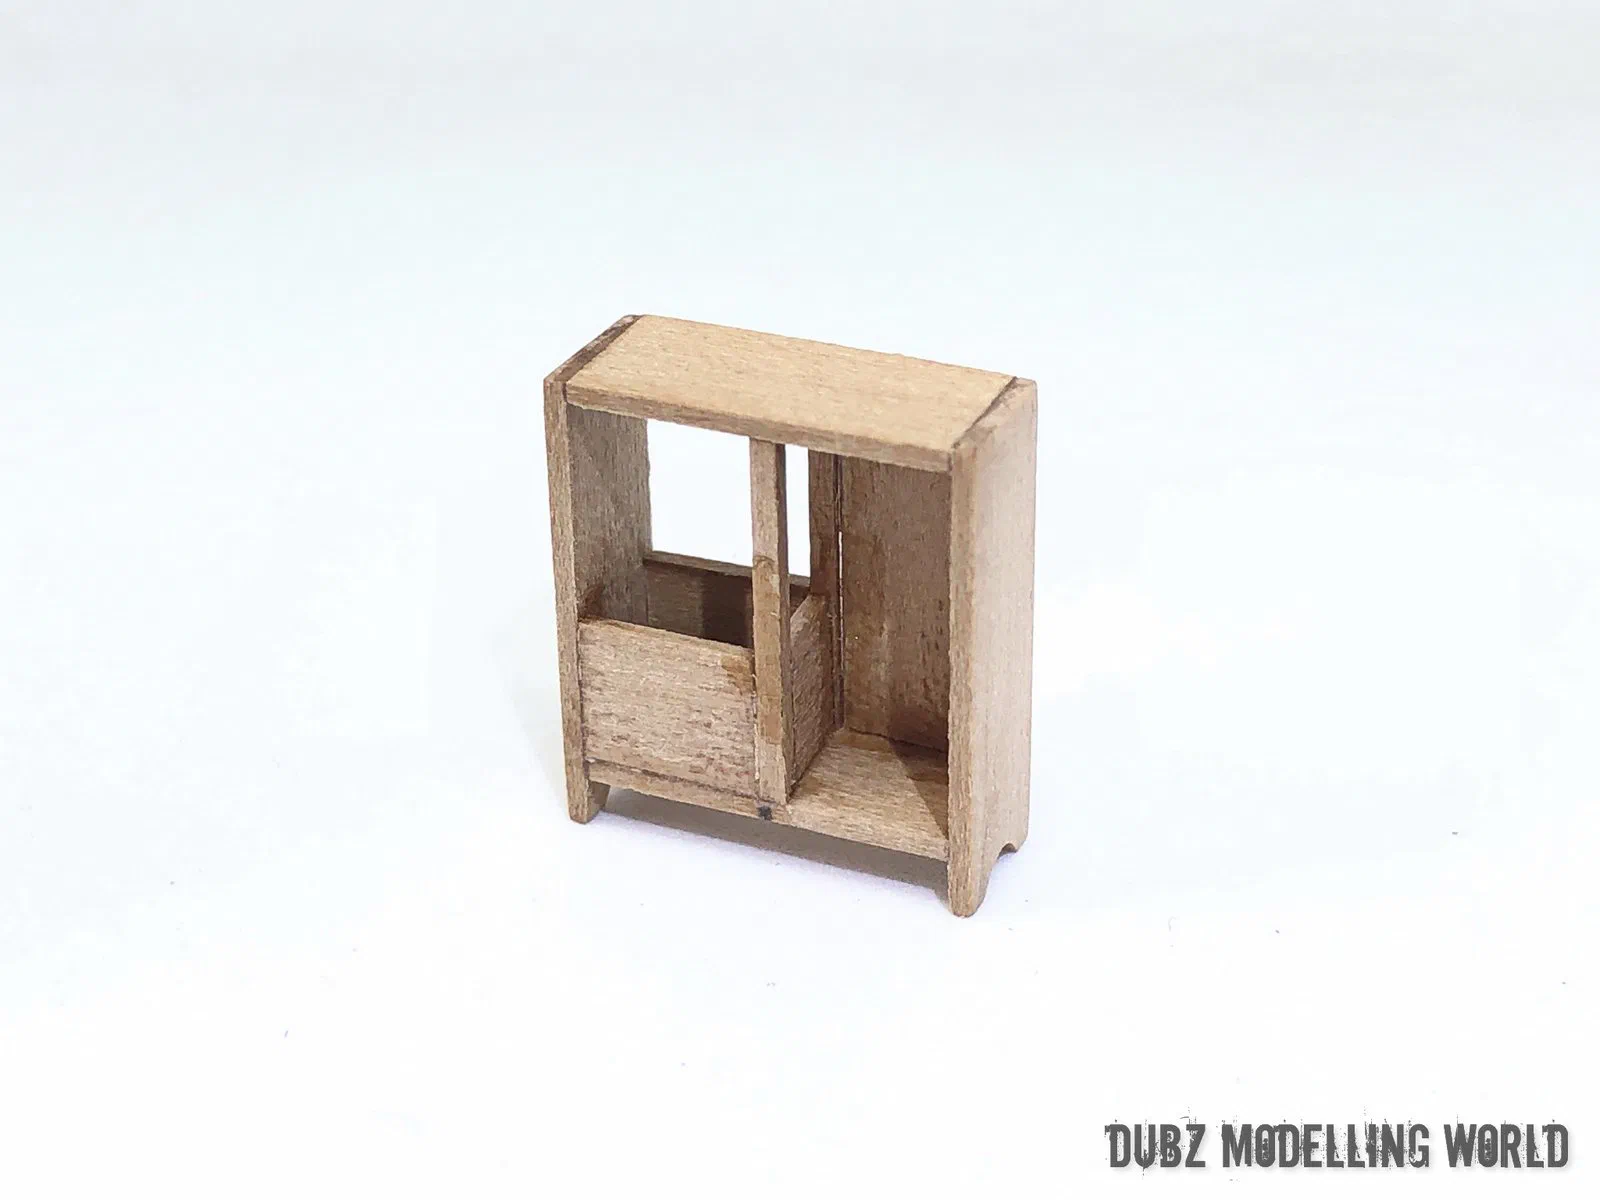
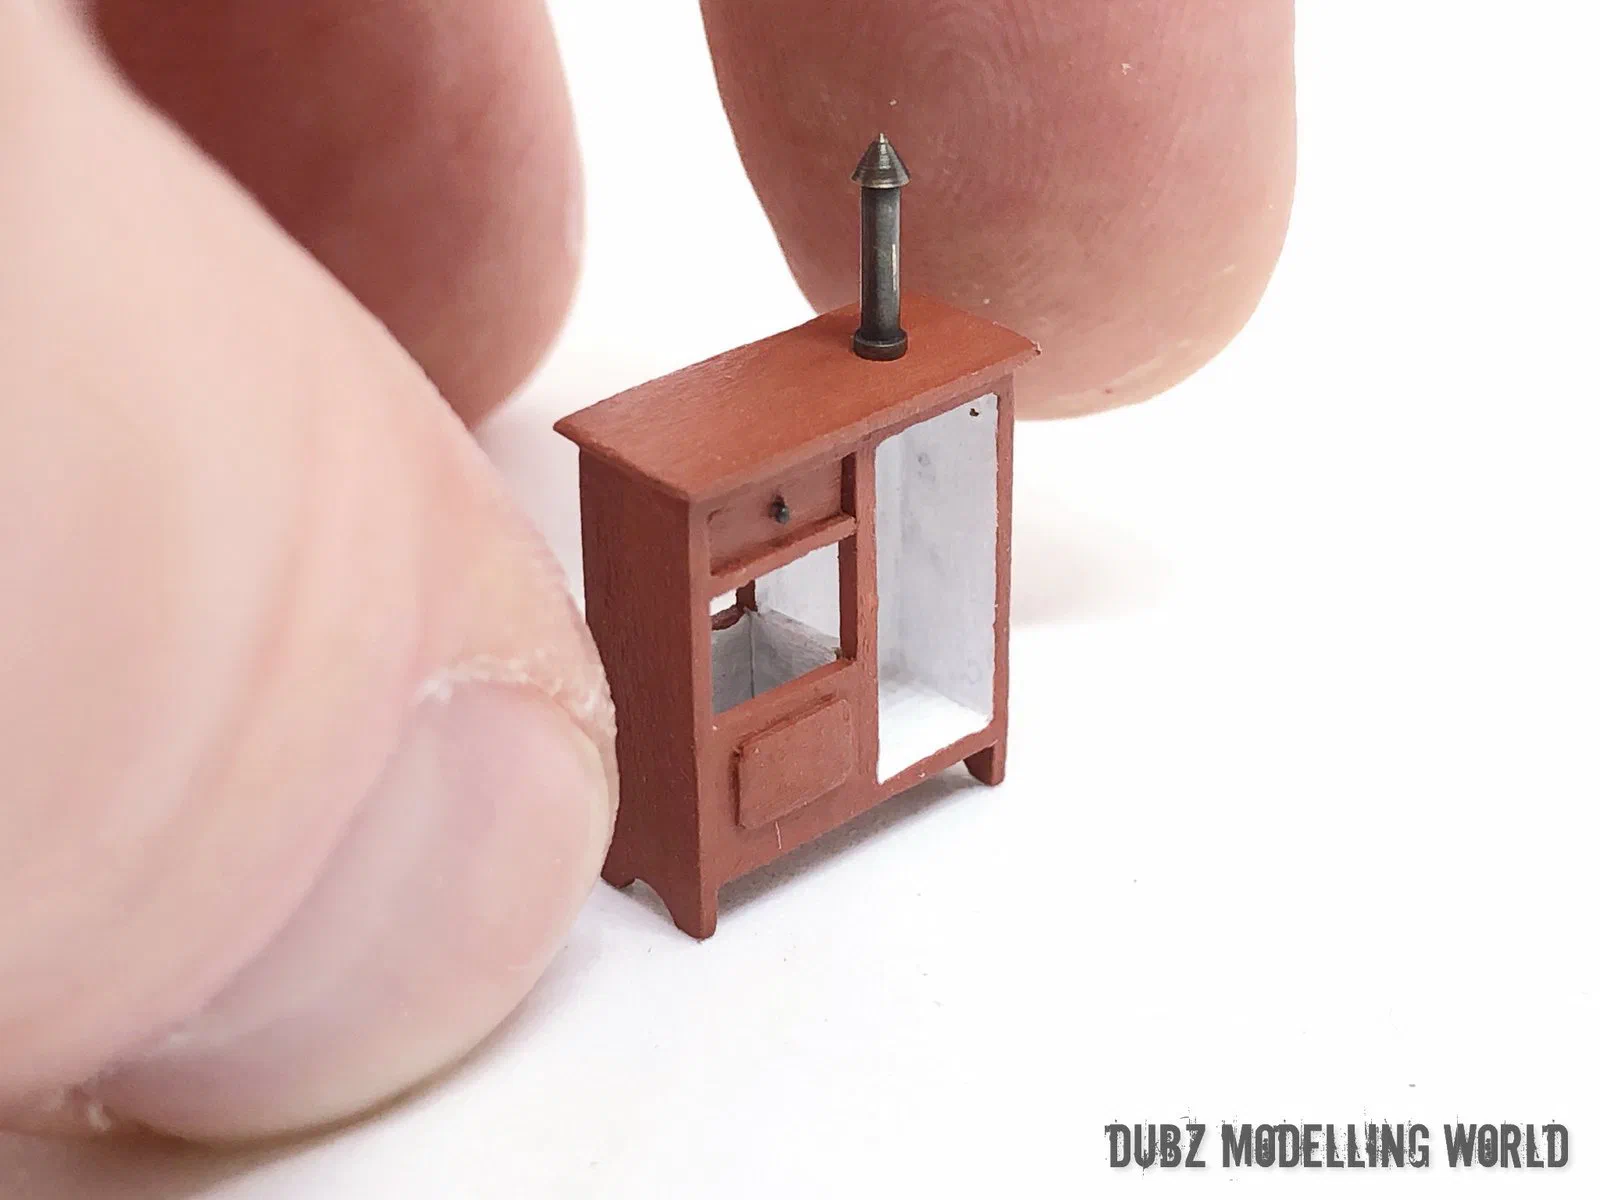
The binnacle is a good example of how a small part can take a surprising amount of time. The kit binnacle puts the compass in the middle, which I think is wrong and does not work with the chimney. My second attempt followed a hint from Eugen of Master Korabel that the Polotsk would not have had the large version, and it became a smaller cabinet with a lamp in a light-proof compartment and a window of mica between the compartments. The third iteration finally satisfied me. A future version of the kit will include a binnacle with two compasses.

Masts and spars
For the masts I did not use the round dowels from the kit. They are very good, but they are not pear. Instead I made my own spars from square pear stock. A small spar gauge, built for the purpose, let me mark the square stock so that I could plane it cleanly to an octagon, then round it and finish it on the lathe. After oiling the lower masts I discovered some serious sanding marks that I had to work out again – a lesson about checking surfaces before the finish goes on.
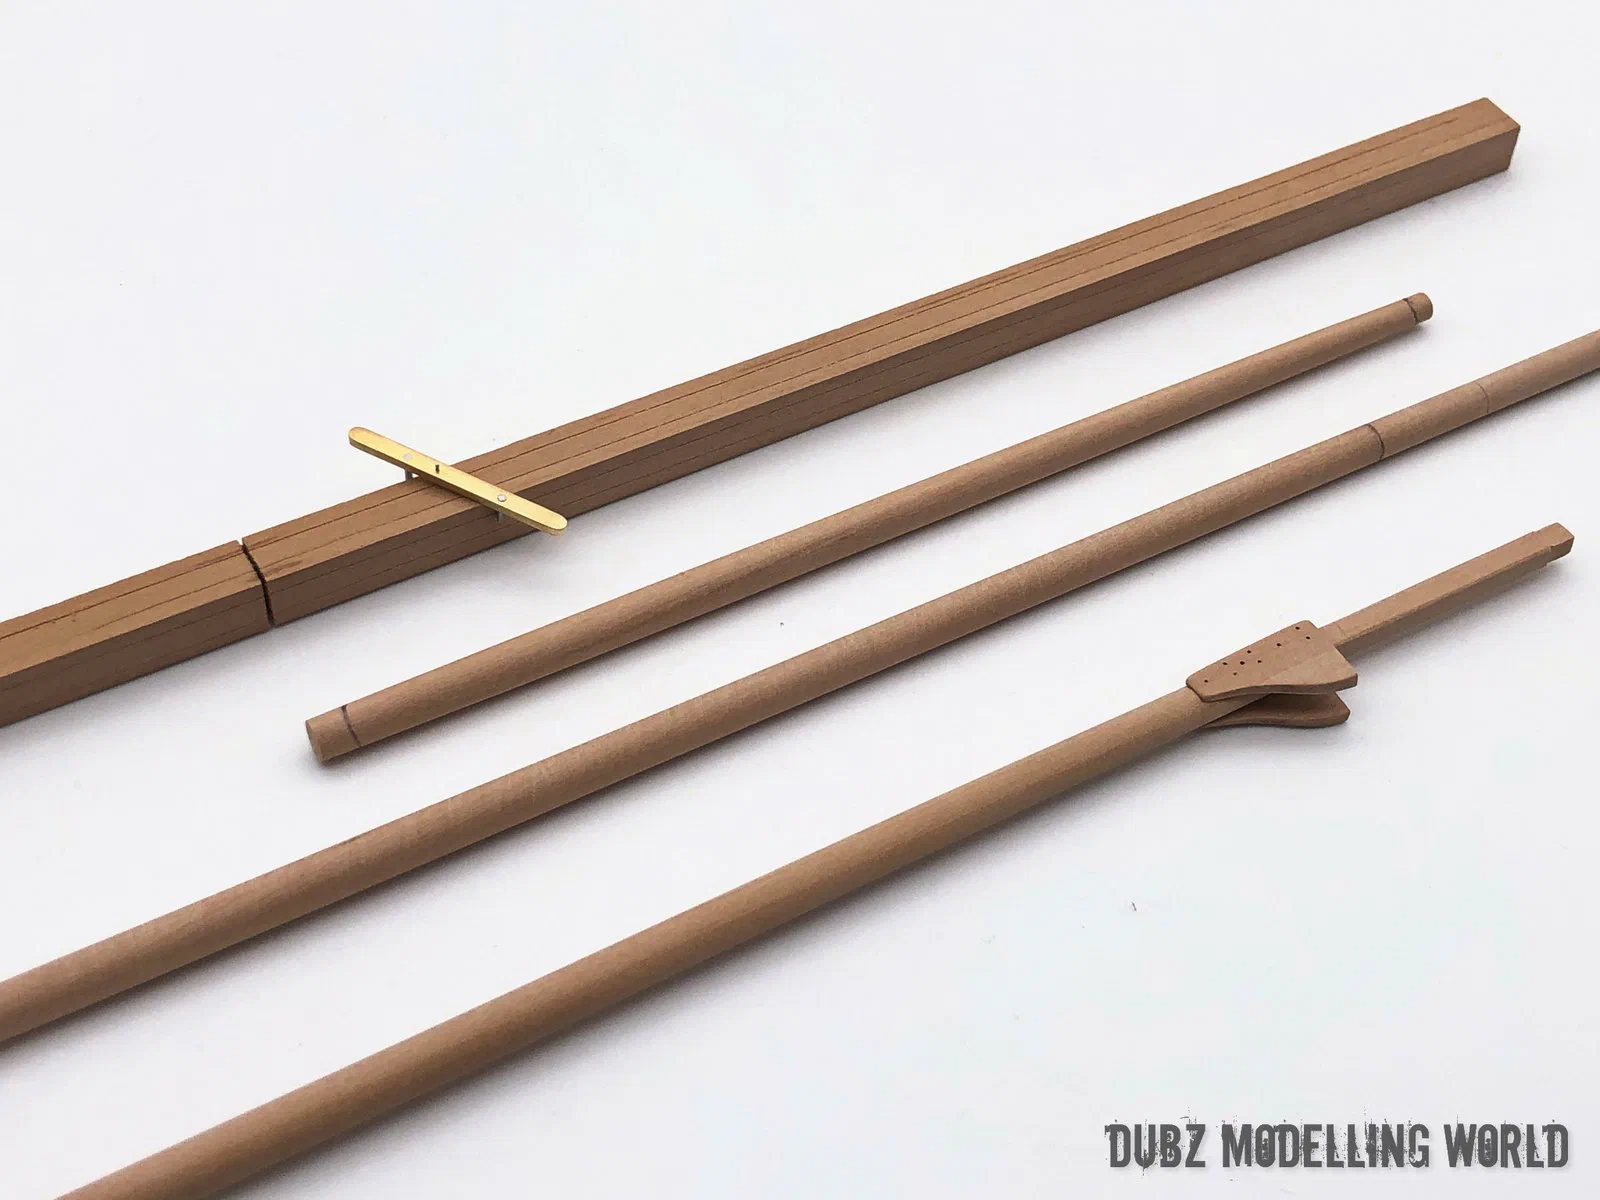
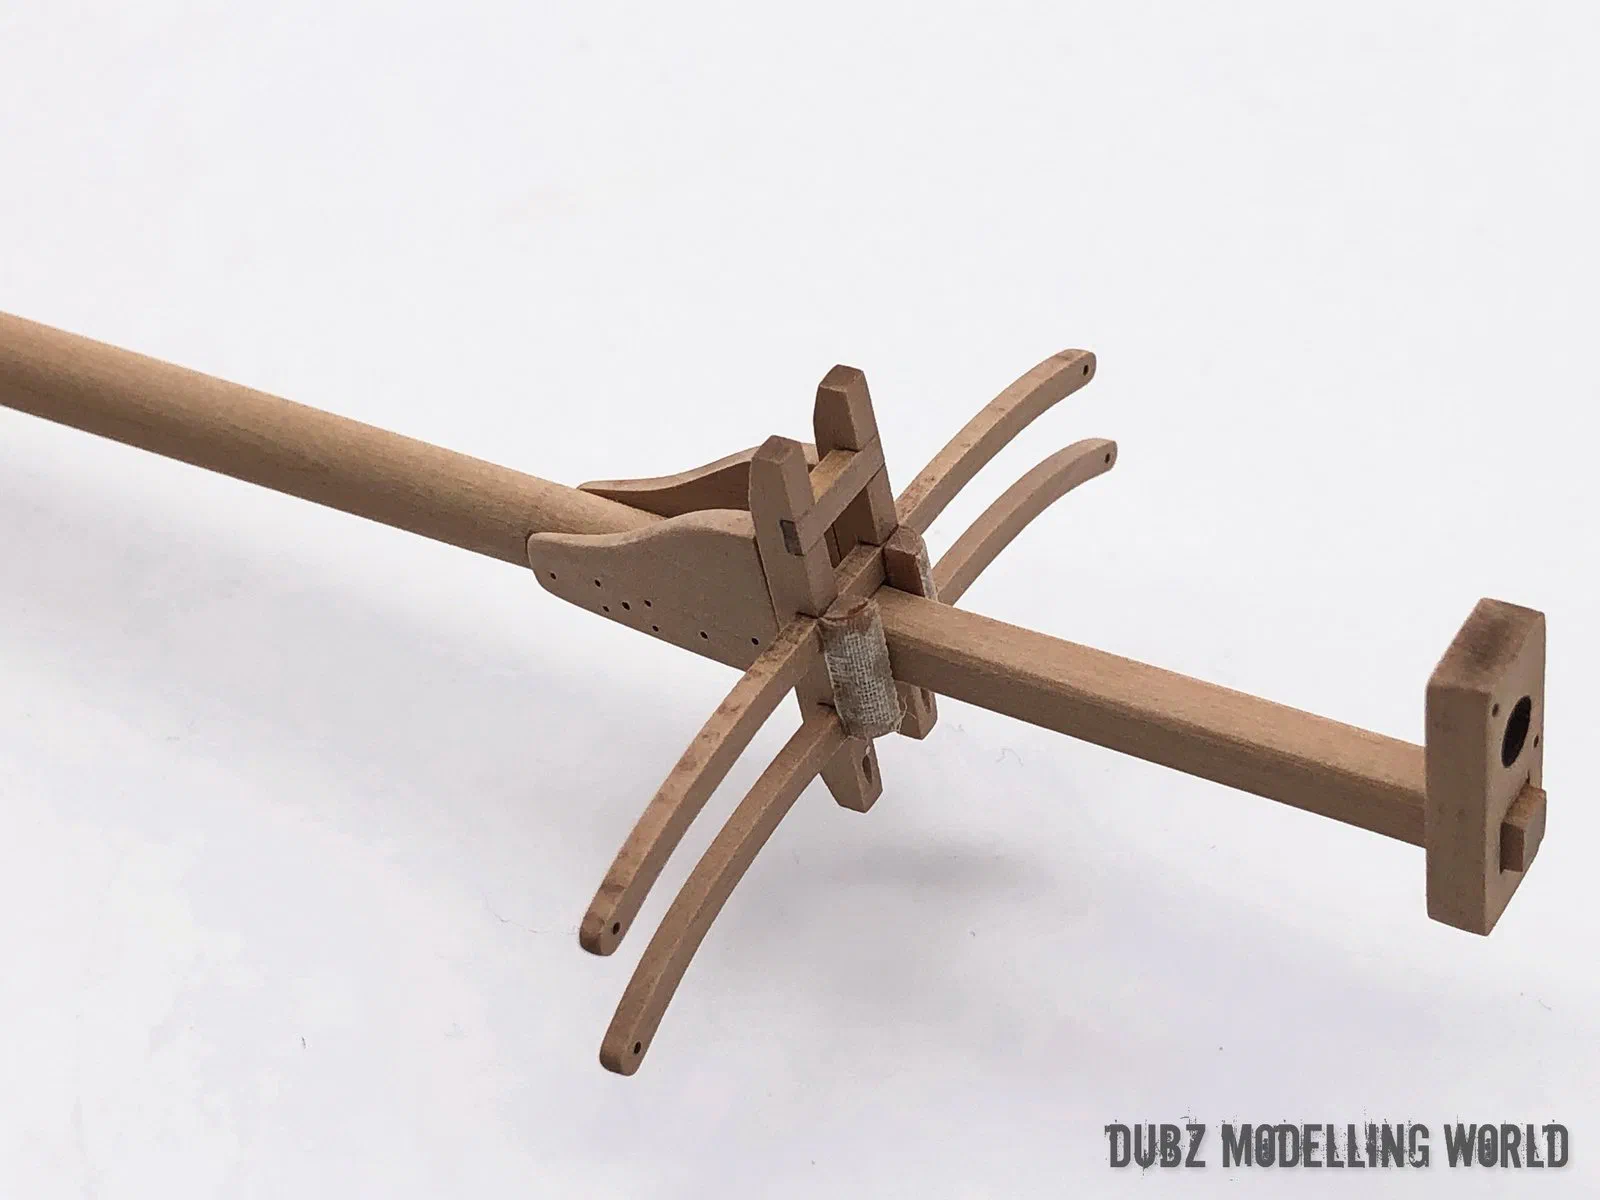
The bowsprit and jib boom followed, then the topmasts. The last details on the masts were the leather imitations at the mast heads – at 1:72 that was hard on the eyes.
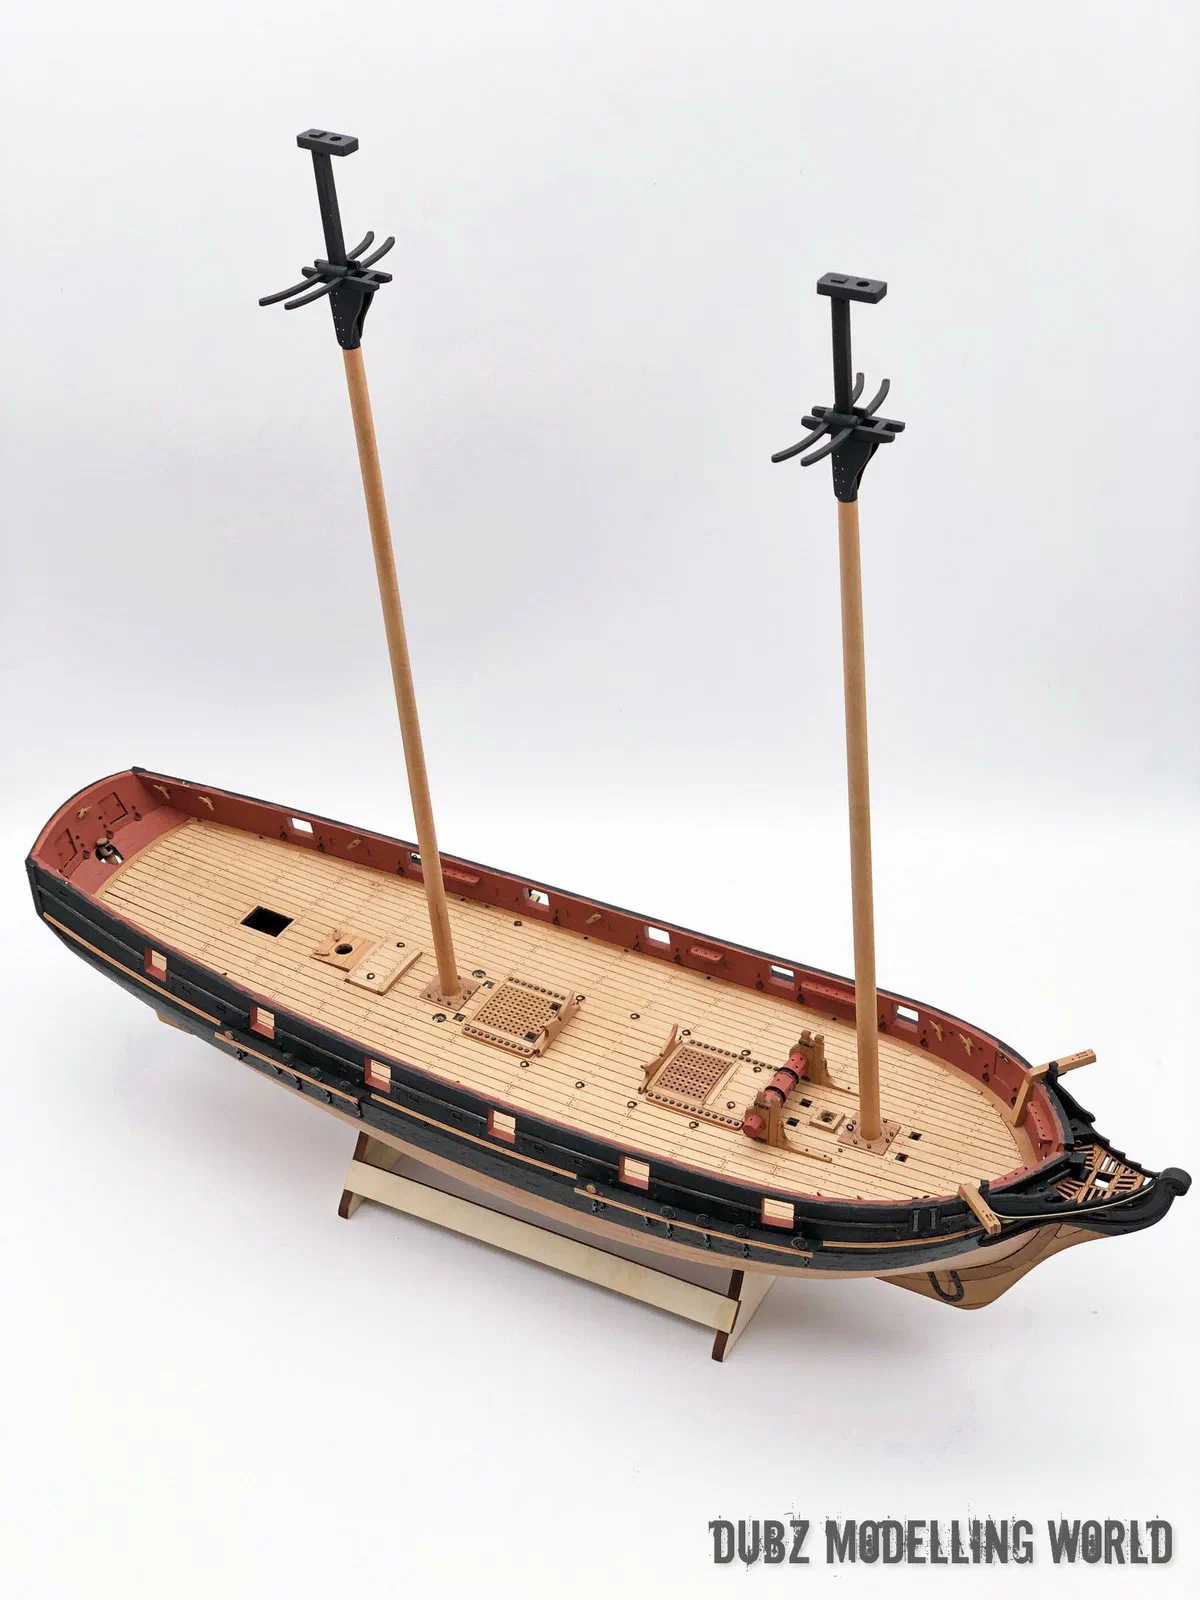
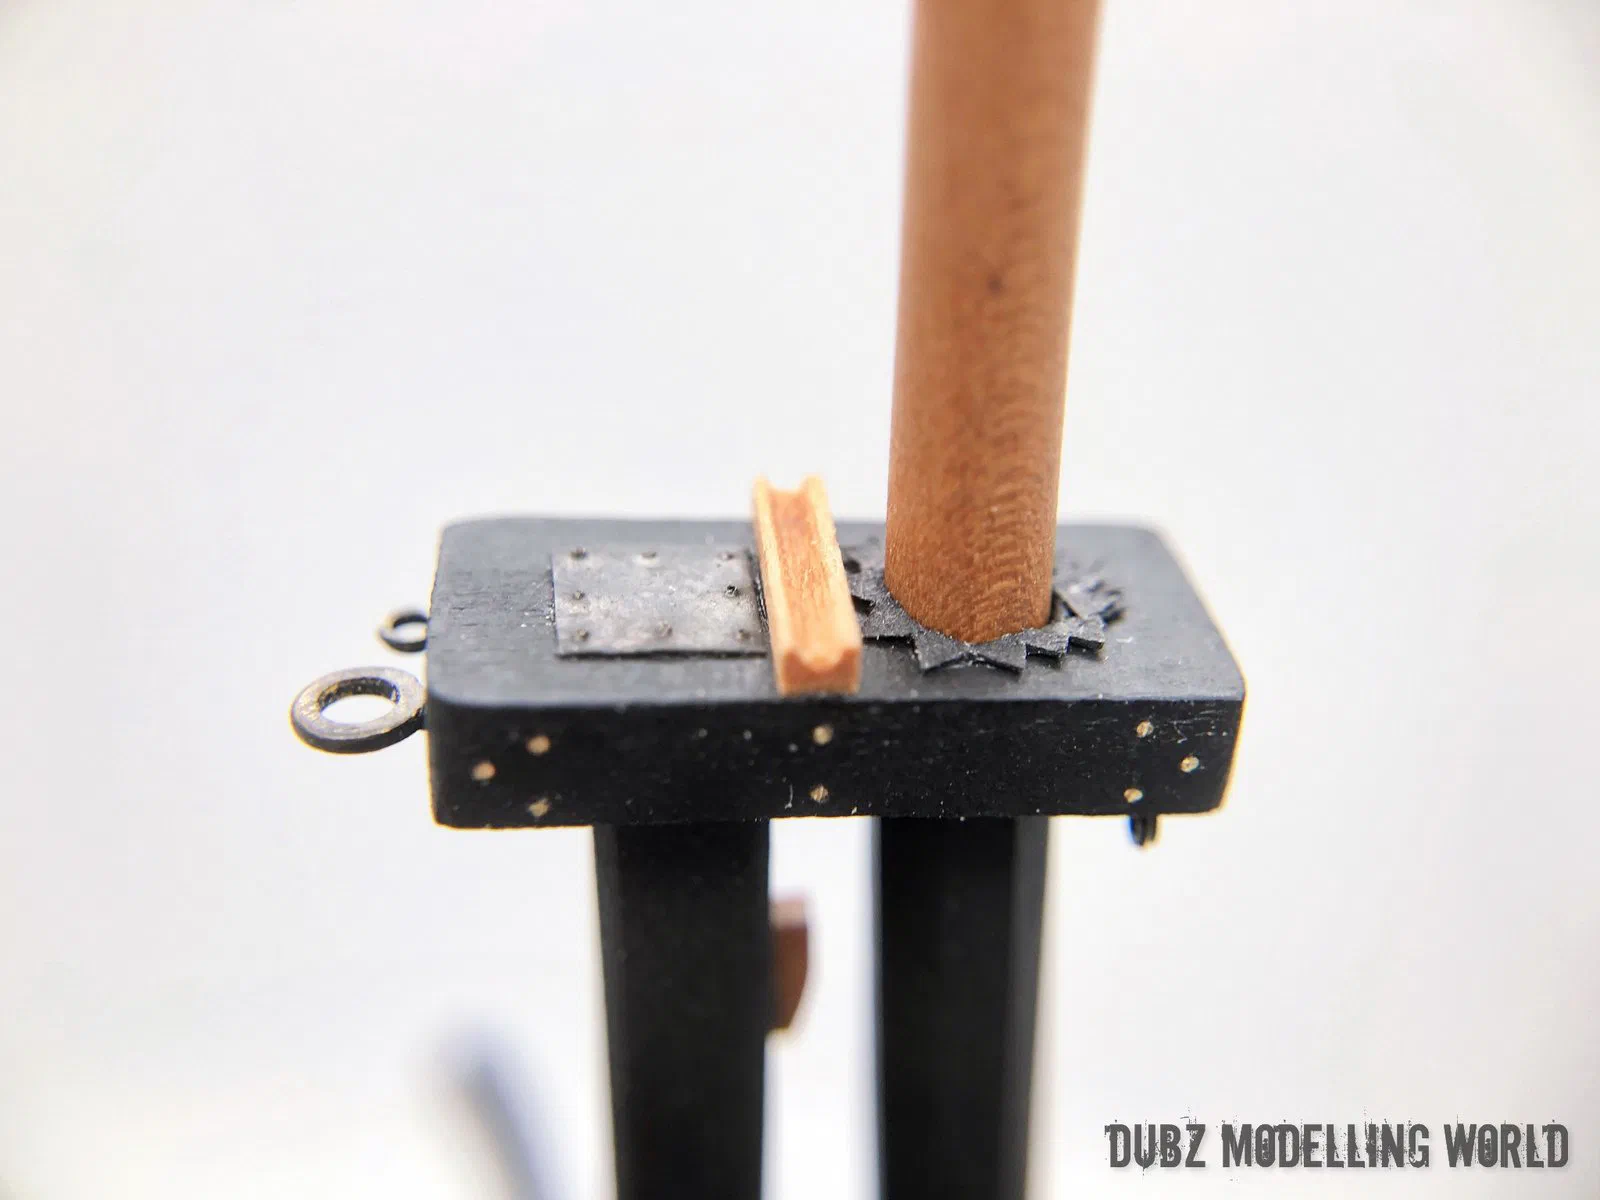
In June 2021 I built the yards. This time I made the tapers before turning, which works better. I deliberately did not paint the yard fittings and cleats black: I like the contrast, and the separate components remain visible and invite questions.
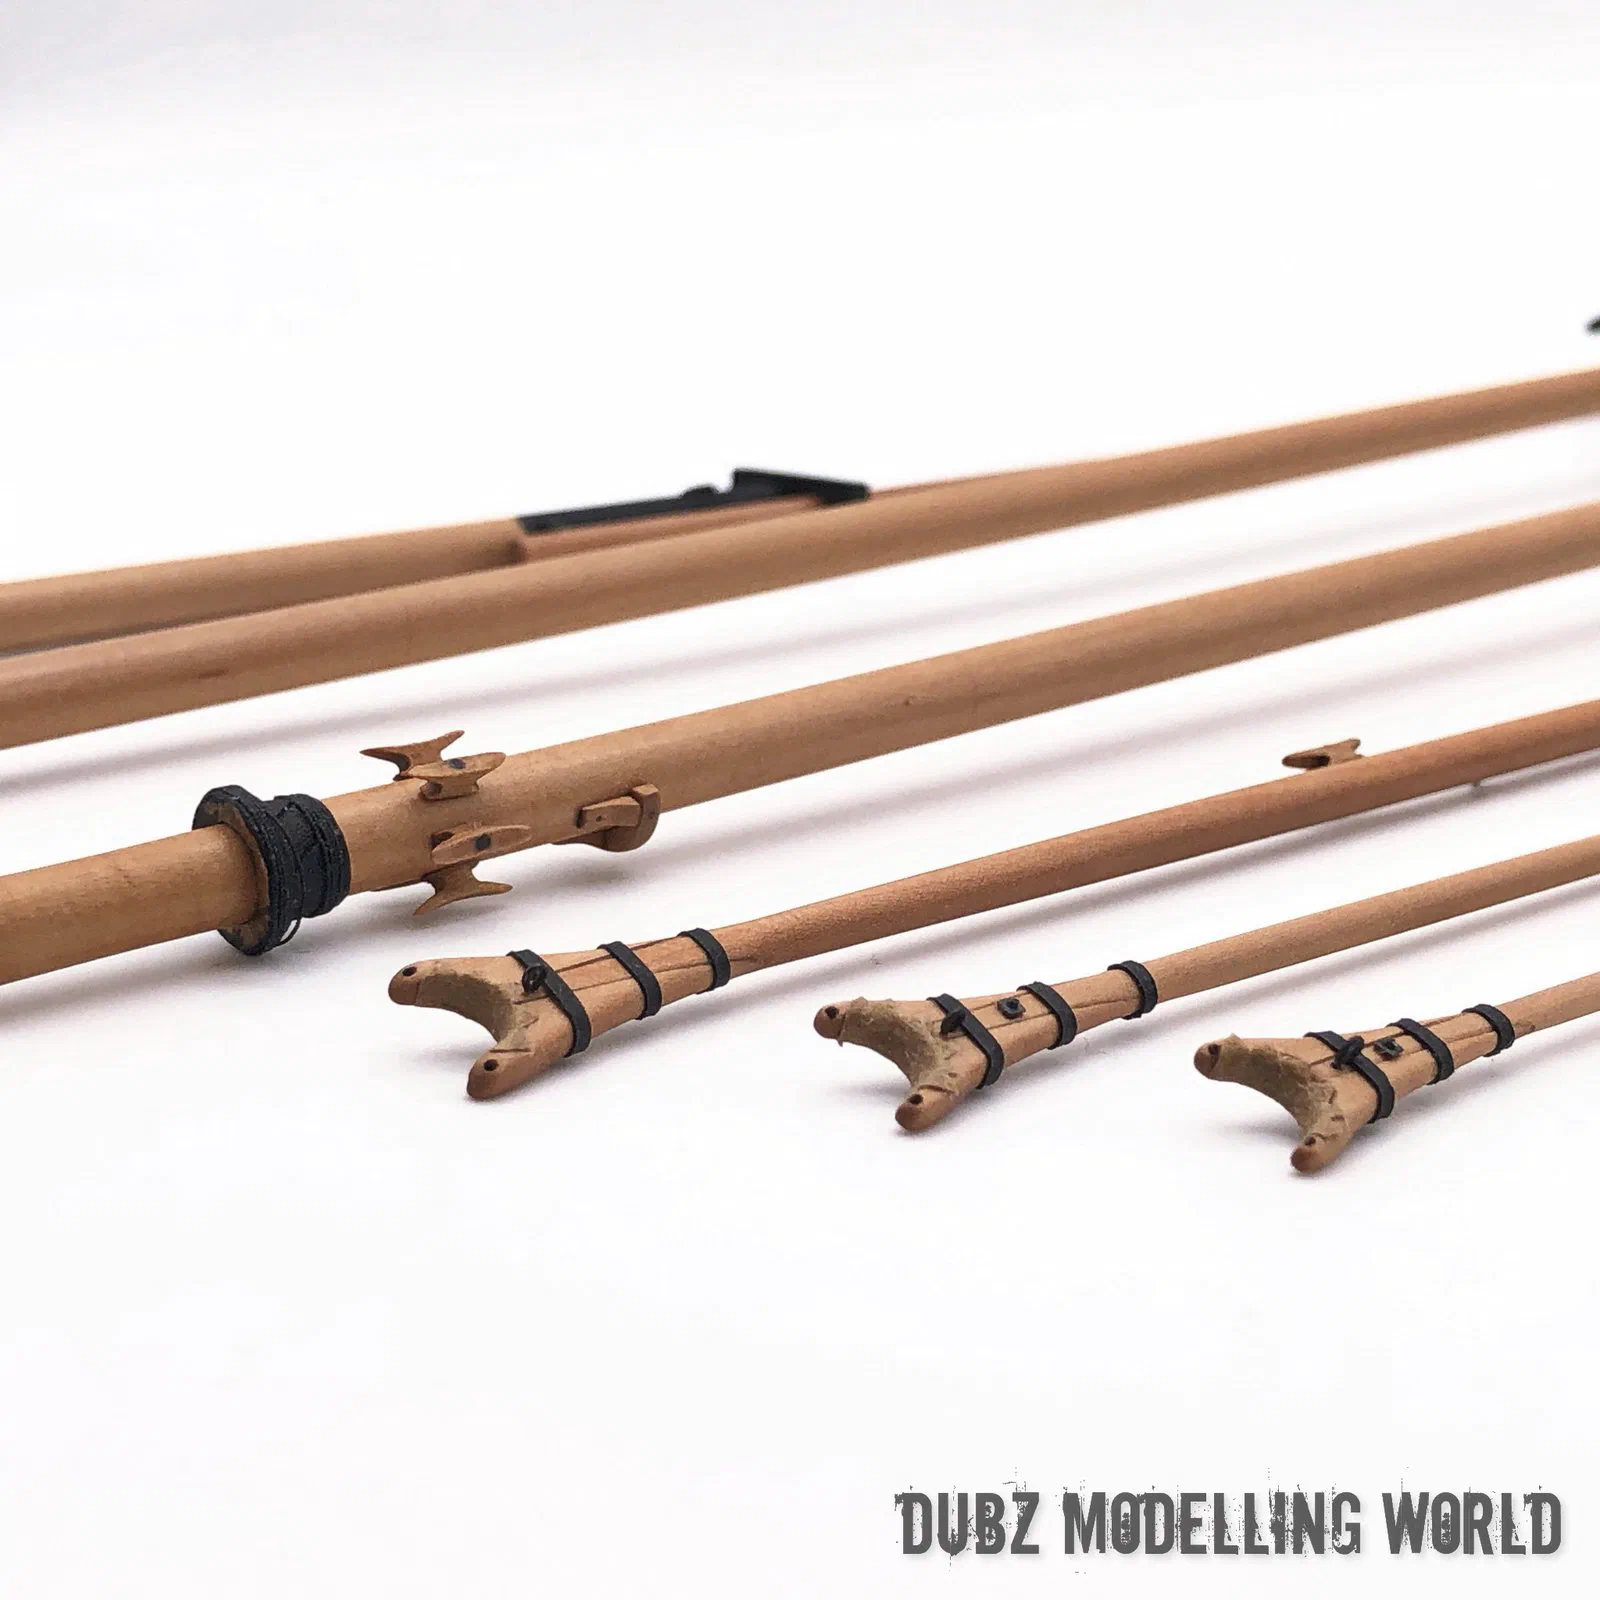
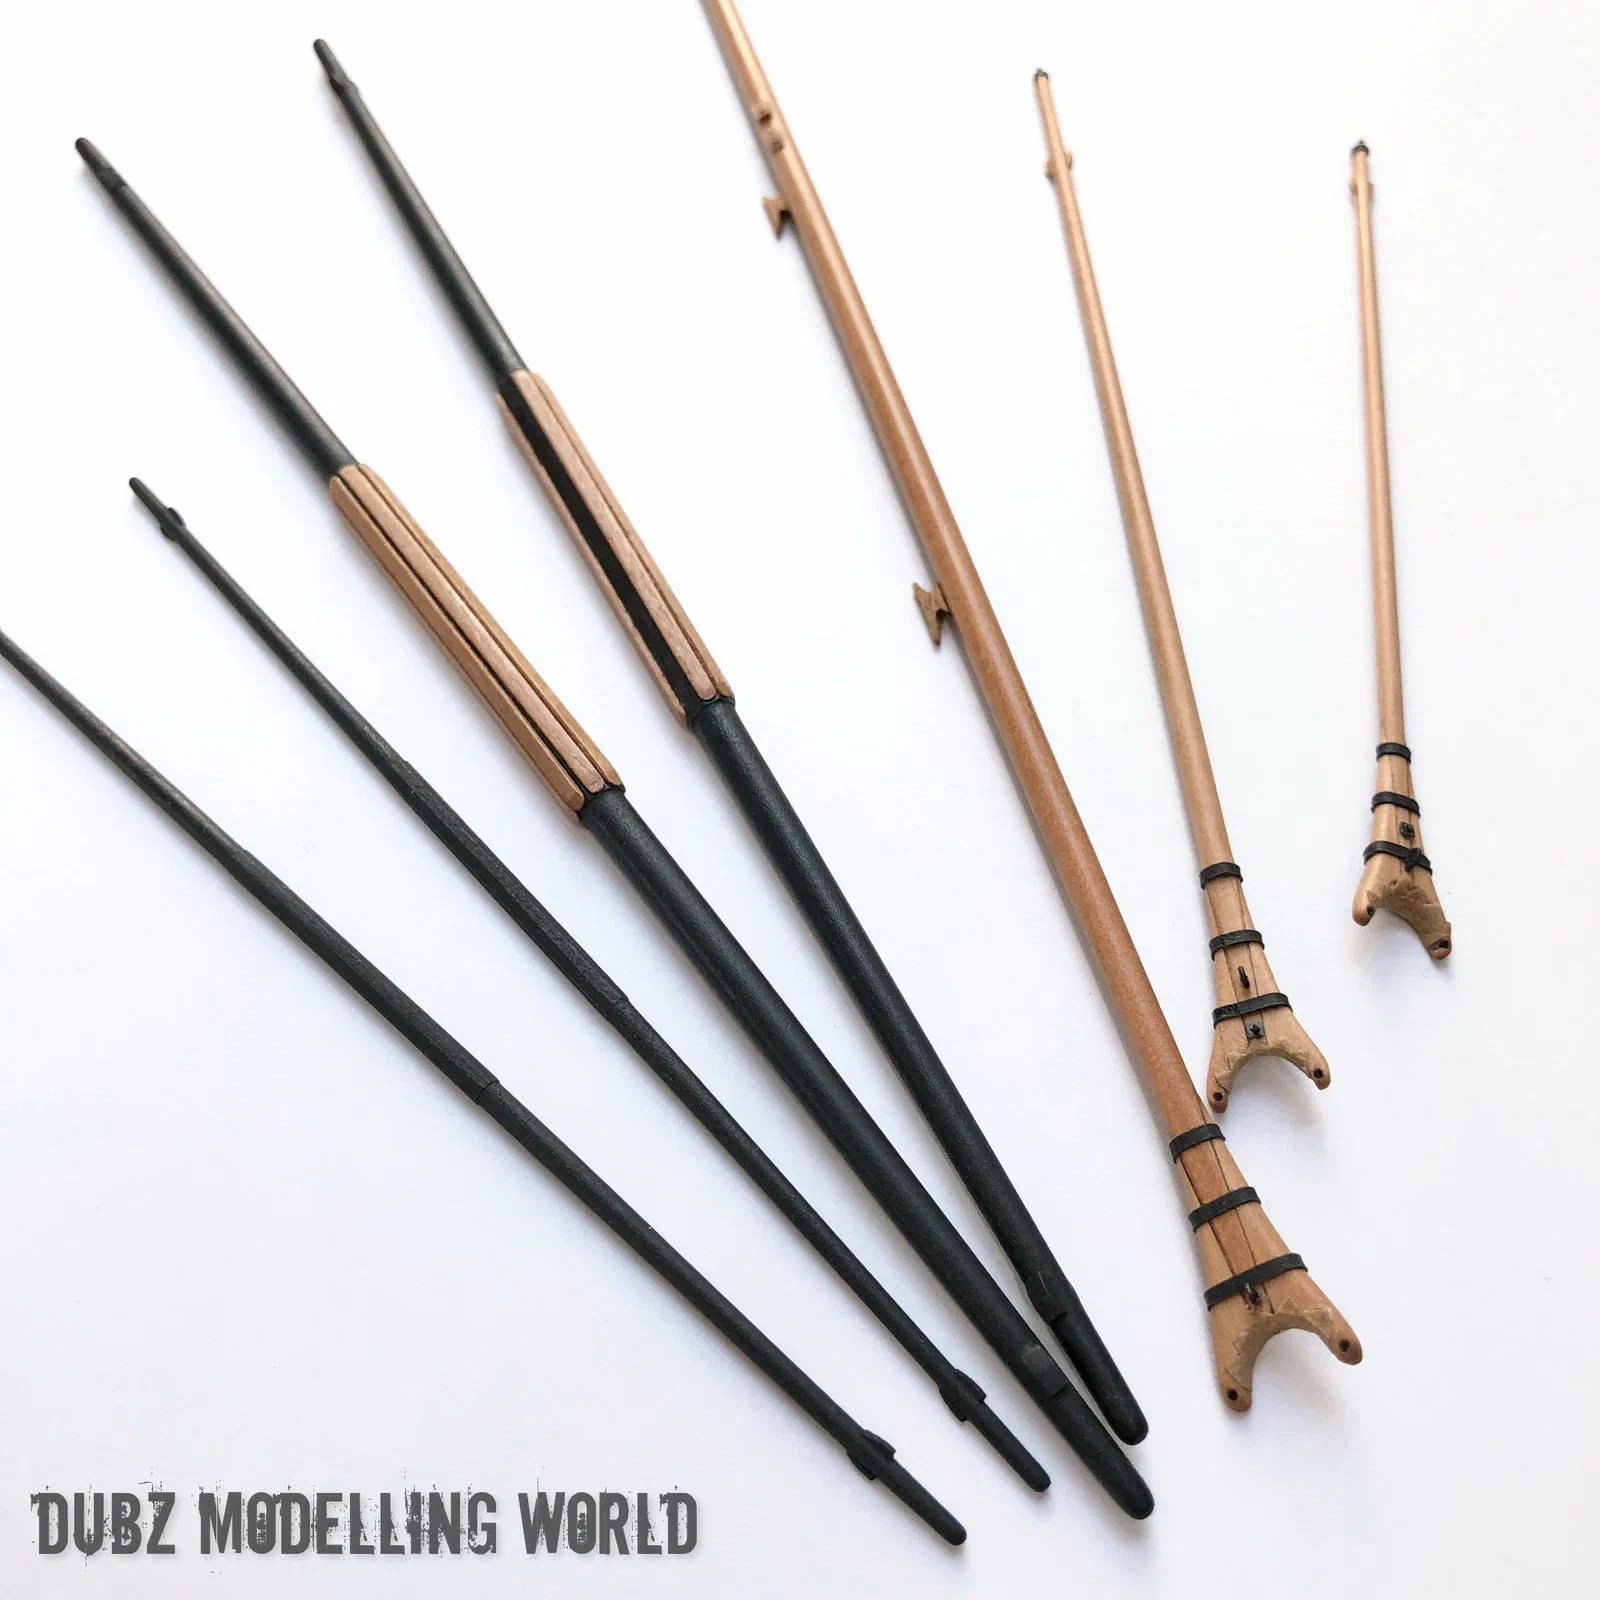
The dinghy
In May 2021 the model got its boat. Master Korabel lasered all parts for the dinghy in pear for me. For bending the planks I used a hotfix applicator – a cheap tool that Russian builders rightly love, and better than any clumsy plank-bending iron. I turned its brass tip round so that it works even better. Most of the time went into carefully removing every trace of laser char. Jokingly, I said the boat would be watered afterwards so that the planks swell and the last gaps close – which is in fact how it was done with real boats.
The boat received a small anchor and then a smaller one with improved flukes, a water barrel, a rudder, and a compass made from a brass tube, white paper with a compass rose drawn in pencil and a drop of Micro Crystal Clear as the glass, set in a small box of pear veneer. Finally she got her rig and was lashed securely on deck. The little boat was also entered on her own in the 4th Concurso Internacional Virtual de Modelismo Naval of the Sociedad Nacional de Modelismo Naval del Perú and took 2nd place in the category “Russian Navy”.
Rope, chain and anchors
The rope for the Polotsk comes from my own ropewalk, which I finished in April 2021 during this build. The first tests used Gütermann Mara thread – colour 2899 for the light rope and 696 for the dark brown. Fine-tuning took time: the brown yarn behaves differently from the beige, the hoofd ran too jerkily for thin ropes, and many of the “recipes” published by other builders did not work for me at all. Measuring the diameters was another uncertainty, as my measurements differed considerably from those of others. The ropewalk has since got its own article, linked below. Baking the finished rope turned out to be one of the best decisions: it can now be cut cleanly without unravelling.
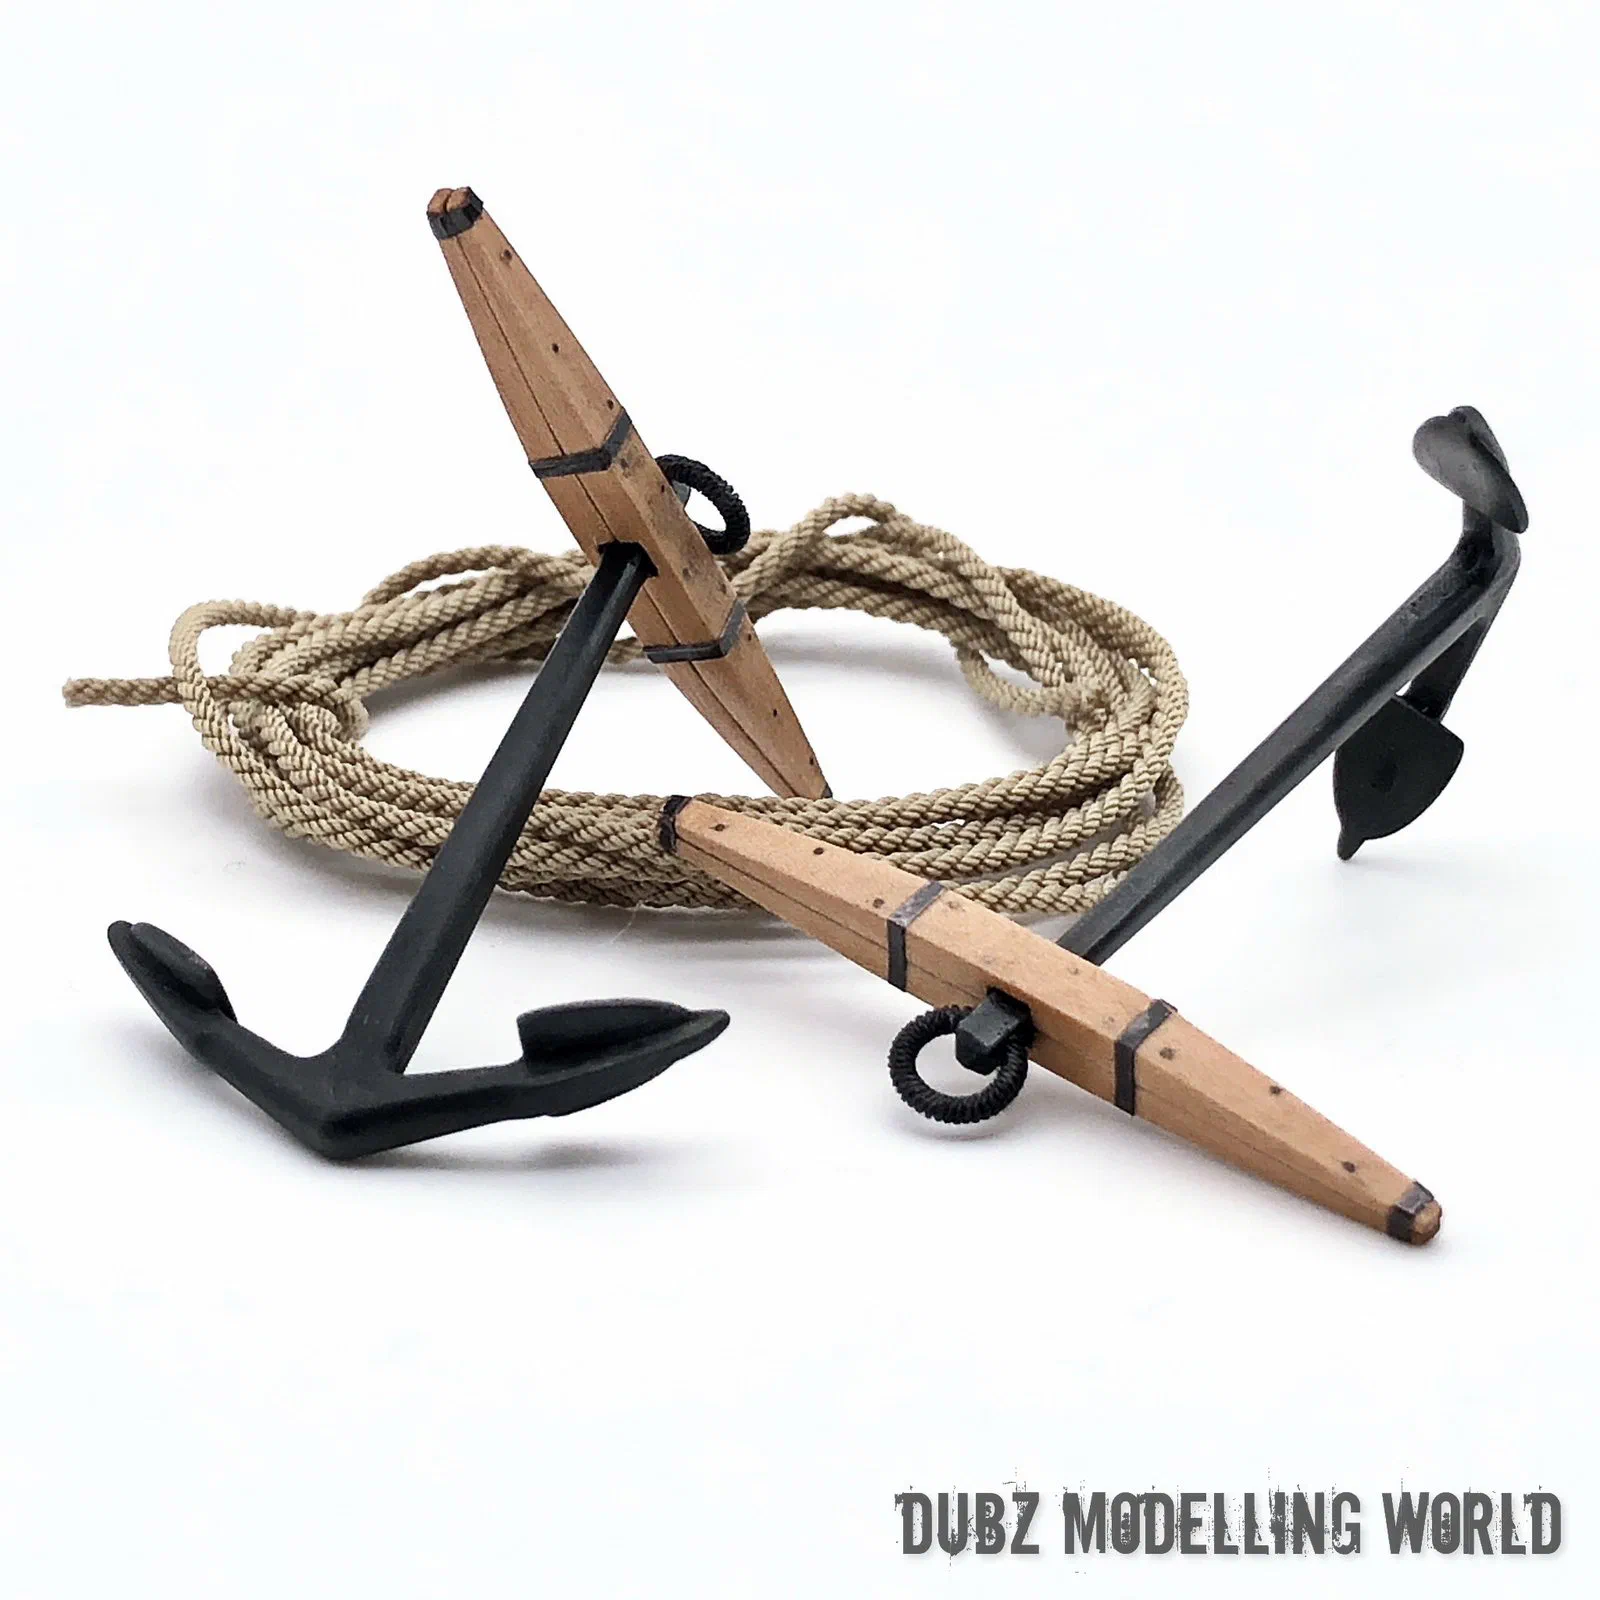
The first anchor cable was made from three ropes, each laid right-handed from 3 × 2 strands of Mara 70 (0.62 mm), which were then laid up left-handed into a cable of 1.4 mm. The first attempt failed because the sledge was too light; with an extra kilogram it worked much better. In November 2021 the anchor cable arrangement was finished, with six stoppers and secured directly at the windlass.
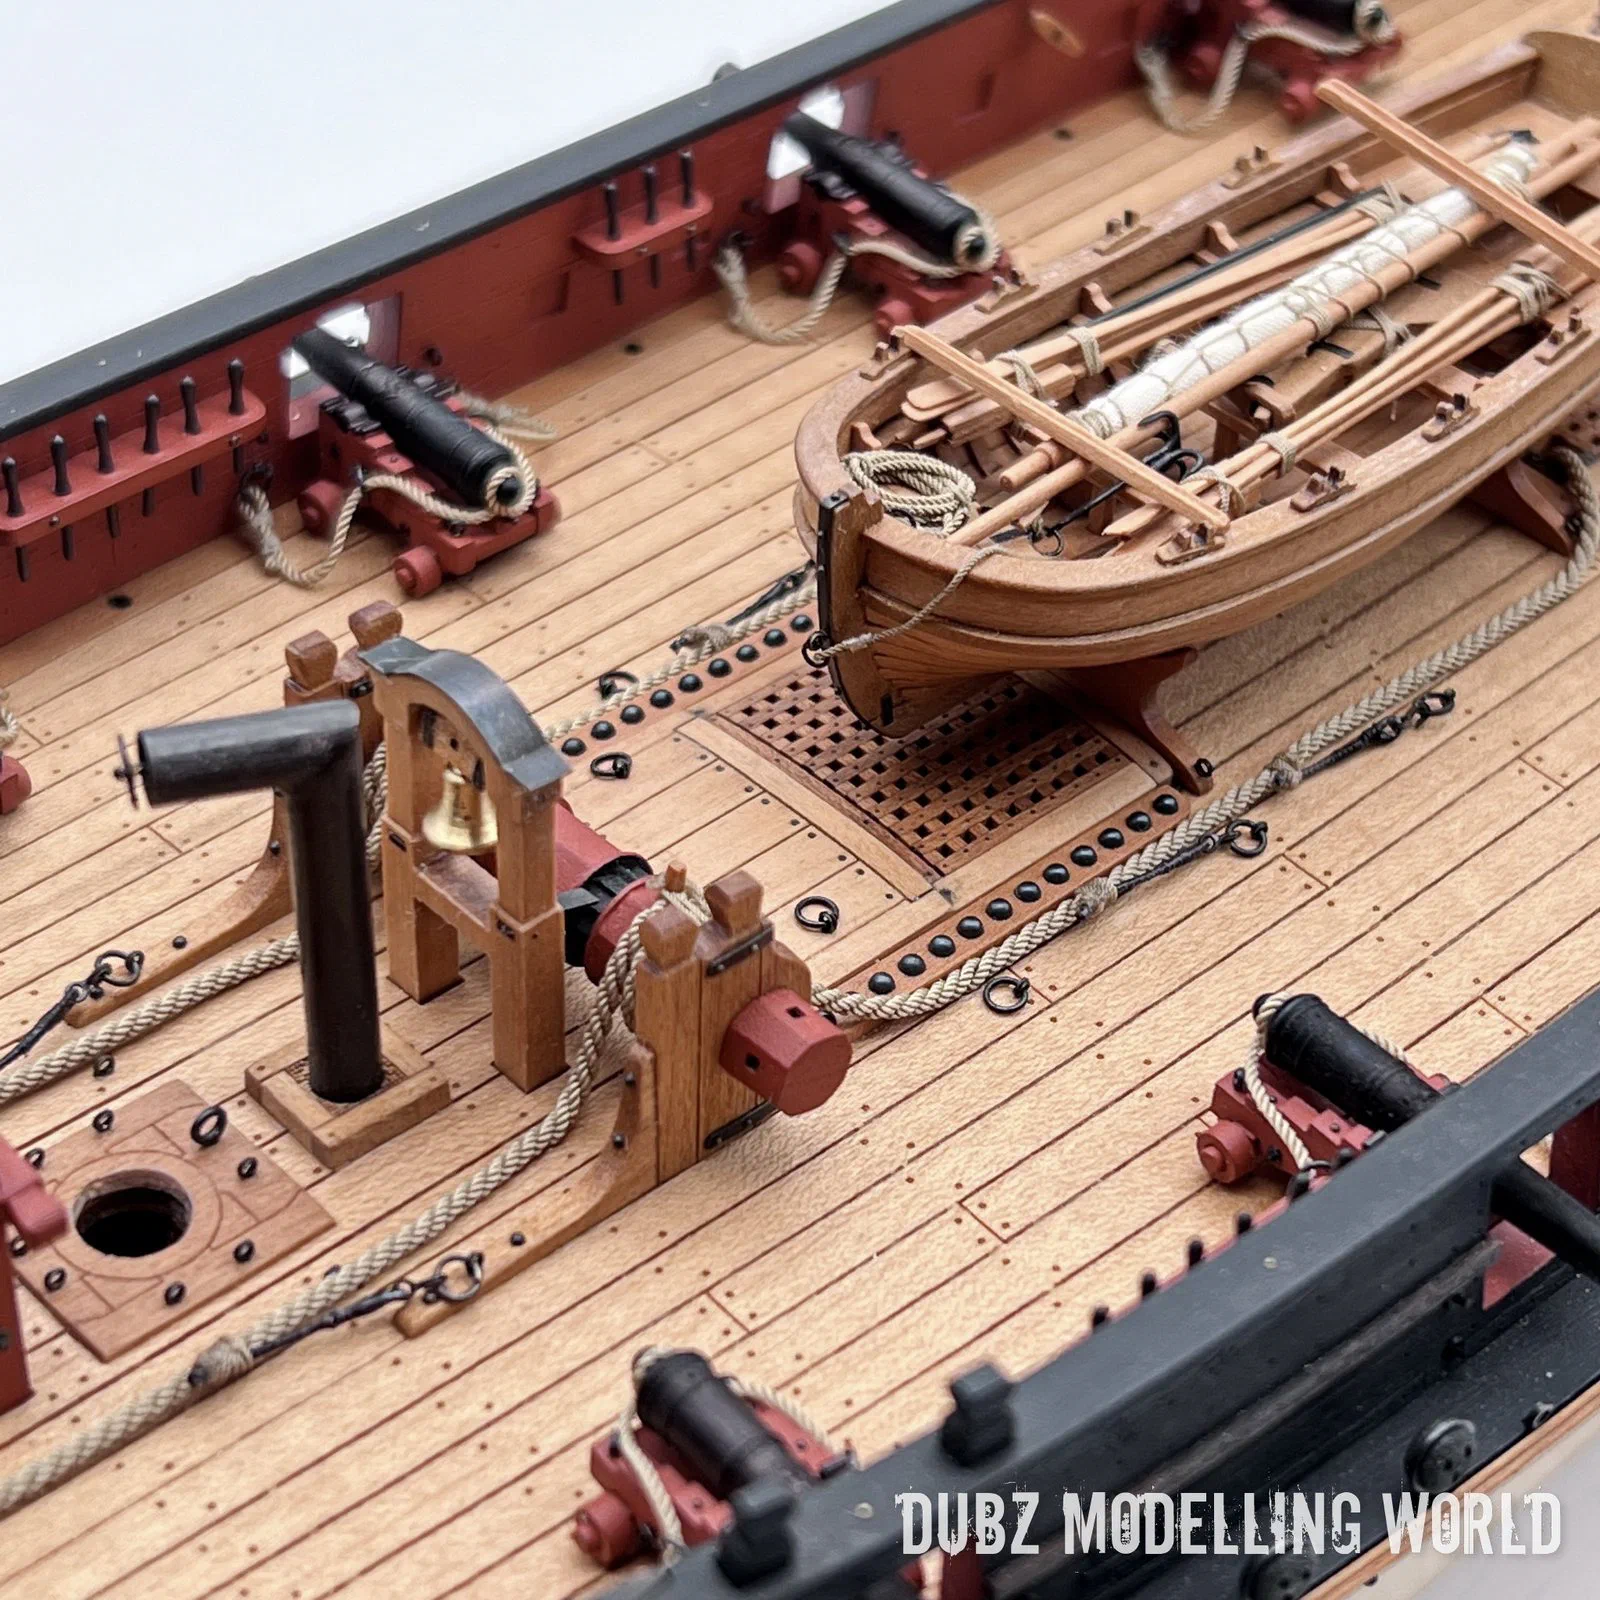
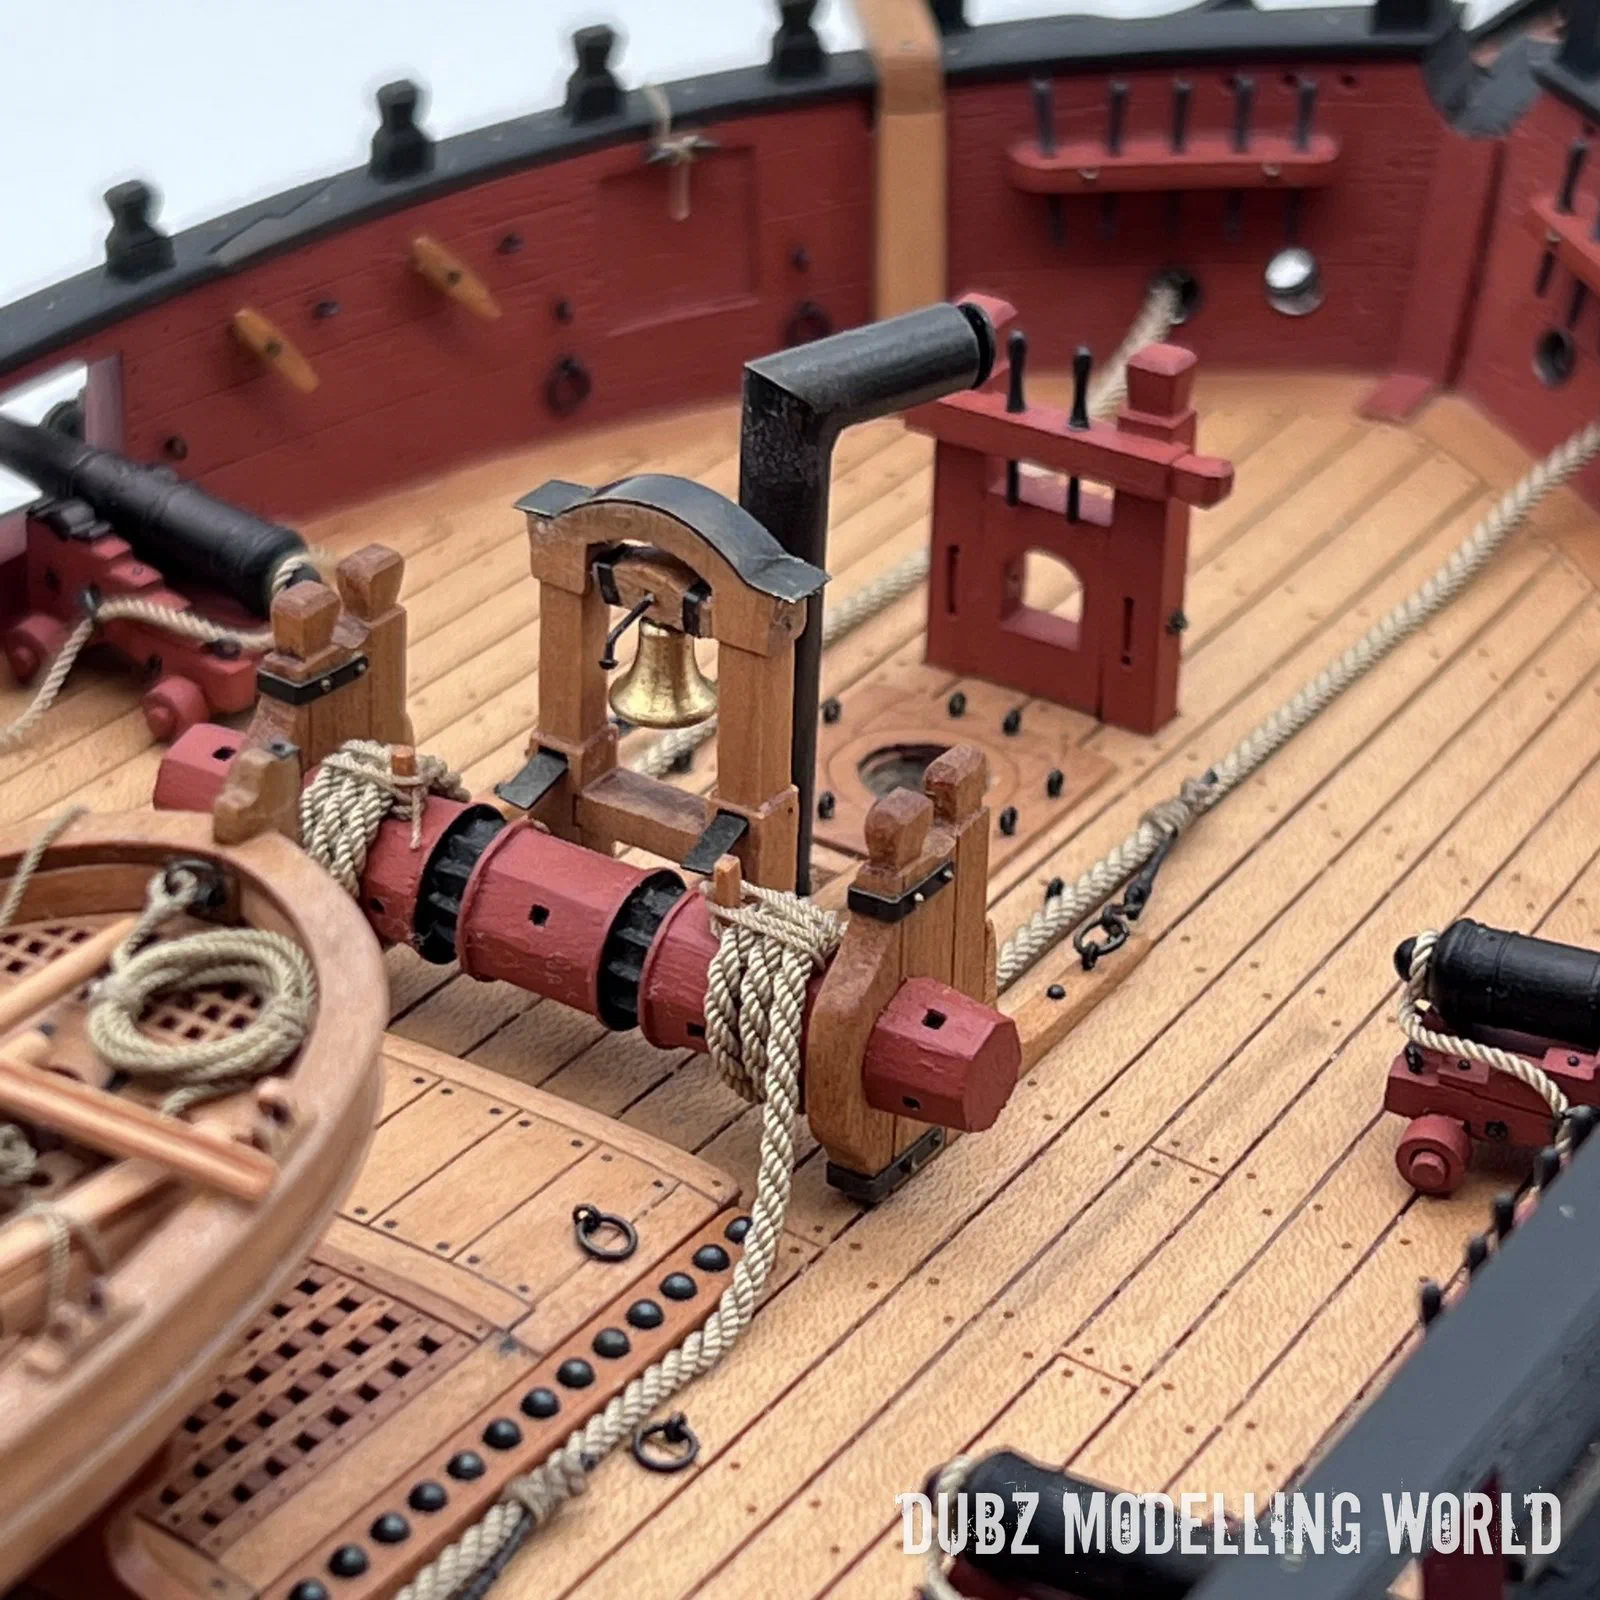
For chain I found very fine chains of the same kind as those sold by kilokits, in diameters of 0.55 and 0.85 mm, and swapped the earlier chains for them.
Standing rigging
The standing rigging began in November 2021 with the hangers and shrouds. I made the shrouds as cablets of 0.67 mm and served them where needed – I am still not completely sure whether the shrouds were cablets or shroud-laid rope, but the tendency is towards cablets. The rudder tackle was made for the third time, with blocks on served strops.
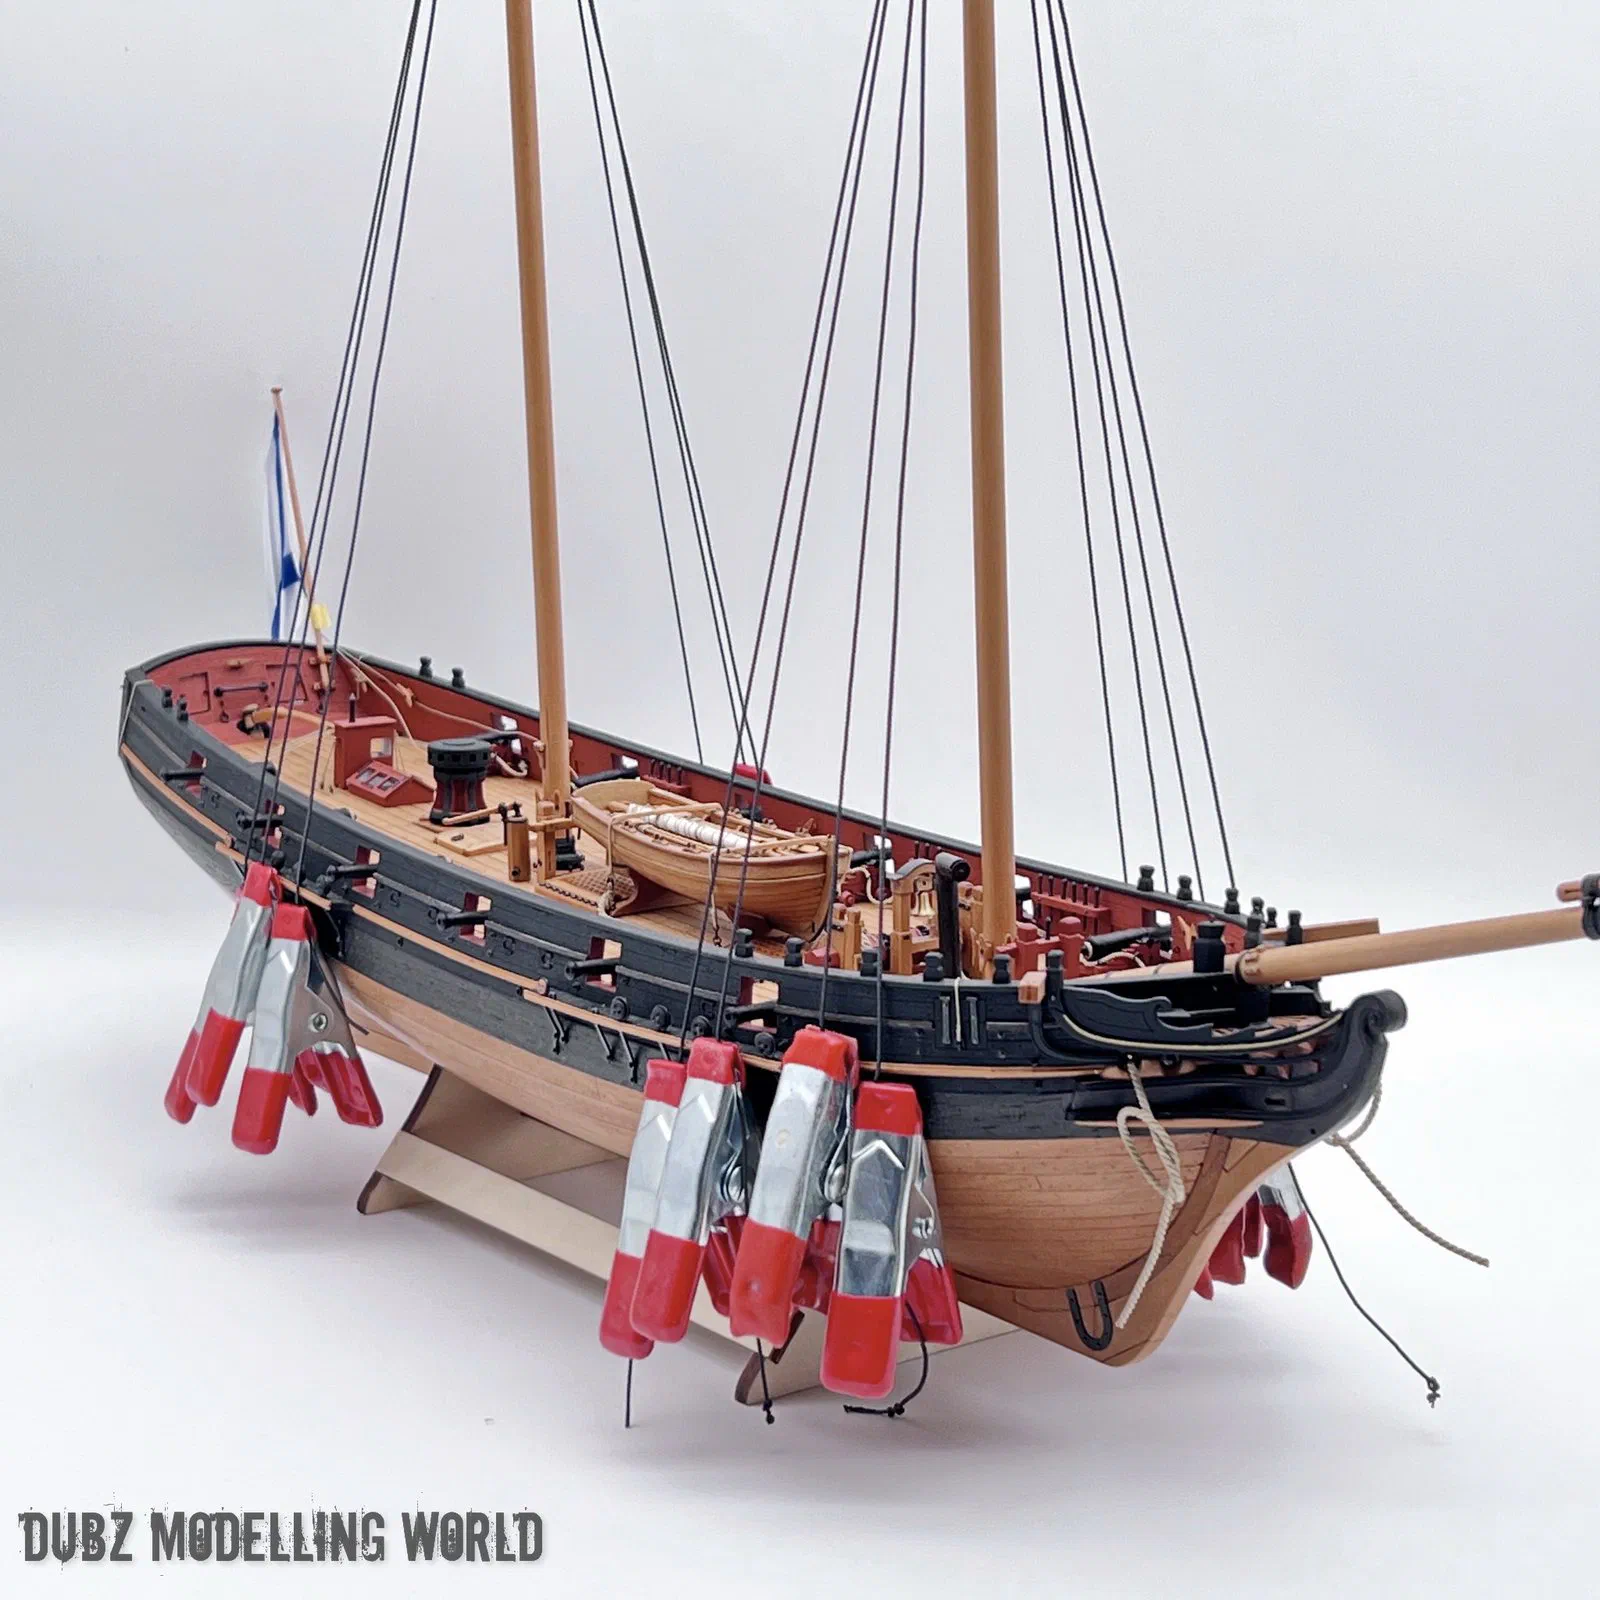

Although I have plenty of books, I sometimes just build and question things later. I built the hangers with mantle tackles as the Master Korabel plan specifies – but a schooner of this kind had no hanger. The equivalent was the mast tackle, which the plan had mistaken for a backstay. Master Korabel is correcting the plans, and I redid several ropes and made the mast tackles with proper blocks. By the end of March 2022 all four mast tackles were finished with violin blocks.
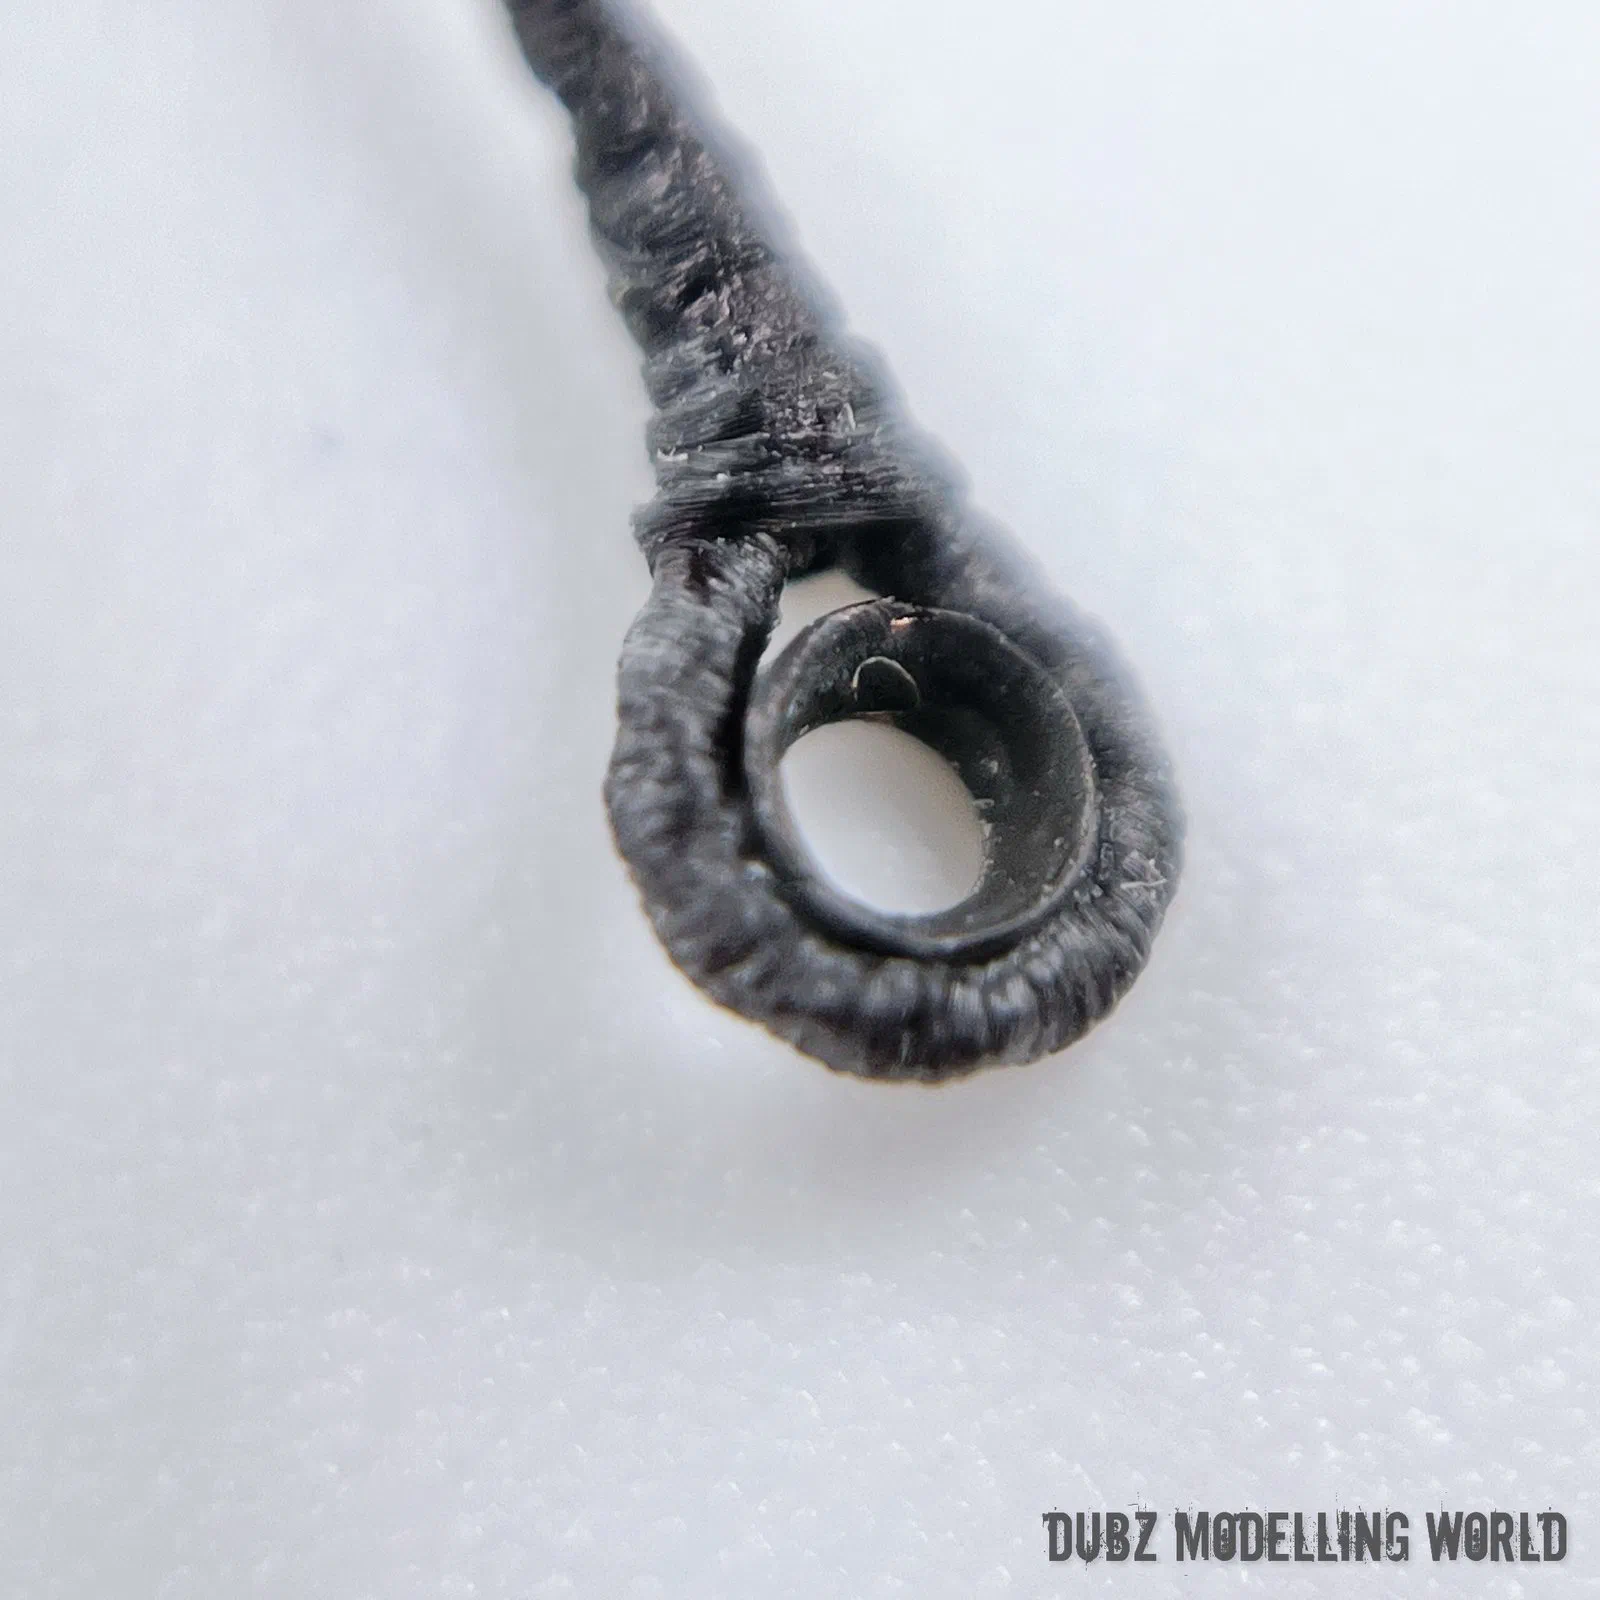
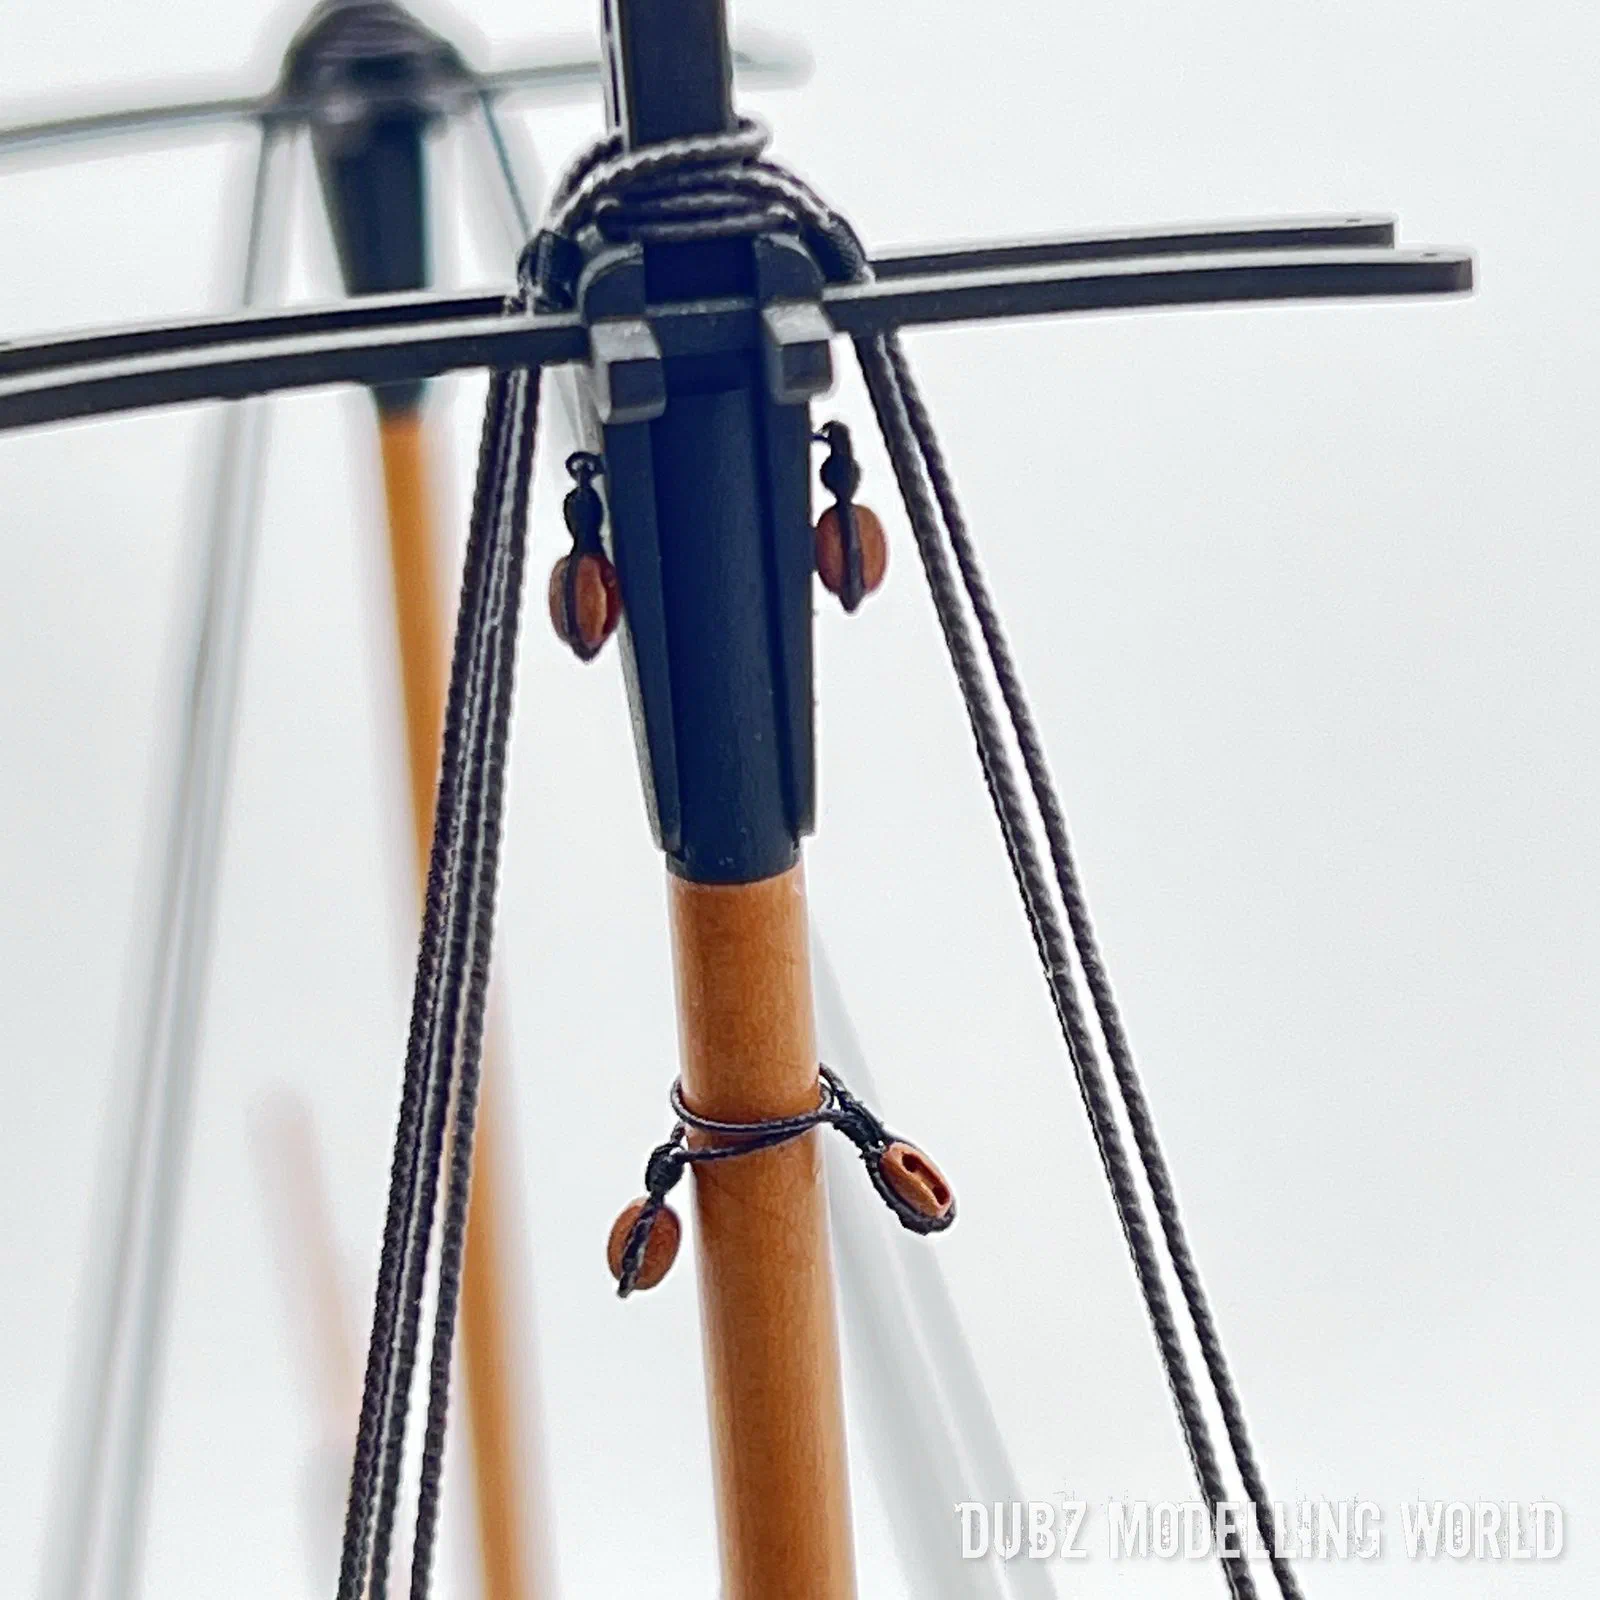
At the same time I started to fit out the yards with my own rope and blocks from Dry-Dock Models & Parts, which together with the Master Korabel blocks are the best on the market.

Where she stands
This is the state of the Polotsk at the last update in April 2022: the hull, deck and fittings are complete, all guns are rigged with their breeching ropes, the dinghy is lashed on deck, the anchors are fitted with their cables and stoppers, the masts and yards are made, the mast tackles and the first shrouds are set up and the yards are being fitted with their blocks. Still to come are the remaining standing rigging, the running rigging and the setting up of the yards. Life has been busy since then – the last update was written between nappy changes – but she will be finished, and this log will grow with her.
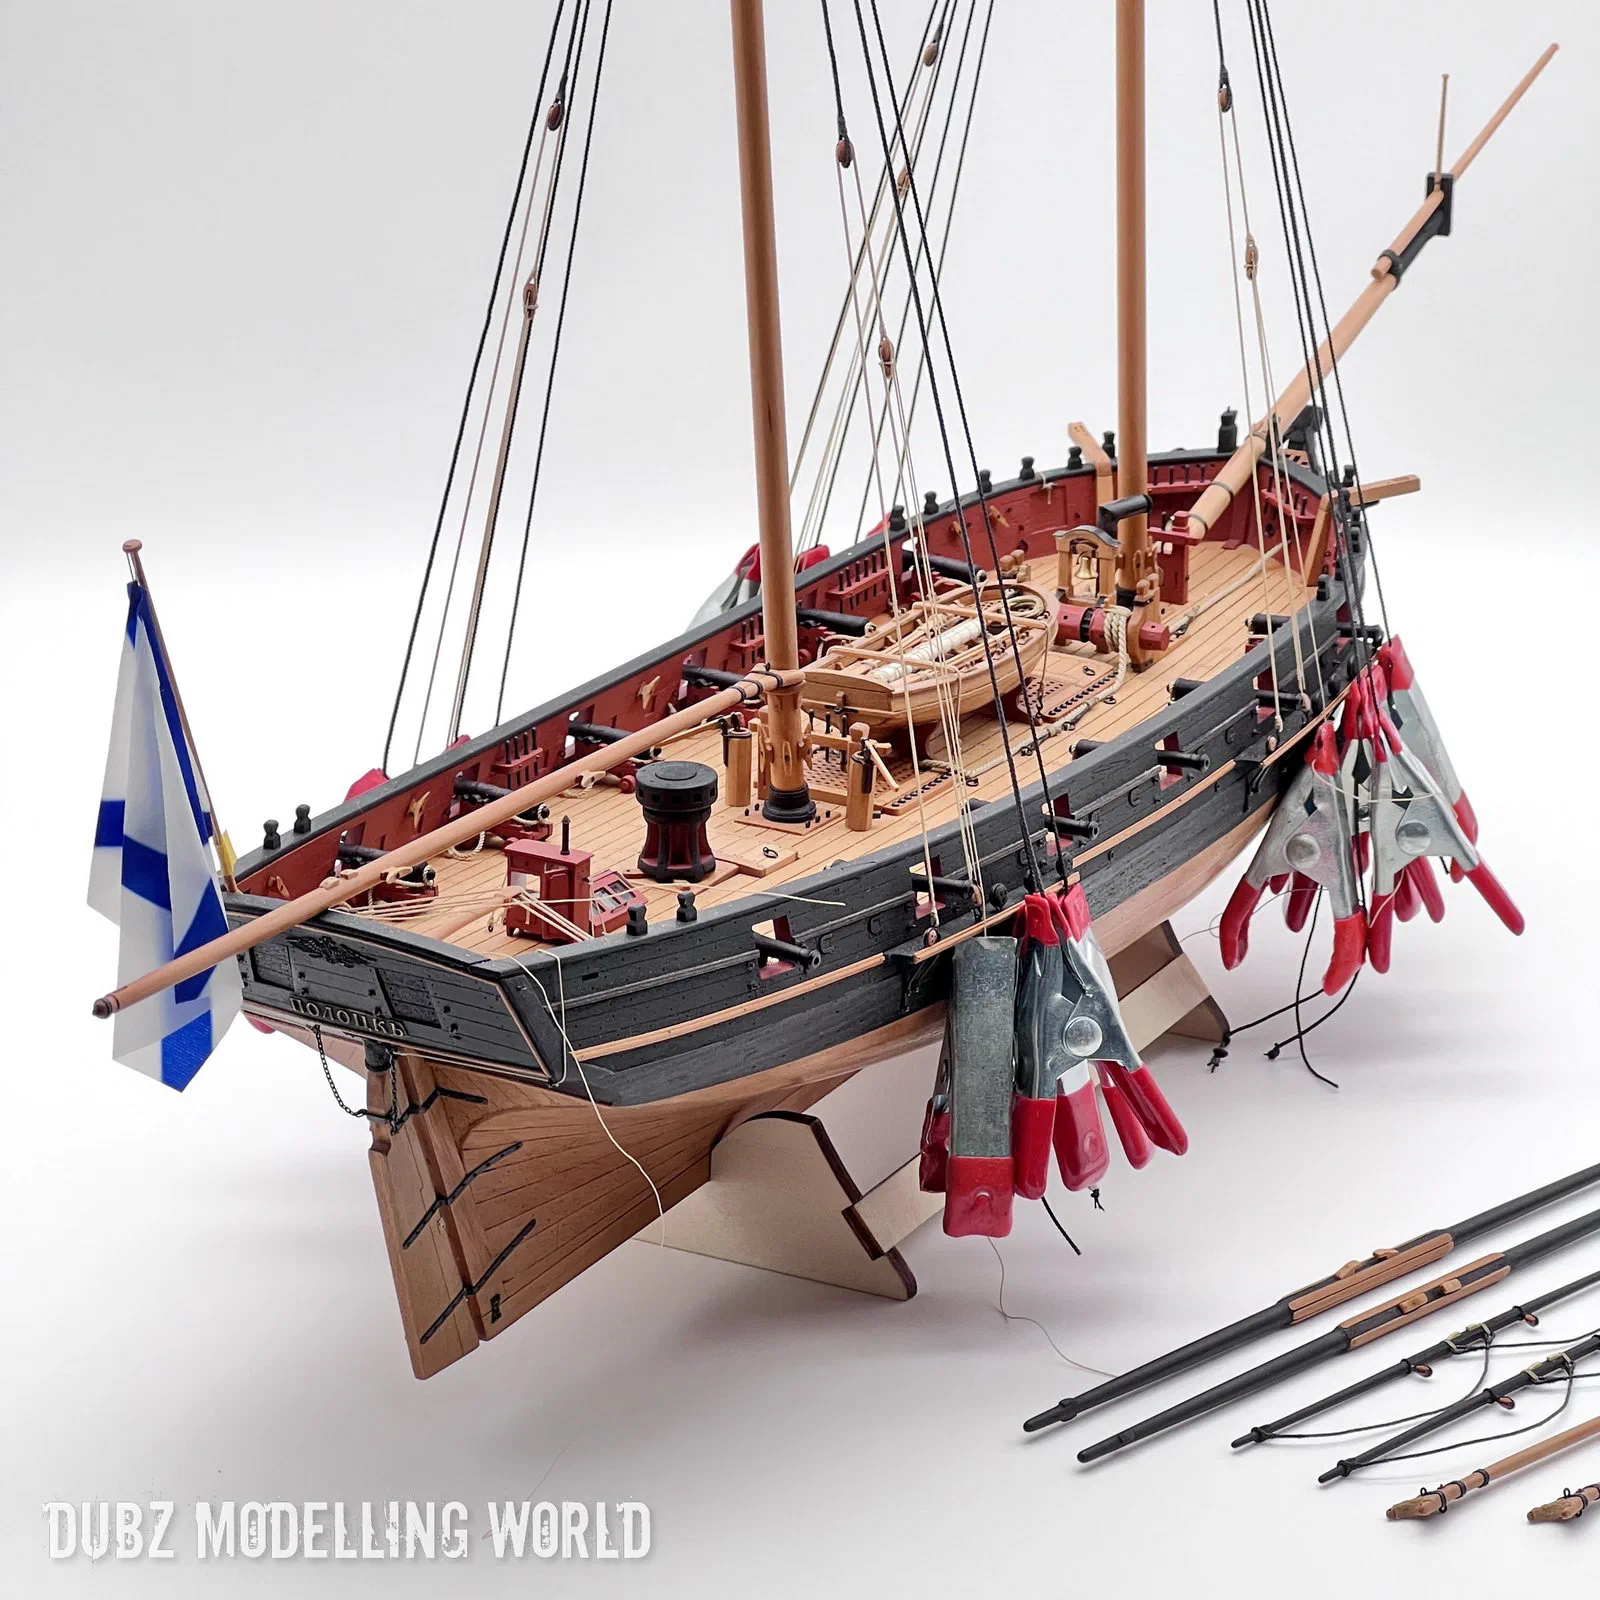
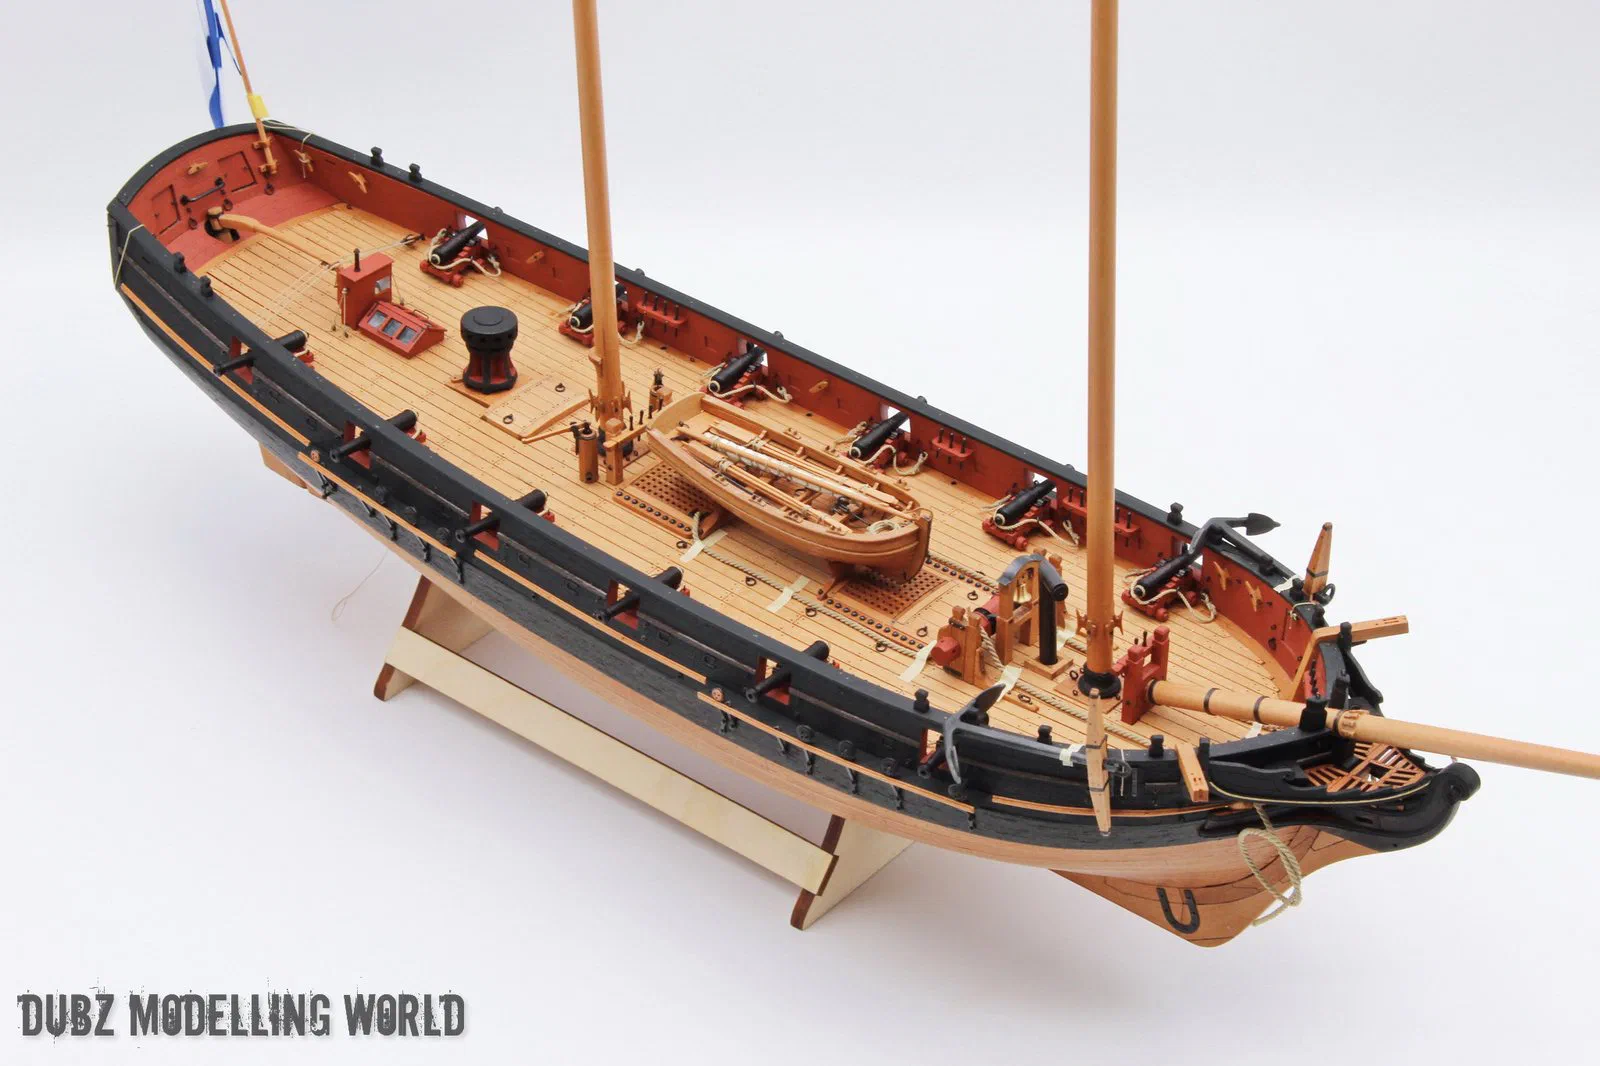
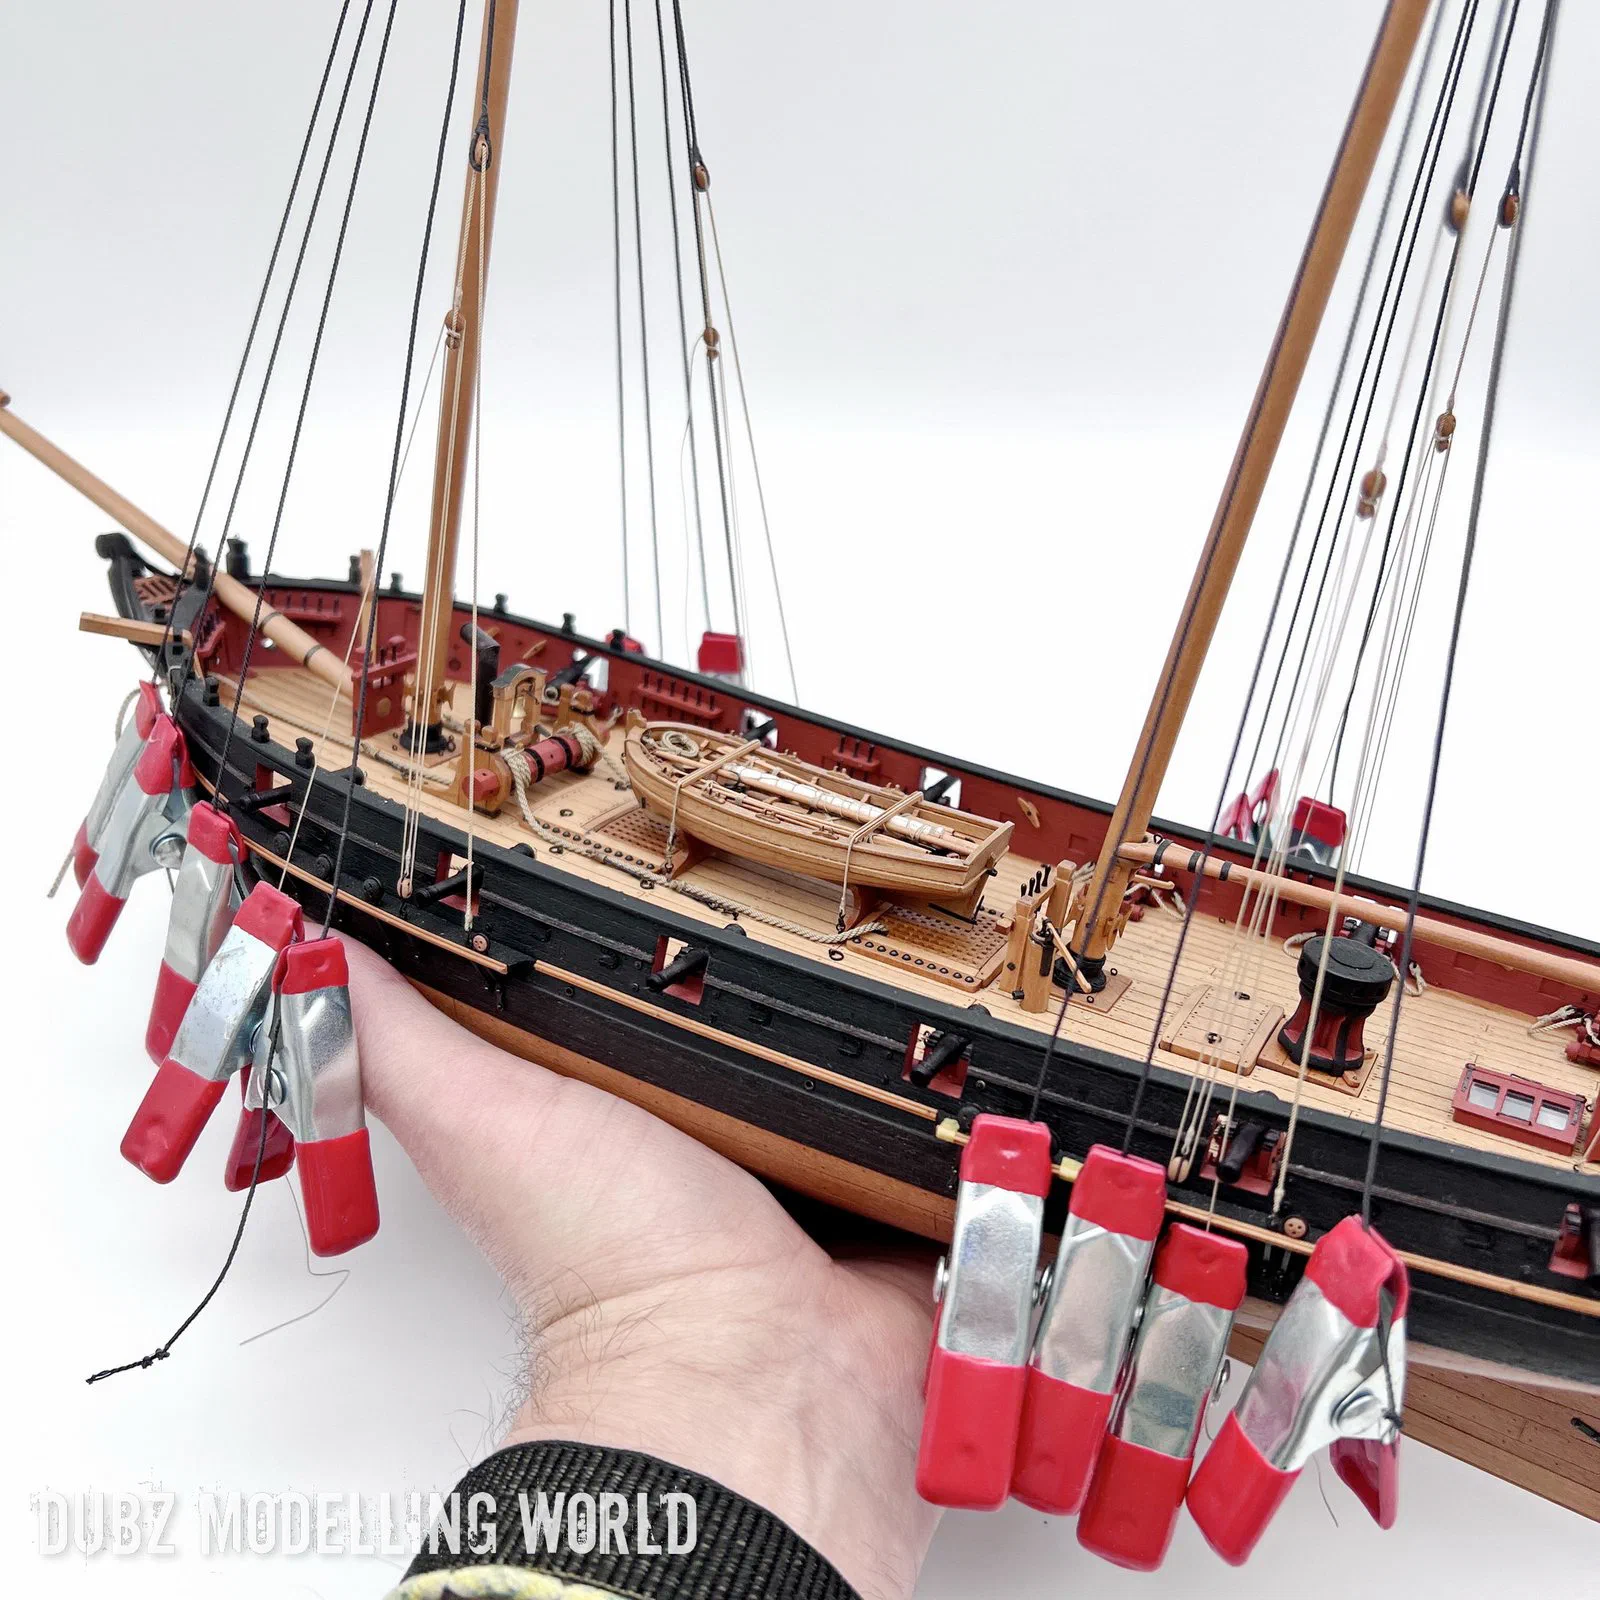
The photos were taken in a small photo box, mostly with an iPhone 13 Pro, and processed in ACDSee.