History
In the spring of 1763 the Seven Years’ War had just ended, and the Royal Navy turned its attention to a quieter but stubborn enemy: the smugglers working the coasts of southern England. Sherbourne was one of the small, fast cutters built for that fight. She was ordered on 30 April 1763, laid down at Woolwich Dockyard on 27 June and launched on 3 December the same year – designed by Sir Thomas Slade, built under Master Shipwright Joseph Harris, at a cost of £1,581 8s 9d.
Her first commander was Lieutenant John Cartwright, later famous as a parliamentary reformer. From December 1763 to May 1766 he patrolled the south coast between Dorset and Devon in support of the Board of Customs. Lieutenant Christopher Raper followed him, and between 1769 and 1777 the cutter passed through the hands of Lieutenants Stephen Rains, Thomas Rayment and Thomas Gaborian, always based in the Channel. Arthur Twyman and Arthur Hayne were her last commanders before she was laid up in 1779.
One last episode is almost touching: in 1783, although the dockyard had already rated her unfit for service, she took part in William Tracey’s unsuccessful attempt to raise HMS Royal George, which had sunk at Spithead the year before. In July 1784 she was sold at Portsmouth.
A quick kit that wasn’t
This build began after a three-year break from the workbench – private matters and a heavy workload had simply left no room for modelling. To get back into it, I wanted something small and relaxed: the Caldercraft kit of HM Cutter Sherbourne, built straight out of the box, just for the fun of it.
“Haha … not possible.”
Of course it didn’t stay that way. After the long break I had forgotten some of my own rules – measure, prepare, measure again – and a few of the early flaws are still visible today. I have learned to live with them. More importantly, the further I got, the less of the kit I was willing to use. Carriages, guns, fittings, mast and spars, almost all of the rigging parts: one by one they were replaced by parts made in the workshop. In the end ‘almost scratch’ describes the model far better than ‘kit’.
The model was started around 2012 and spent long stretches on the shelf while other projects – above all the Syren – took over the bench. Many of the small details I developed for the Syren, such as smaller rings and eyebolts, found their way onto the Sherbourne as well.
Hull, wales and planking
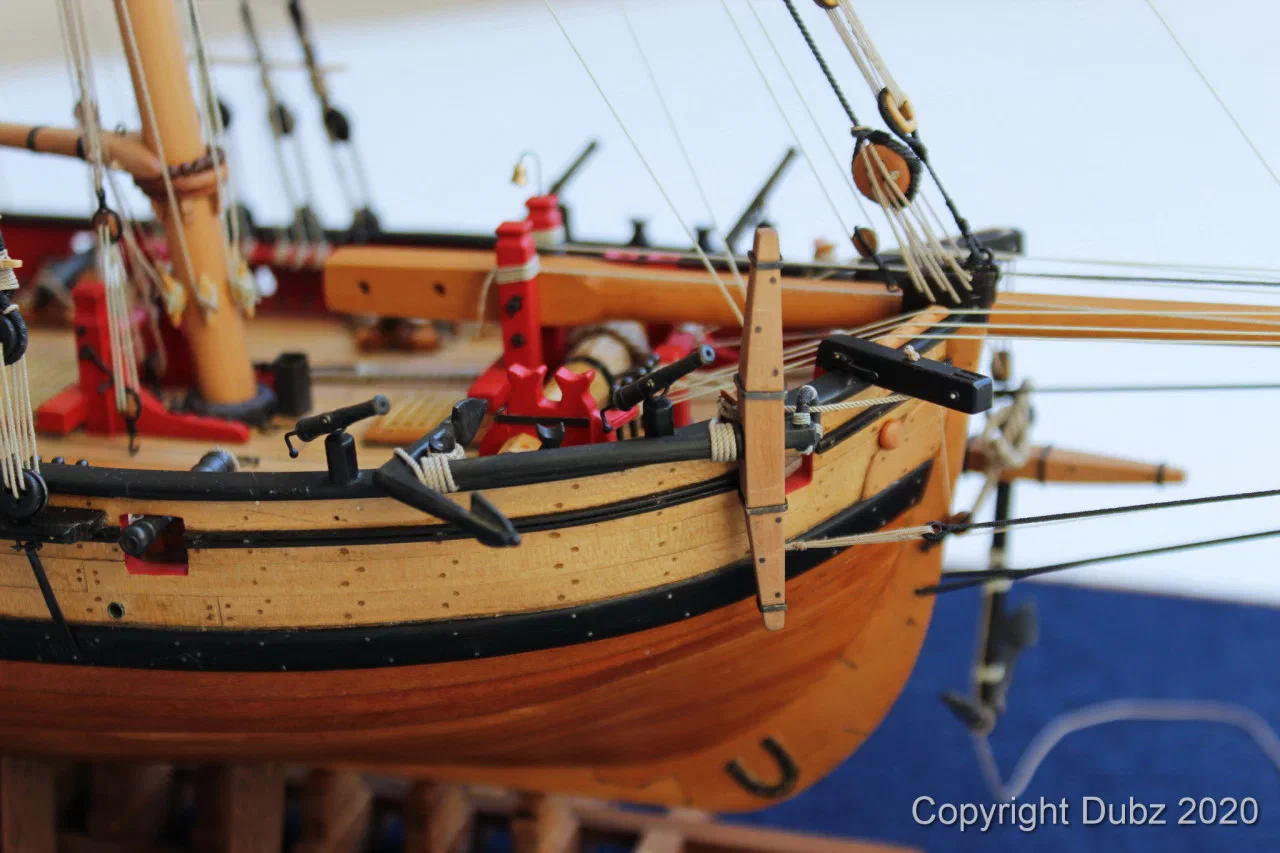
The first thing that set the tone was the main wale, made from ebony instead of the kit material. Its deep black against the natural wood is what gives an 18th-century cutter its characteristic look, and ebony takes a crisp edge that paint never quite achieves.
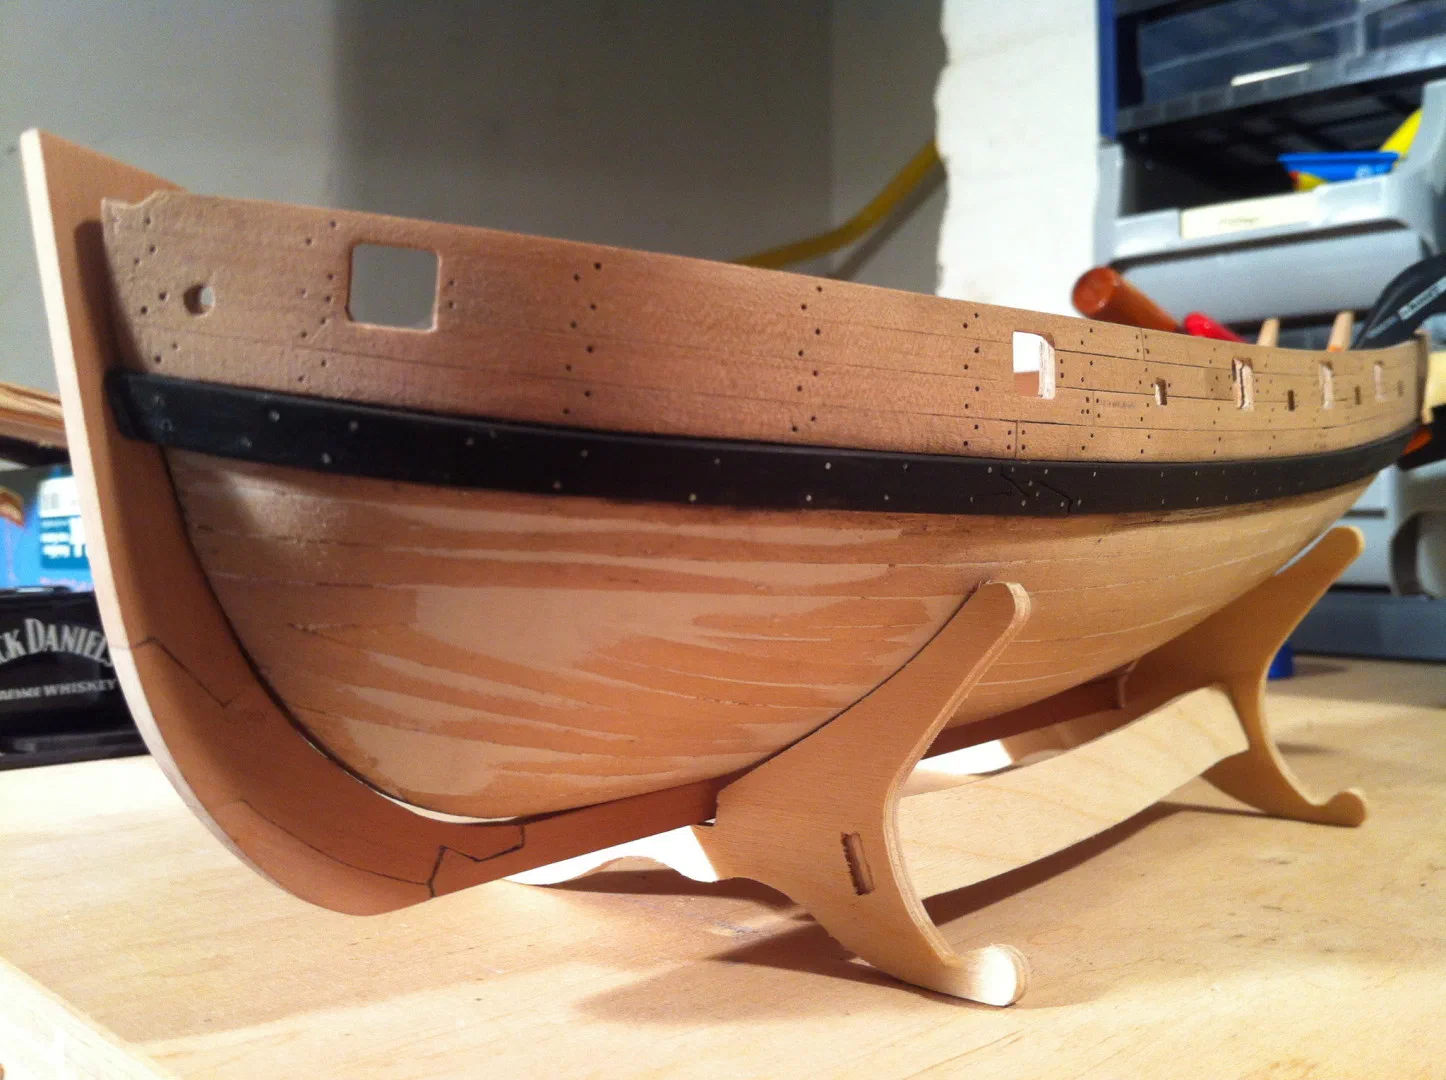
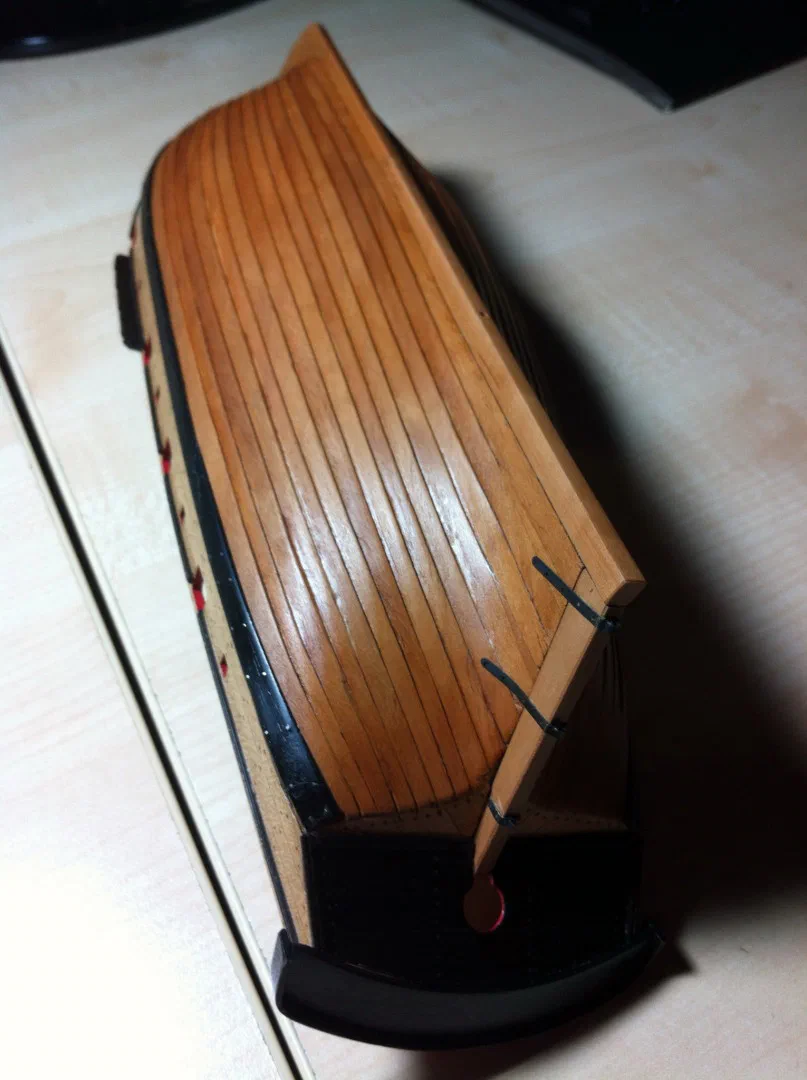
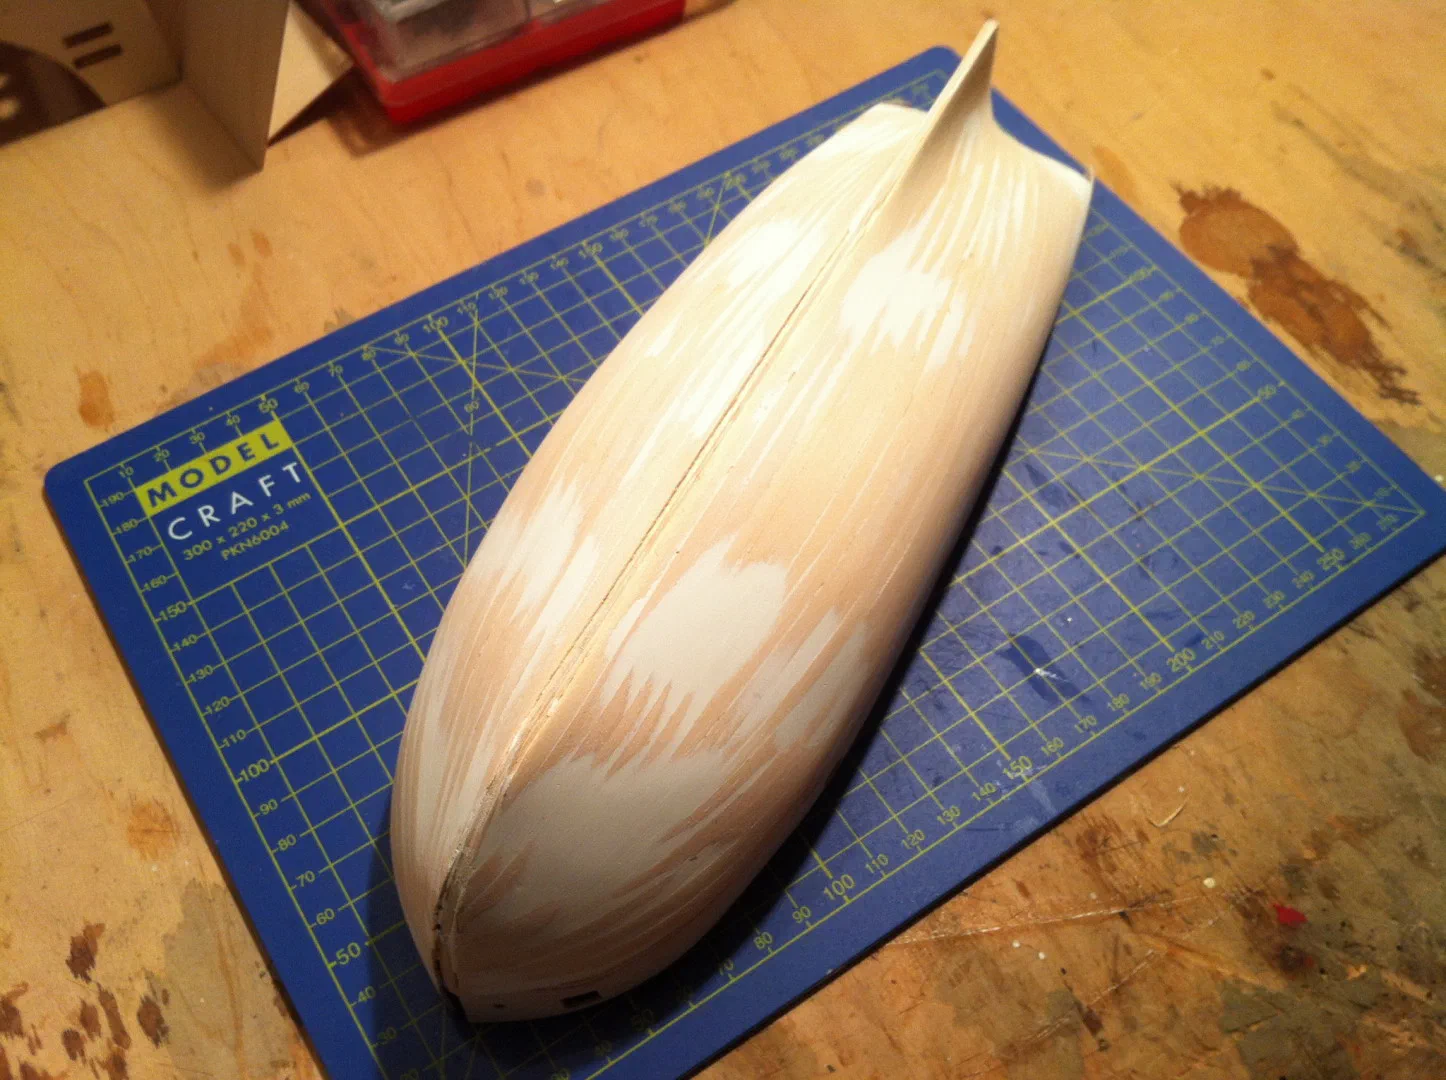
At the bow I had to double some planks to correct a flaw from the first planking – one of those moments where honesty with yourself pays off later. The second planking was then finished, oiled, polished, oiled again and given a last polish. It is not perfect, but I was happy with it. The big question afterwards was the nailing: did I really want to drill around 800 holes? Small parts such as the horseshoe and fish plate and the entry steps followed.
Much later, when the rigging was already under way, something that had bothered me for years finally got fixed: the stern. I could no longer remember why I had built it the way I had, but it was simply wrong for a cutter. So I took it apart and rebuilt it, again in ebony. Not perfect, but much better than before.
The deck
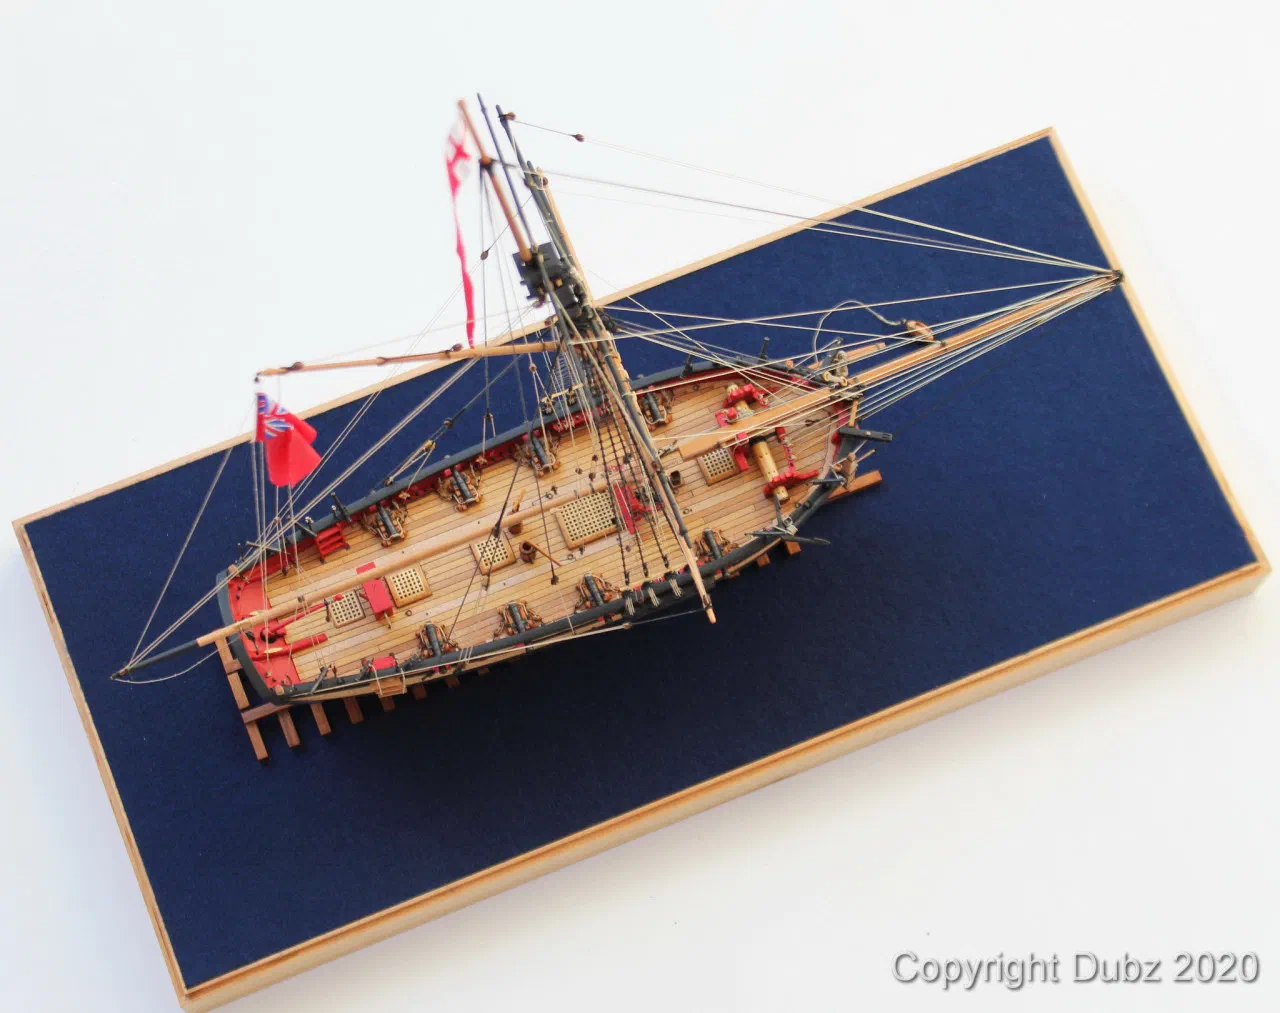
Before a single deck plank went on, I researched the deck layout from the original plan. The kit’s arrangement did not match it, so the layout on the model follows the Admiralty draught: gratings, hatches, the position of the windlass and the guns.
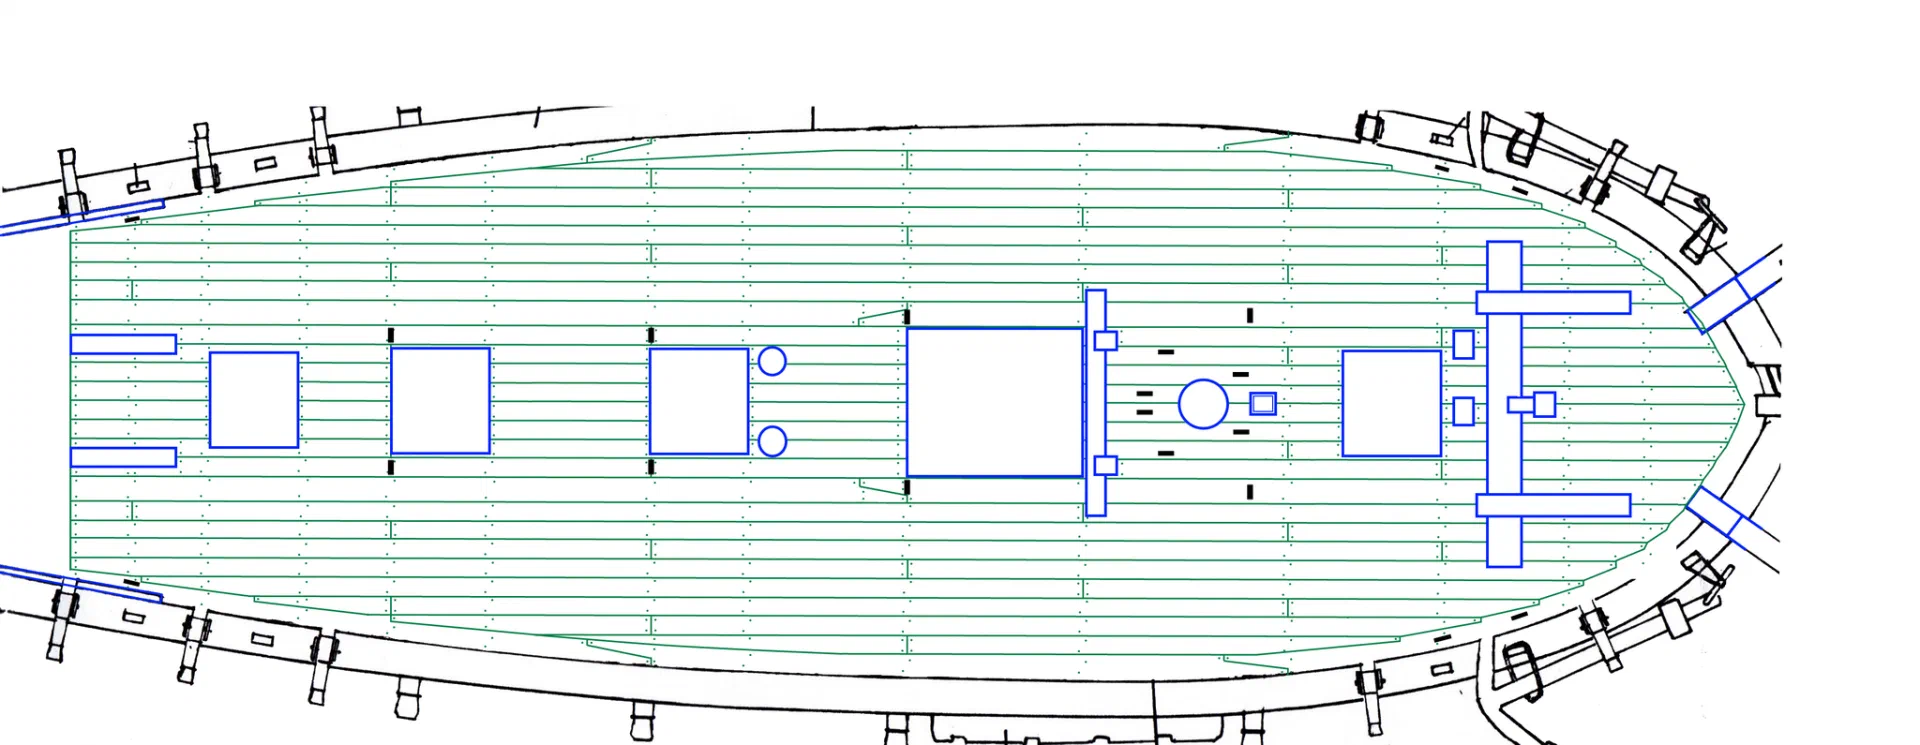
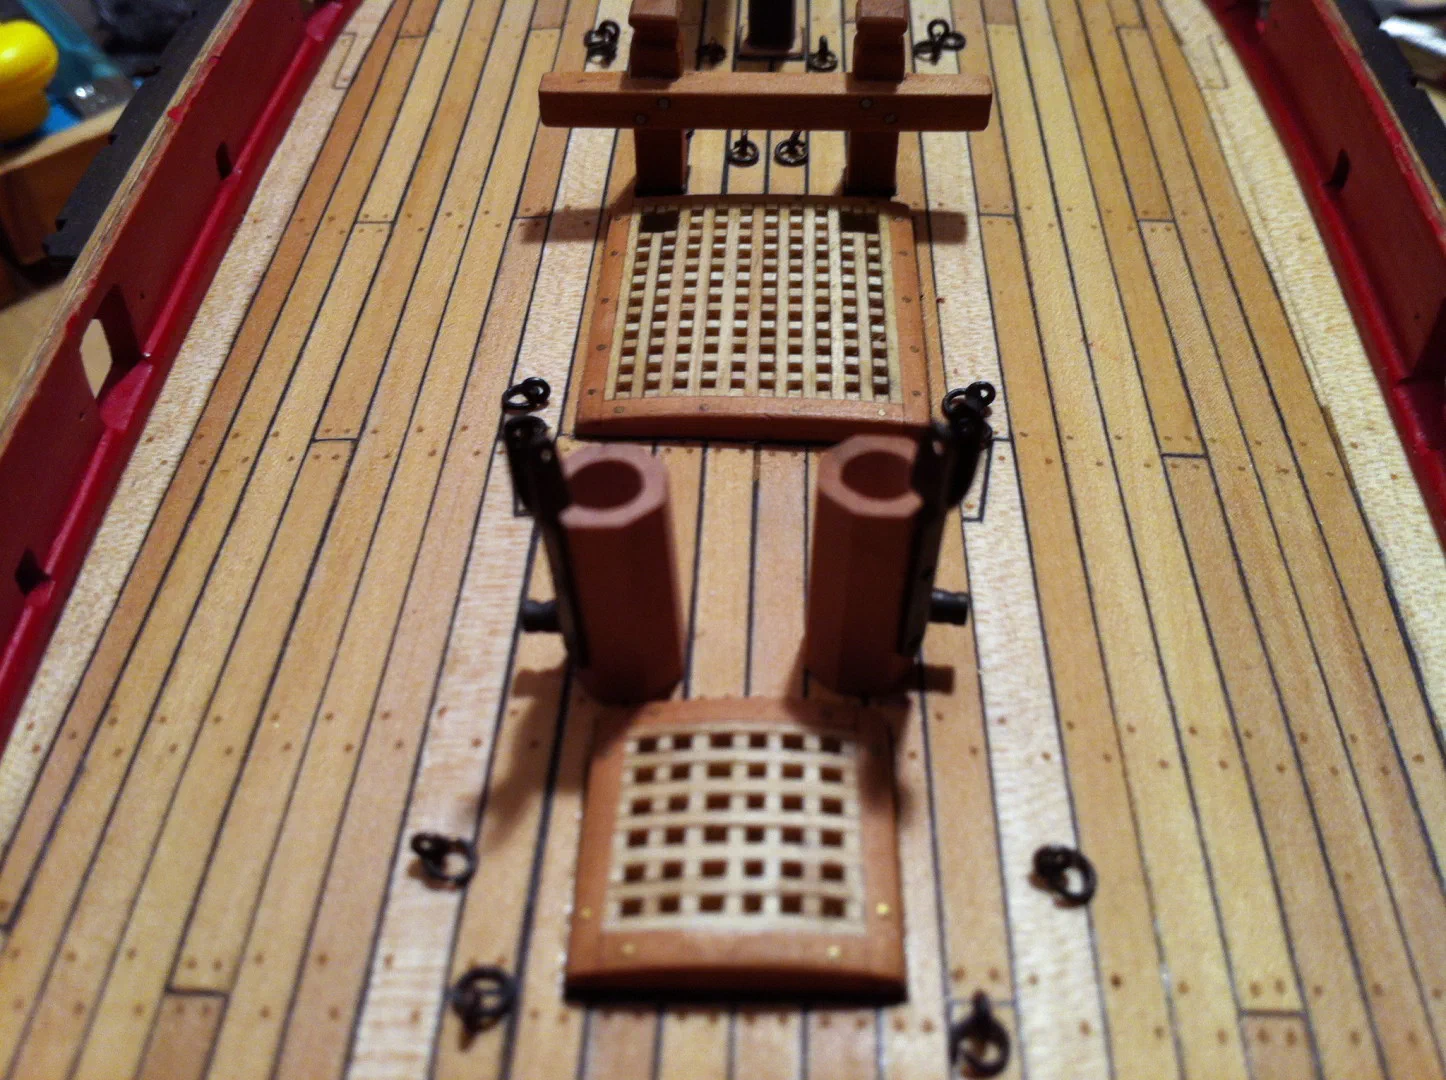
The deck planking itself has a major flaw – I know exactly where it is, and you will probably find it too. The deck was waxed afterwards, which is also how I make the nail heads. The gratings, the flue, the rudder, tiller and braces were all built in this phase.
Guns and carriages
The Caldercraft carriages were the first kit parts to go. Their shape is simply wrong for a British cutter of this period, and I don’t like the wood. There is nothing better than pear. So I made new ones, cut a fine line into each side because the originals were built from two parts, drilled all the holes, oiled them and built a small jig to glue them later in exactly the right positions.
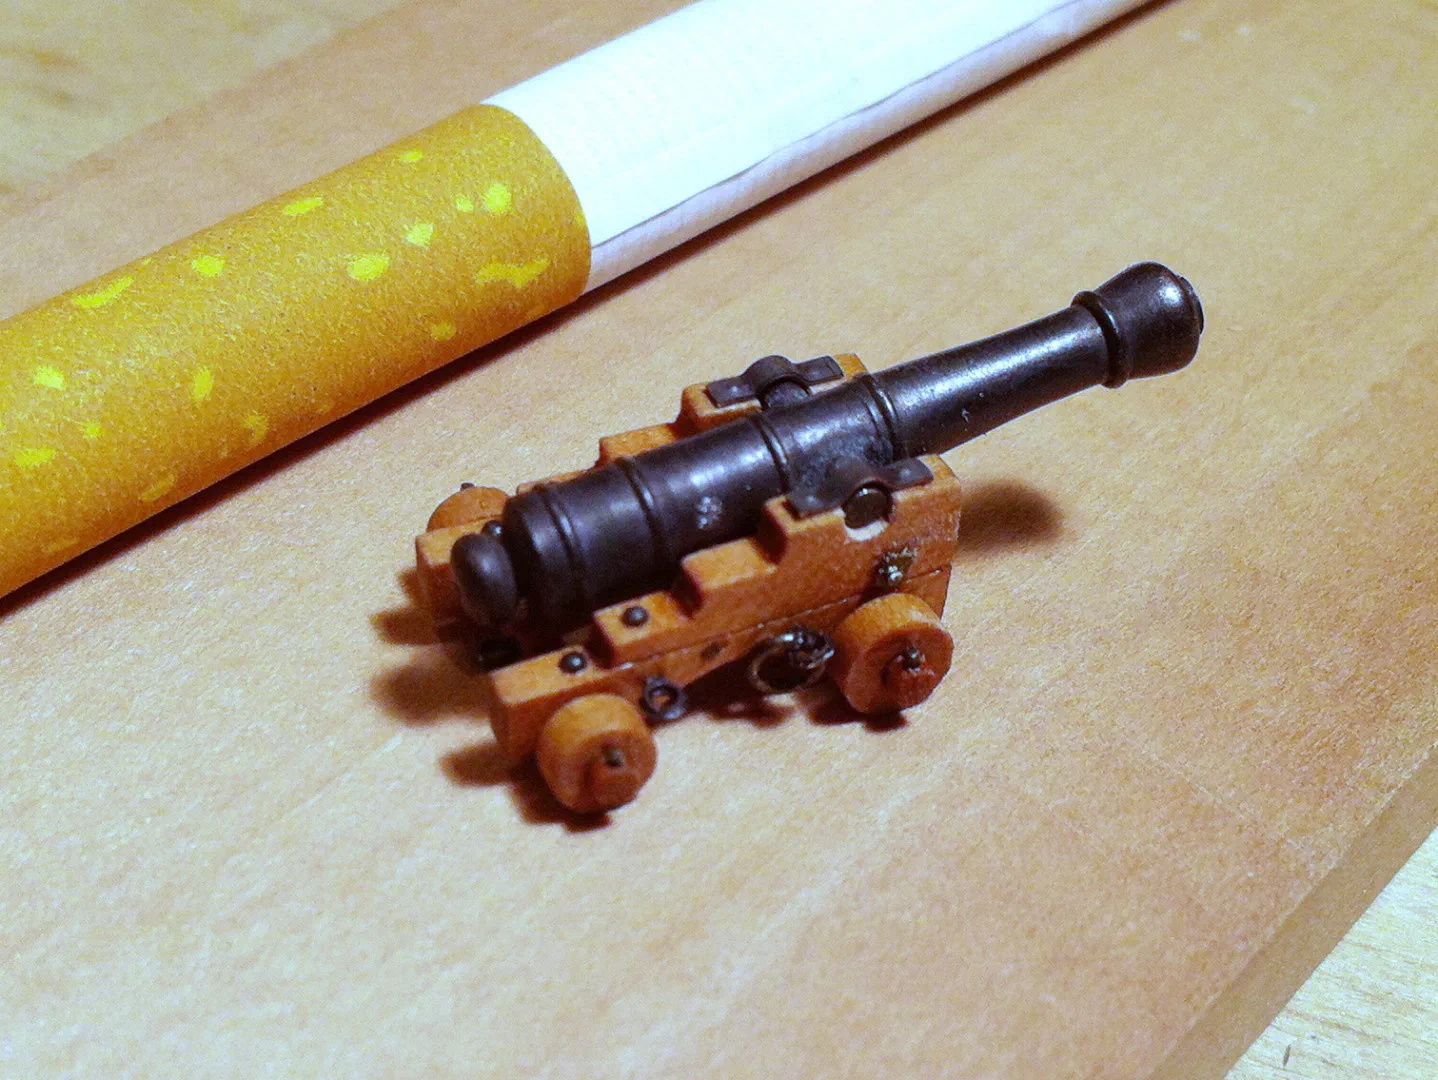
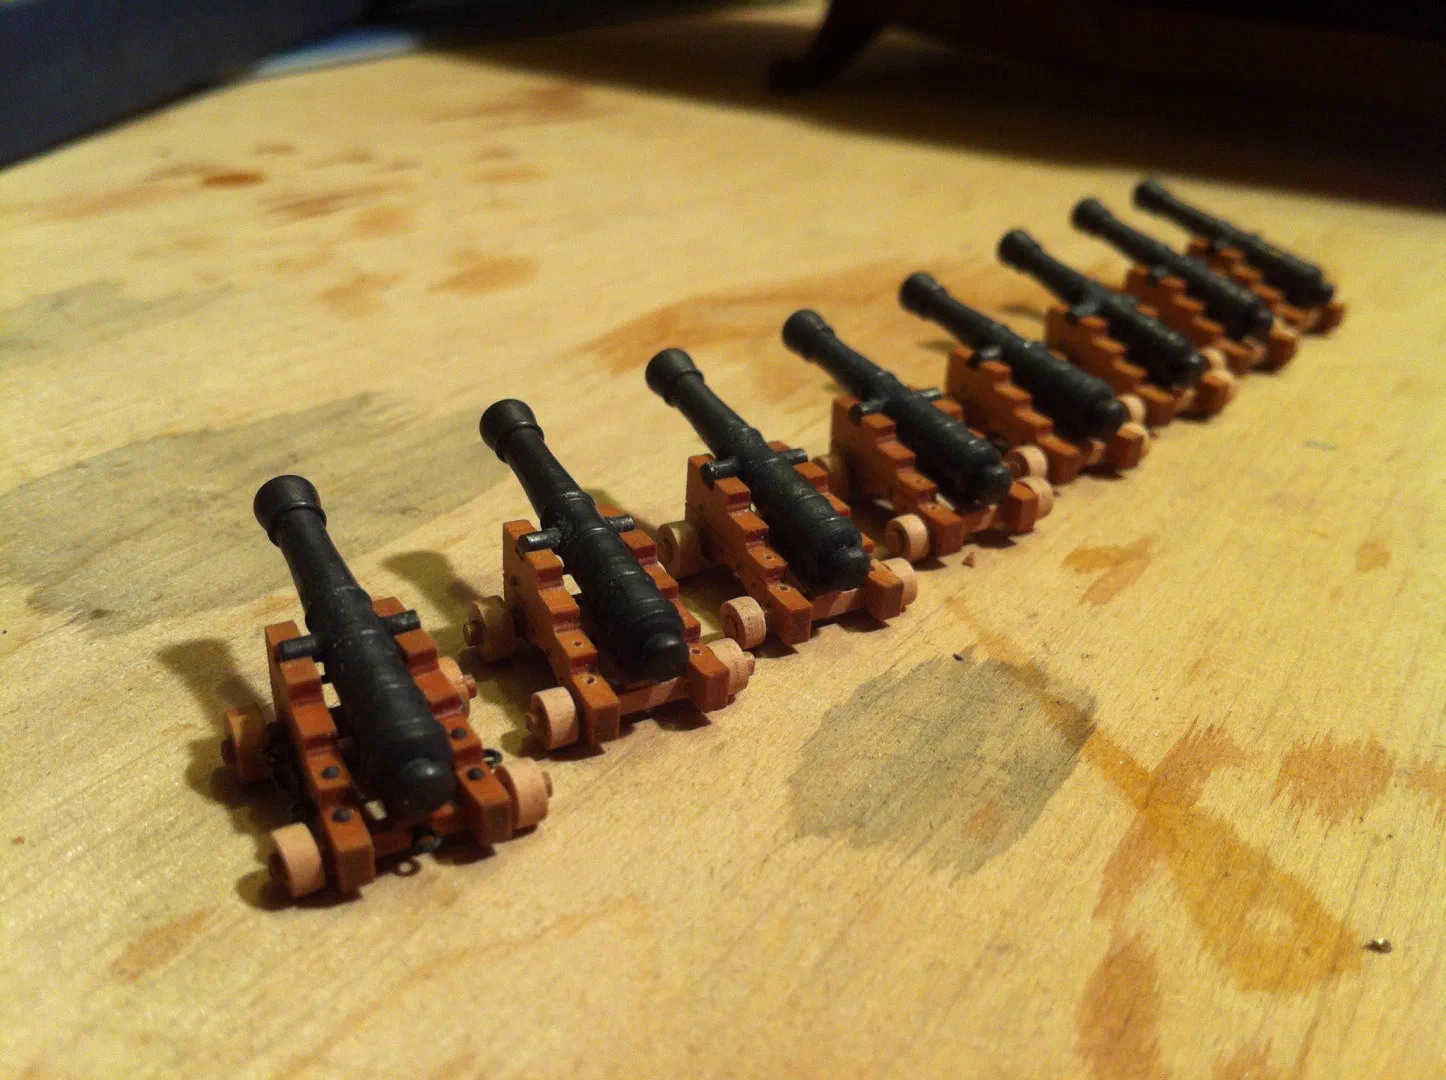
The barrels are brass ones from Caldercraft; the trunnions were soldered on – and because the drilling of such small barrels was not perfectly exact, some of them sit at a slight angle. The eyelets on the carriages were a problem of their own: too big. The solution came from the kit itself. The photo-etched hooks had exactly the eye diameter I wanted, so I cut off the hooks and used only the eyes. For the nuts and washers on the tie bolts I ended up with photo-etched parts made for military models – tiny, but perfect for the job.
The swivel guns came from Chuck Passaro’s Syren Ship Model Company. They still needed work: removing the head, drilling, soldering on a new handle. Their mounting pintles were silver-soldered – a skill I was still learning, so this took a while.
Rigging the guns was a chapter in itself. Choosing the diameter of the breeching rope was a visual compromise: 0.63 mm is a little too thick at the breech but looks right in any normal view. The tackles use 2 mm single blocks and the smallest hooks I could find, with 0.1 mm line – 32 tackles in total. On the Sherbourne every tenth of a millimetre counted, so the guns had to be run in a little to make room for the tackles at all.
Deck fittings
Then came the long list of small things that make a deck come alive: the windlass and the pump, catheads, details on the main hatch, the pin rails, ladders and stop cleats. The windlass was rebuilt in boxwood – I love the sharp edges you get with it – and later received a crank handle and a small set of micro gears.
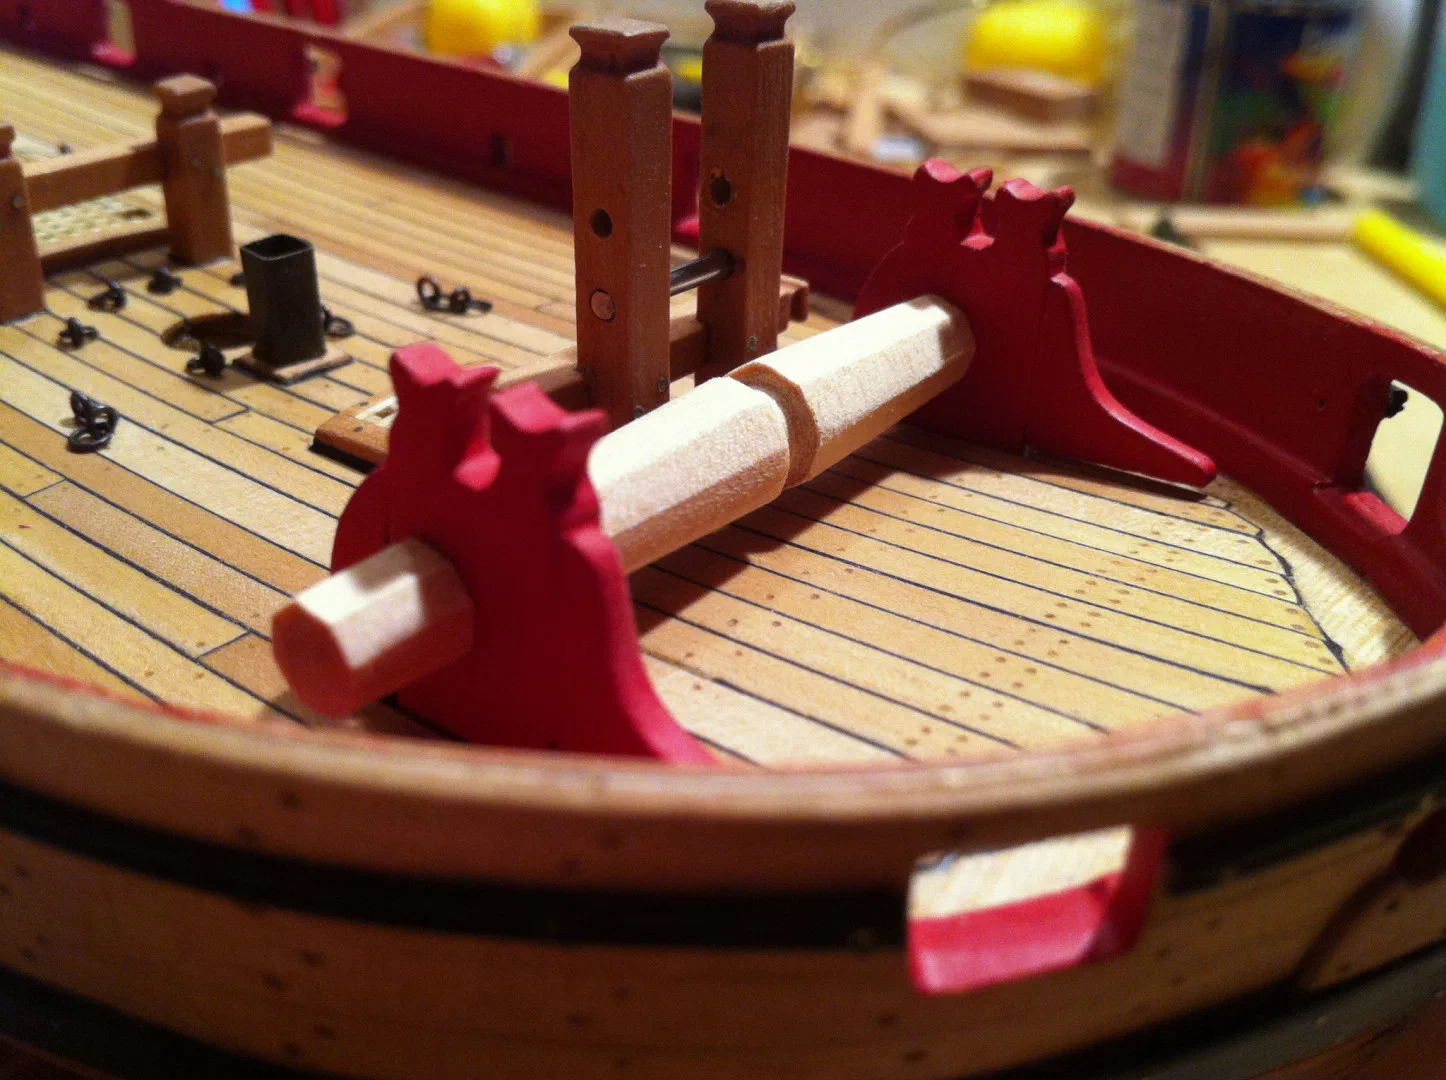
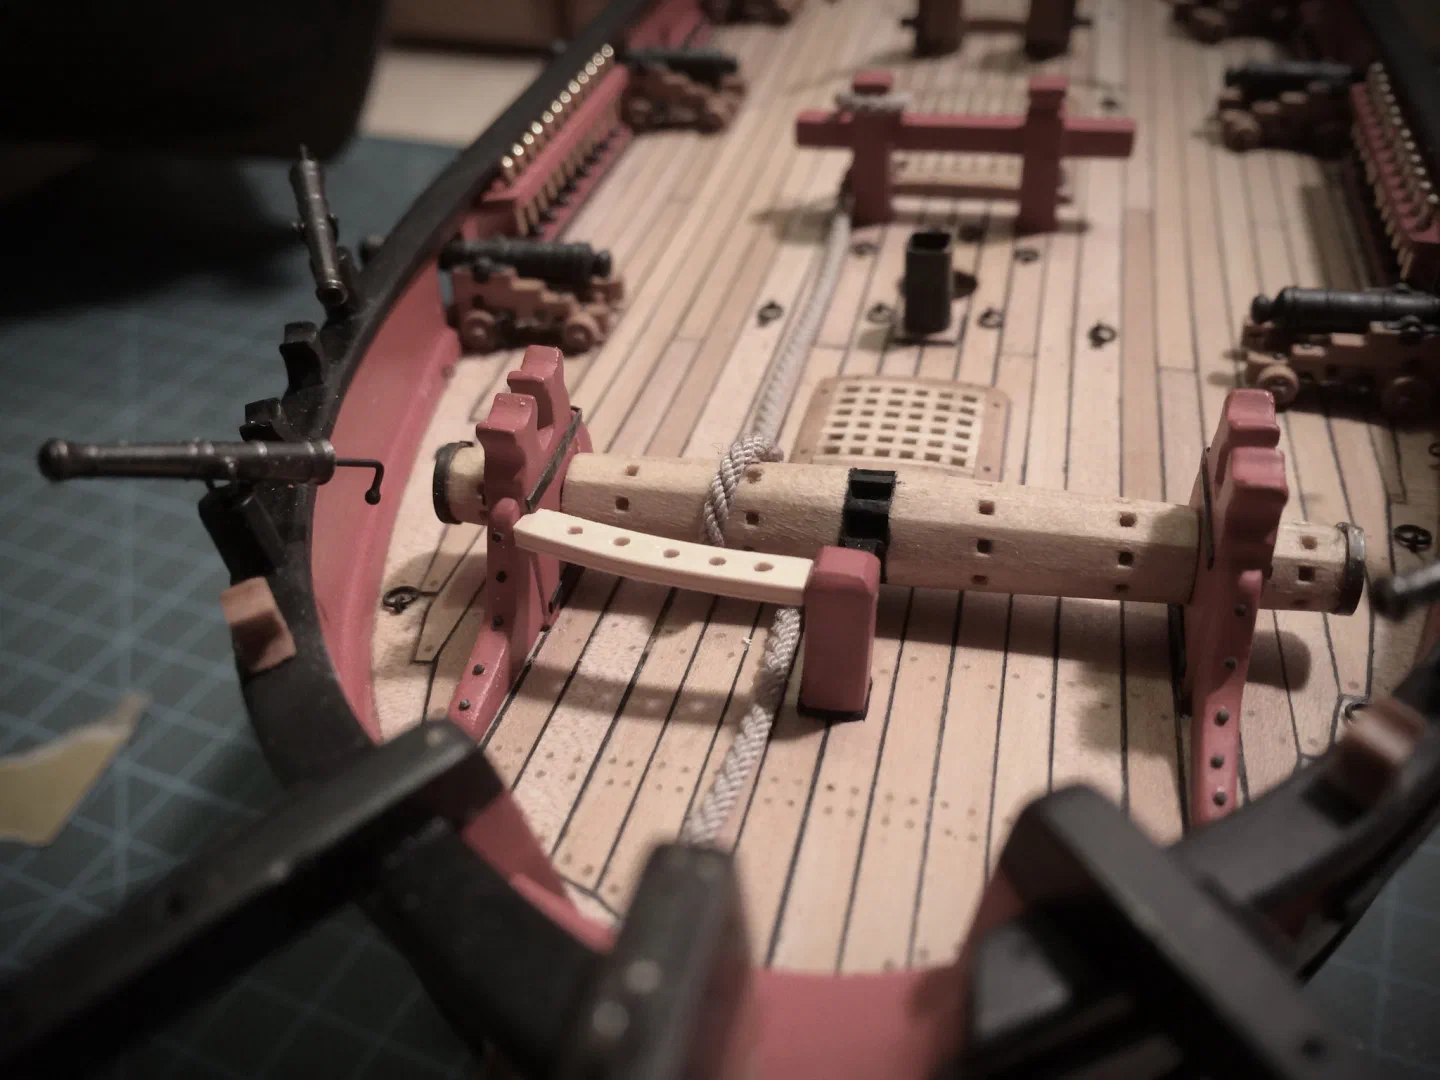
The stop cleats were made in brass – only to discover, while rereading the book on the Alert, that they should be wooden. I kept them anyway; I like the look. The stanchion for the entry ladder is soldered from brass tube, eyebolts and a micro washer, and the iron eye plate for the preventer stay was another small piece of metalwork. I also decided to paint a few more parts red than originally planned, which helps the deck read well from a distance.
Rigging a model always shows where the kit is too generous with simplification. Caldercraft provides far too few belaying points, so I lengthened the pin rails and added knees – seen on other models and perhaps not strictly correct for the Sherbourne, but this build never claimed to be perfect. The missing belaying points at the bow were solved with a new rail, made the way I usually do it: cardboard template first, then the wooden part, filled and painted.
Research for the rig
The Sherbourne is an older cutter, with an older form of rig: the topmast stands abaft the mast. Good information on this early rig is surprisingly hard to find. Lennarth Petersson’s Rigging Period Fore-and-Aft Craft covers the later rig; the Anatomy of the Ship volume on the Alert shows the older one, but for a larger vessel with a more elaborate rigging. Marquardt’s book describes the older rig too, again for a bigger cutter. James Lees’ The Masting and Rigging of English Ships of War and Klaus Schrage’s excellent German book Rundhölzer, Tauwerk und Segel filled further gaps, and Chuck’s plans for the Cheerful served as another orientation.
The kit plans themselves were no help: non-uniform measurements and a heavily simplified rig. Tony and Gregor from the forum helped with information and advice – thank you again. The result is not a scientific reconstruction with every detail researched, but a rig I believe is reasonably correct and tells the right story.
Mast and spars
The mast and spars are made from pear. Each dowel started square, was planed to an octagon and then rounded. The topmast was turned on an old Unimat 3 lathe – a recent addition to the workshop, together with a new shelf, a bigger work top and a small table saw built by a friend. Small parts on the mast were made from boxwood and pinned with 0.3 mm brass rod. Apart from the crosstrees nothing is glued, which makes later corrections in the rig much easier.
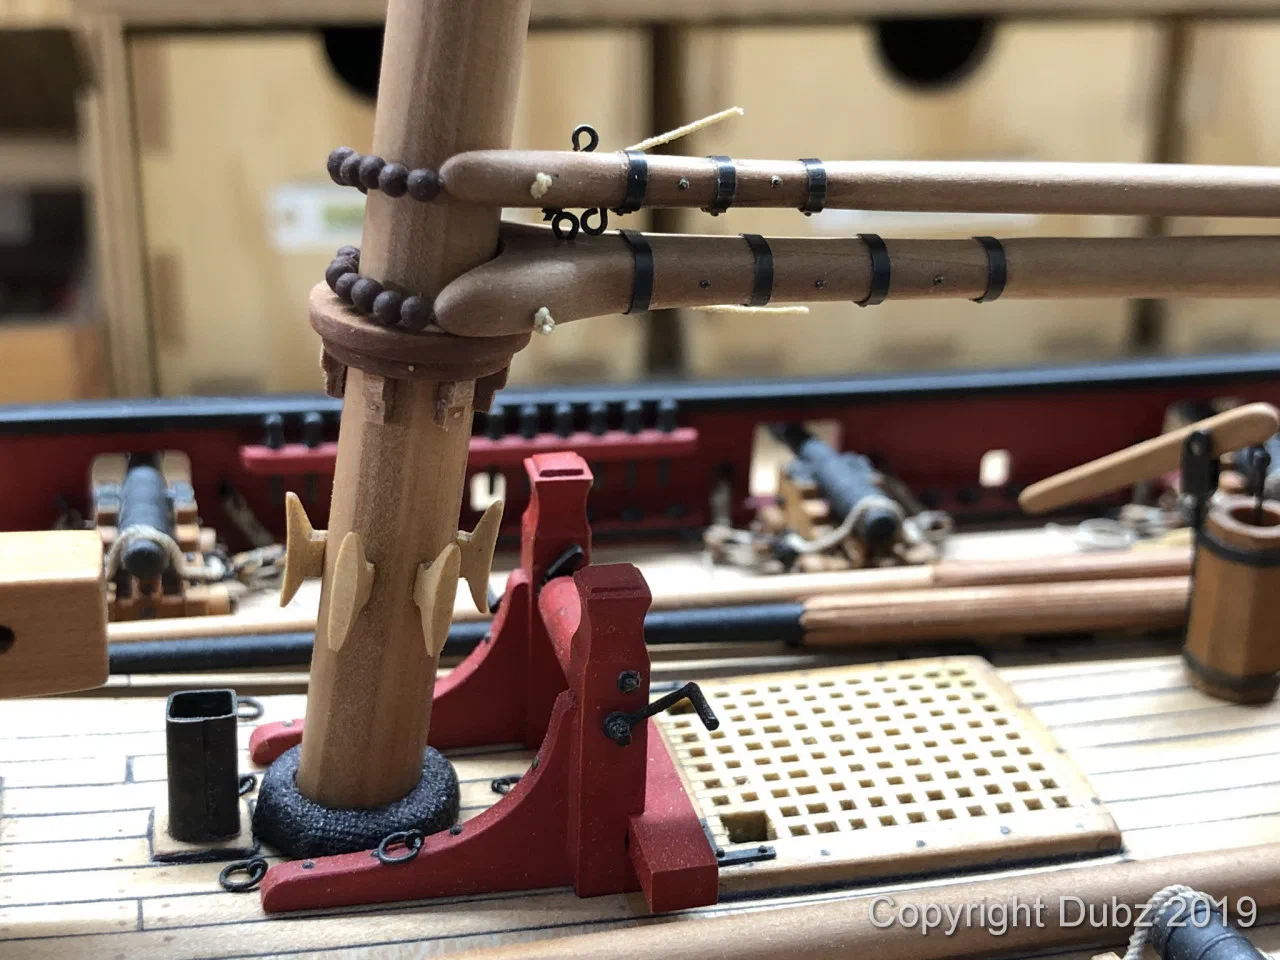
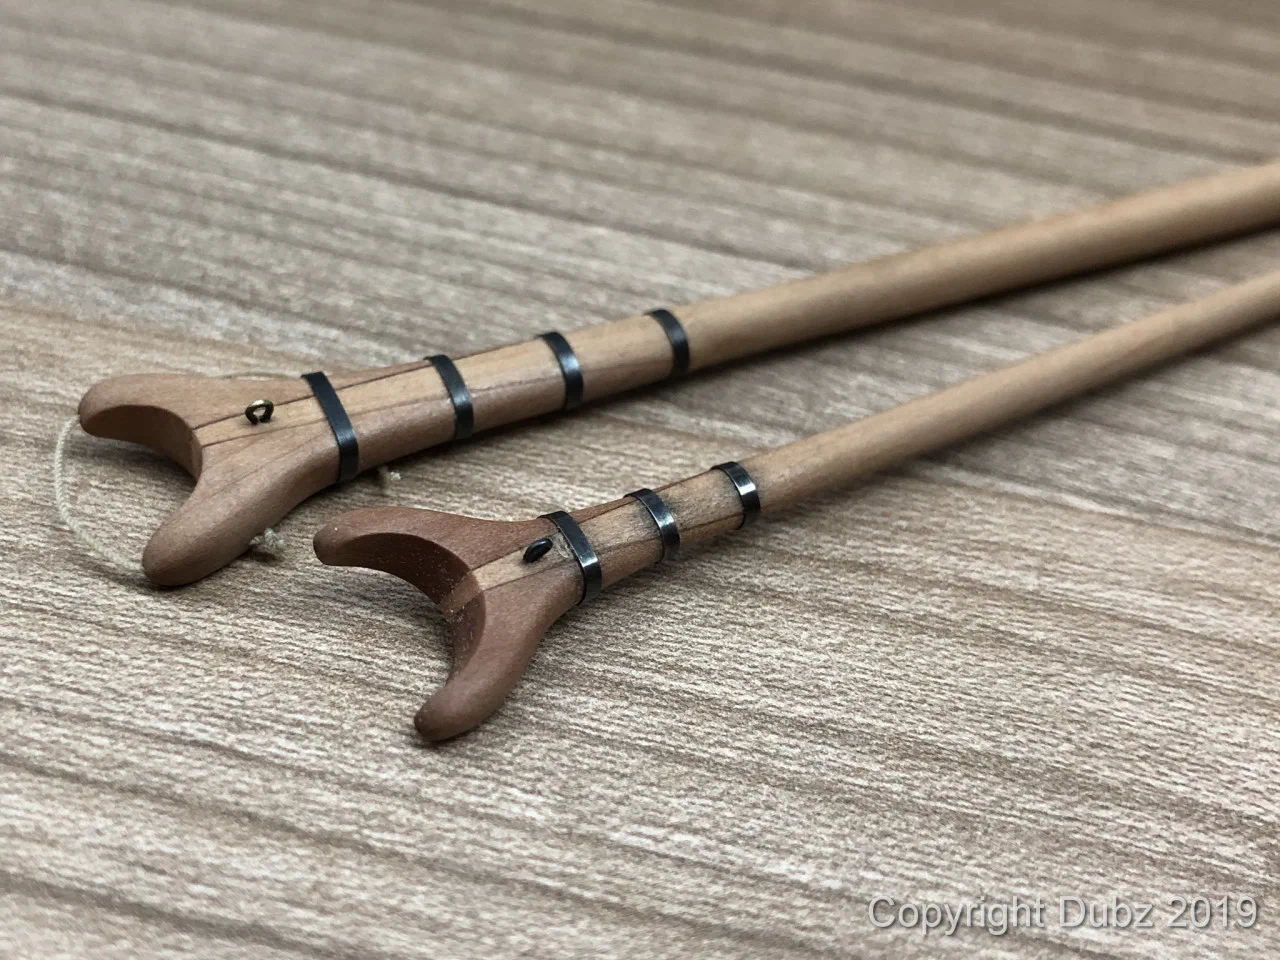
Cleats on the mast came from Chuck as well; they have to follow the angle of the deck. The spread yard stayed natural, the other yards were airbrushed with Vallejo Black Primer – easy to spray and a great result. The gaff and boom took longer than expected, because the sources show so many variants with little consistency. I love the effect of oil on pear, and in the end the boom kept its natural colour except for a black end.
Deadeyes, chainplates and standing rigging
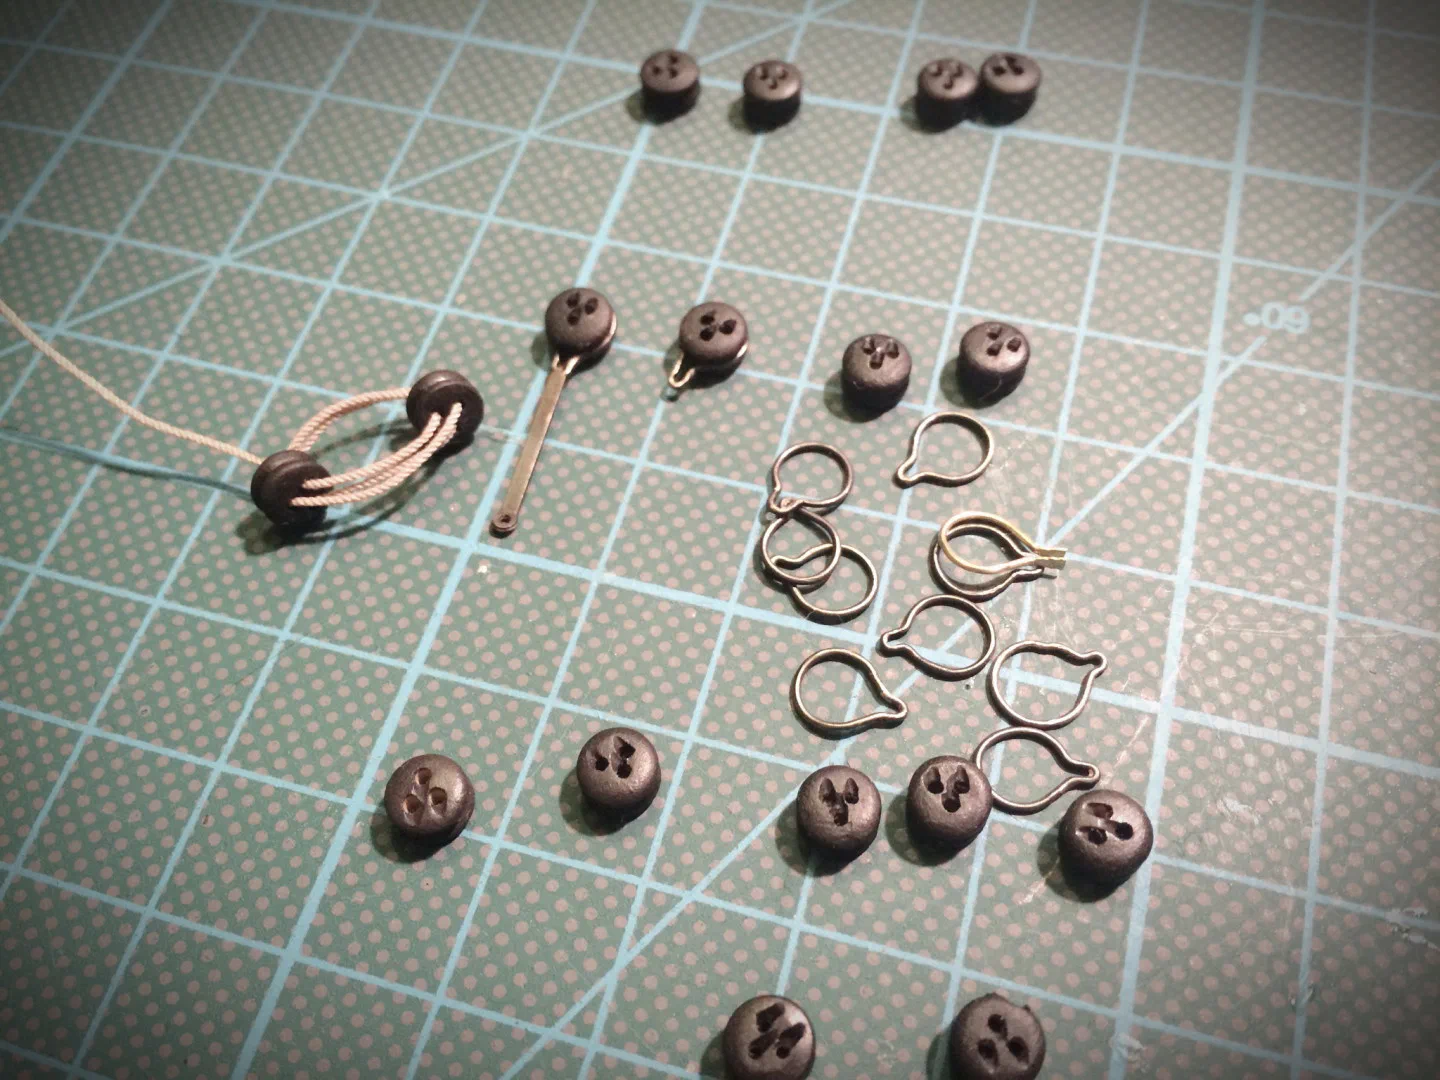
Years earlier I had prepared the channels and deadeyes the way the Alert book shows it. In the meantime I had come to dislike that solution – and the original plans actually document how it was done on the Sherbourne. So I built a prototype, and when it worked, small-scale ‘mass production’ began. The deadeye strops no longer pass through the channel as the kit suggests; an ebony moulding locks the chainplate assemblies, the chainplates are pinned with micro rivets, and nothing is glued until the run of the shrouds has been checked with a dummy mast.
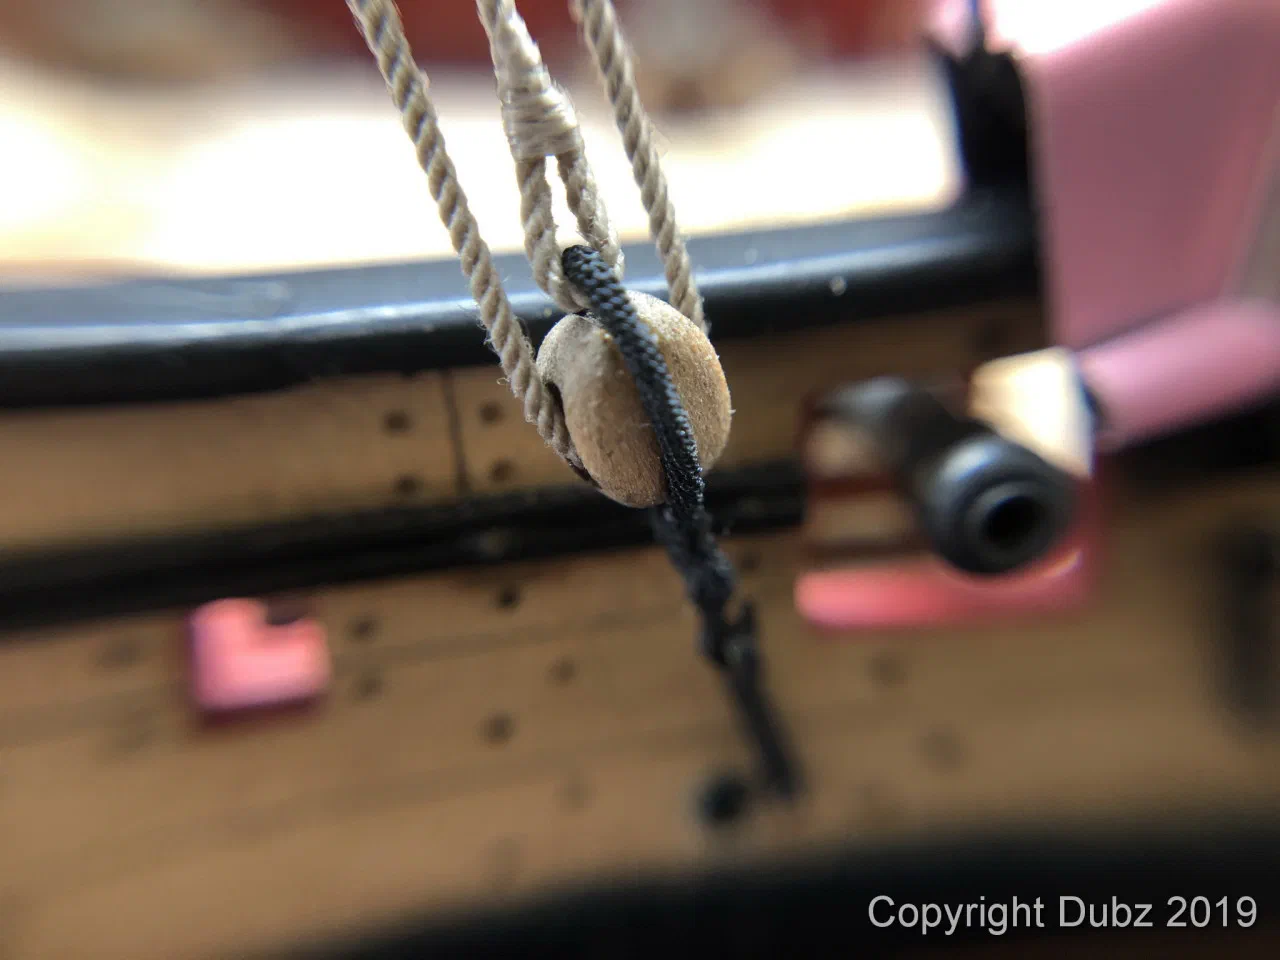
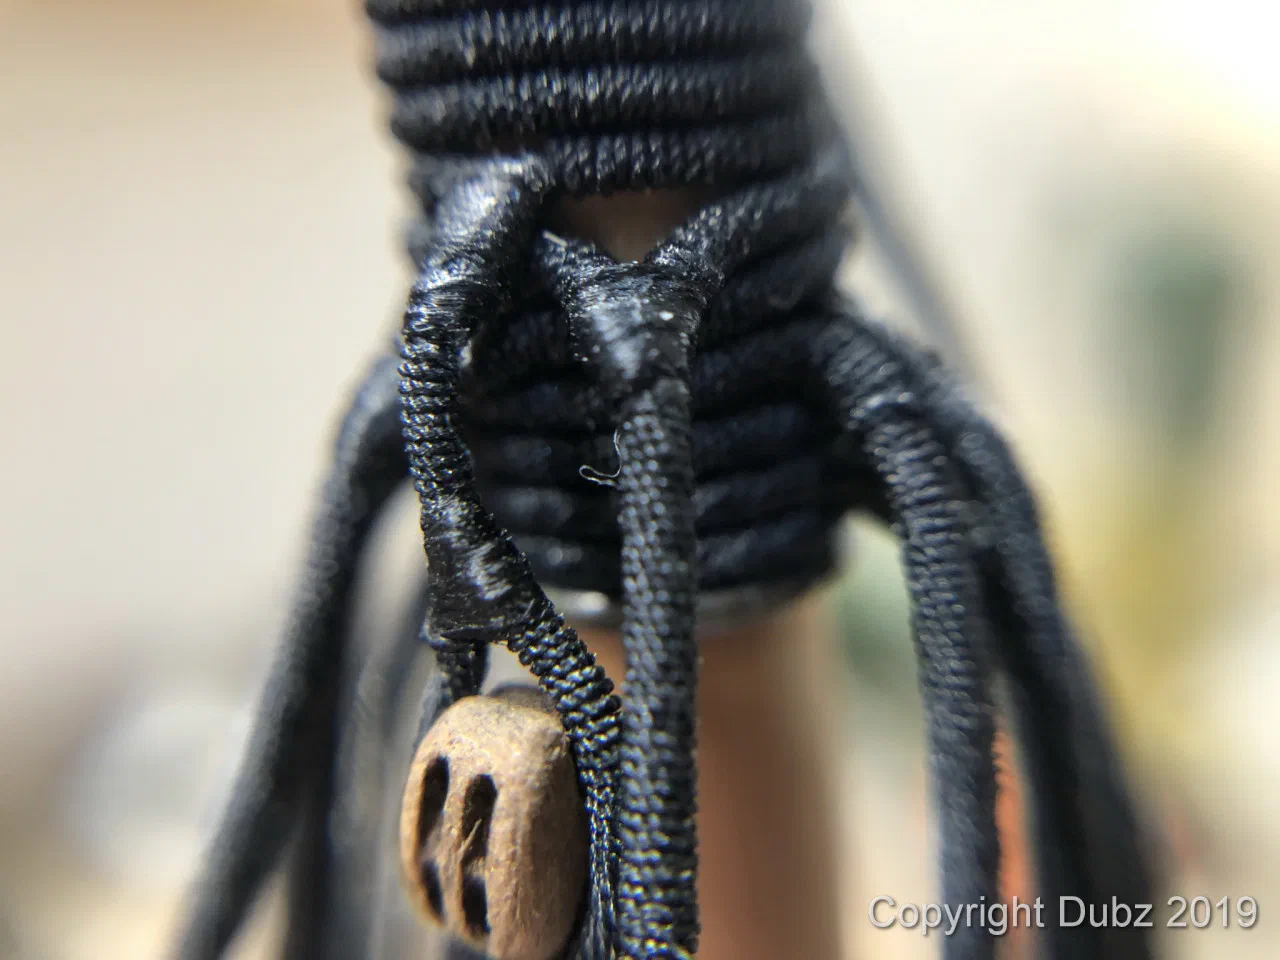
The standing rigging was, as usual, two steps forward and one back. The eyes of the shrouds had to be made wider because the mast was already ‘too finished’ to pass through them otherwise. The serving is done with 0.1 mm rope from Morope. After two nights I admitted that I didn’t like my first attempt – so it came off again, and the second was much better. The blocks are mostly from Master Korabel, with special blocks from Syren.
For the stays I turned a five-hole deadeye myself; the hearts are from Syren. A mouse had to be made for the forestay before serving and eye, and the bowsprit received its shrouds with thimbles. The ratlines were the first in my life – not my favourite job. I did them by eye without a template; somehow my eye is fixed on about 6 mm, which in 1:64 is almost exactly the historical 15 inches.
Yards and running rigging
The running rigging brought its own puzzles. Which yards carried truss pendants? The cross jack yard surely did, but what about the spread yard and the topsail yard? In the end the rig itself answered the question: without a truss on every yard it simply would not work. Footropes went onto the cross jack and topsail yards, without stirrups. Perhaps not historically proven, but I liked to show these elements – and I’m the captain.
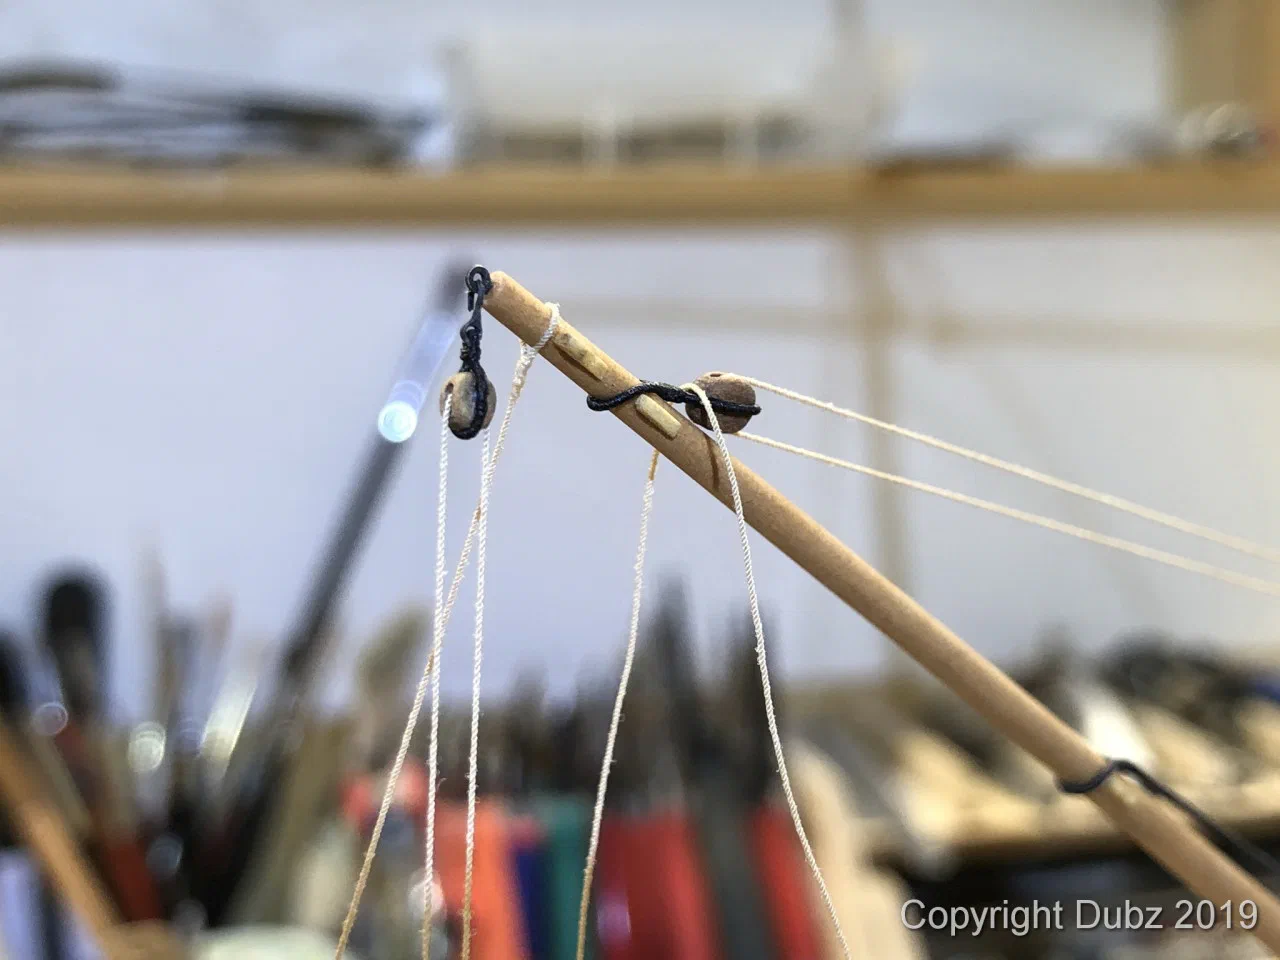
A double block that didn’t sit well under the triple block broke during adjustment – so both were redone, now as two single blocks as in the Alert book. The final belaying points were chosen with Petersson’s book and the builds of Tony and Gregor as references. Brace pendants, bowlines, the block for the traveller inhauler, the rudder rigging and finally the mousing of the hooks followed – ‘damn small’, as I noted at the time.
The last details
Towards the end the list of small things seemed endless. The windlass received one more detail I had found in Röding’s Allgemeines Wörterbuch der Marine of 1794. The Sherbourne carried six stoppers; I wanted to show at least one, working and securing the cable – which turned out to be tricky with the rope already on board. Bad planning, again.
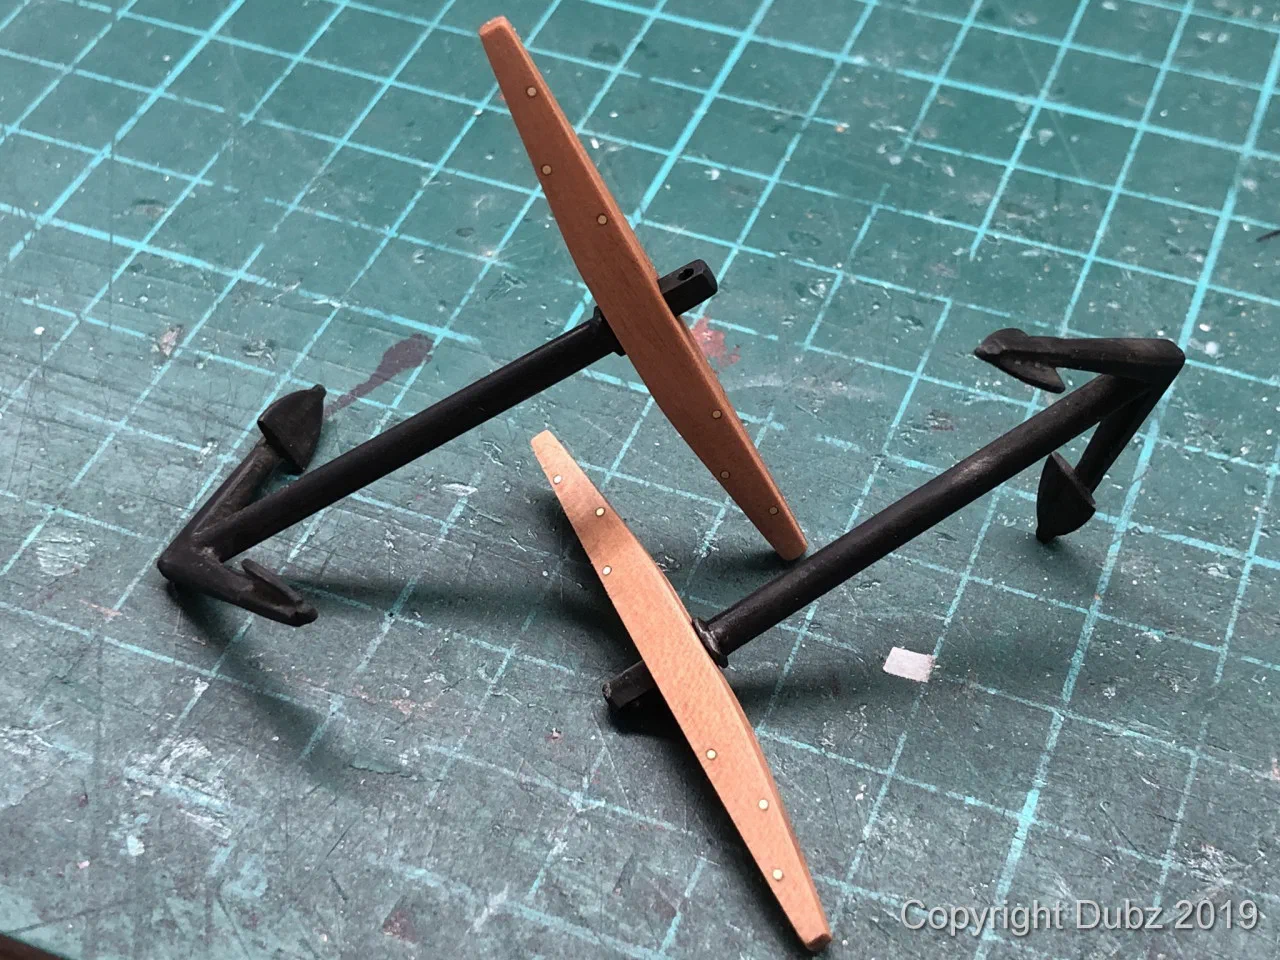
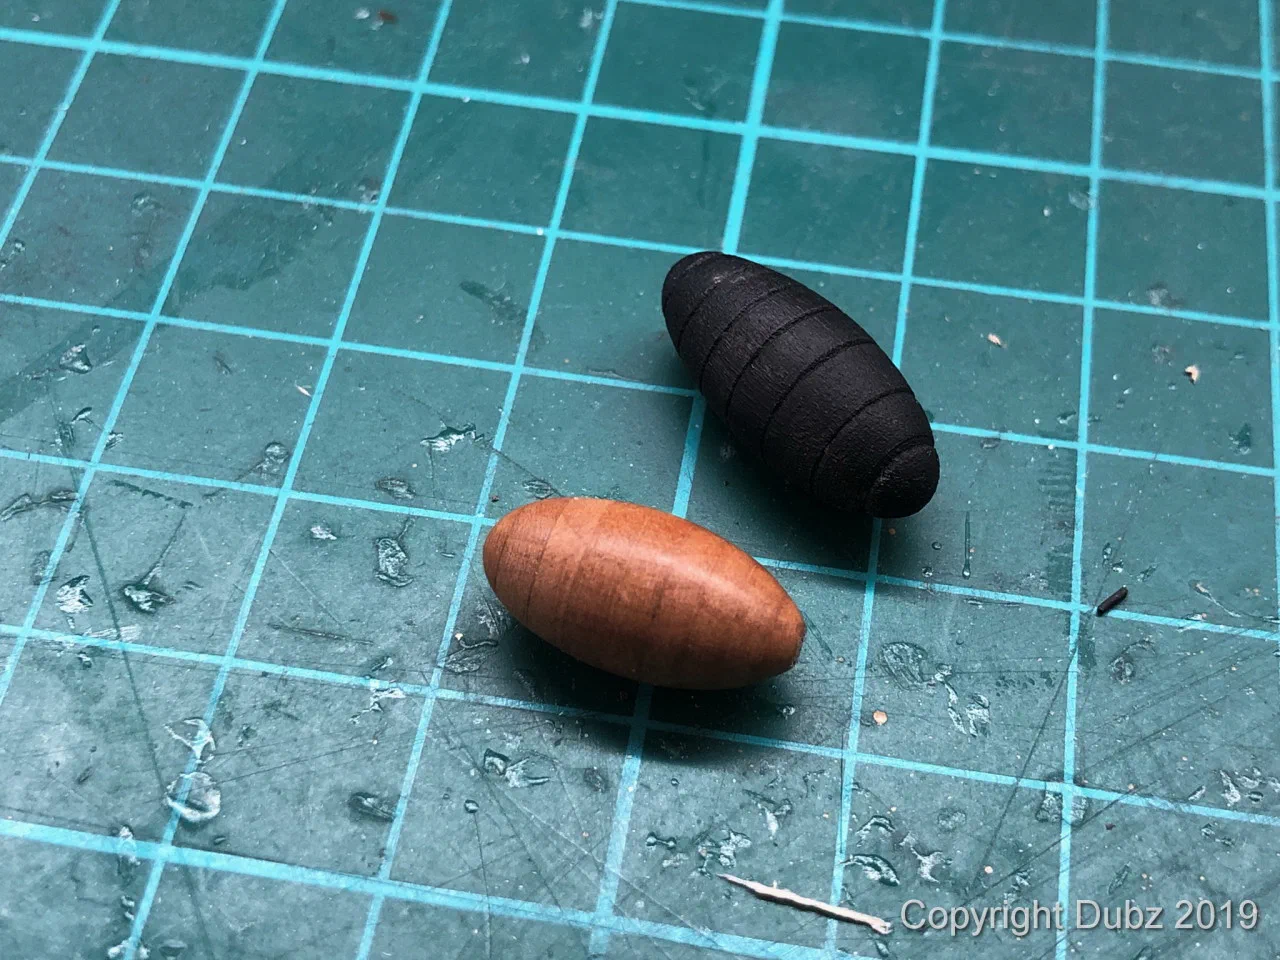
The anchors were silver-soldered – the first attempt showed that my soldering skills were ‘expandable’, the next ones went better – and I show both anchors in different conditions. On the starboard side, where there is no anchor cable, the hawse hole was closed. The buoy started as a simple version and ended up layered from pear.
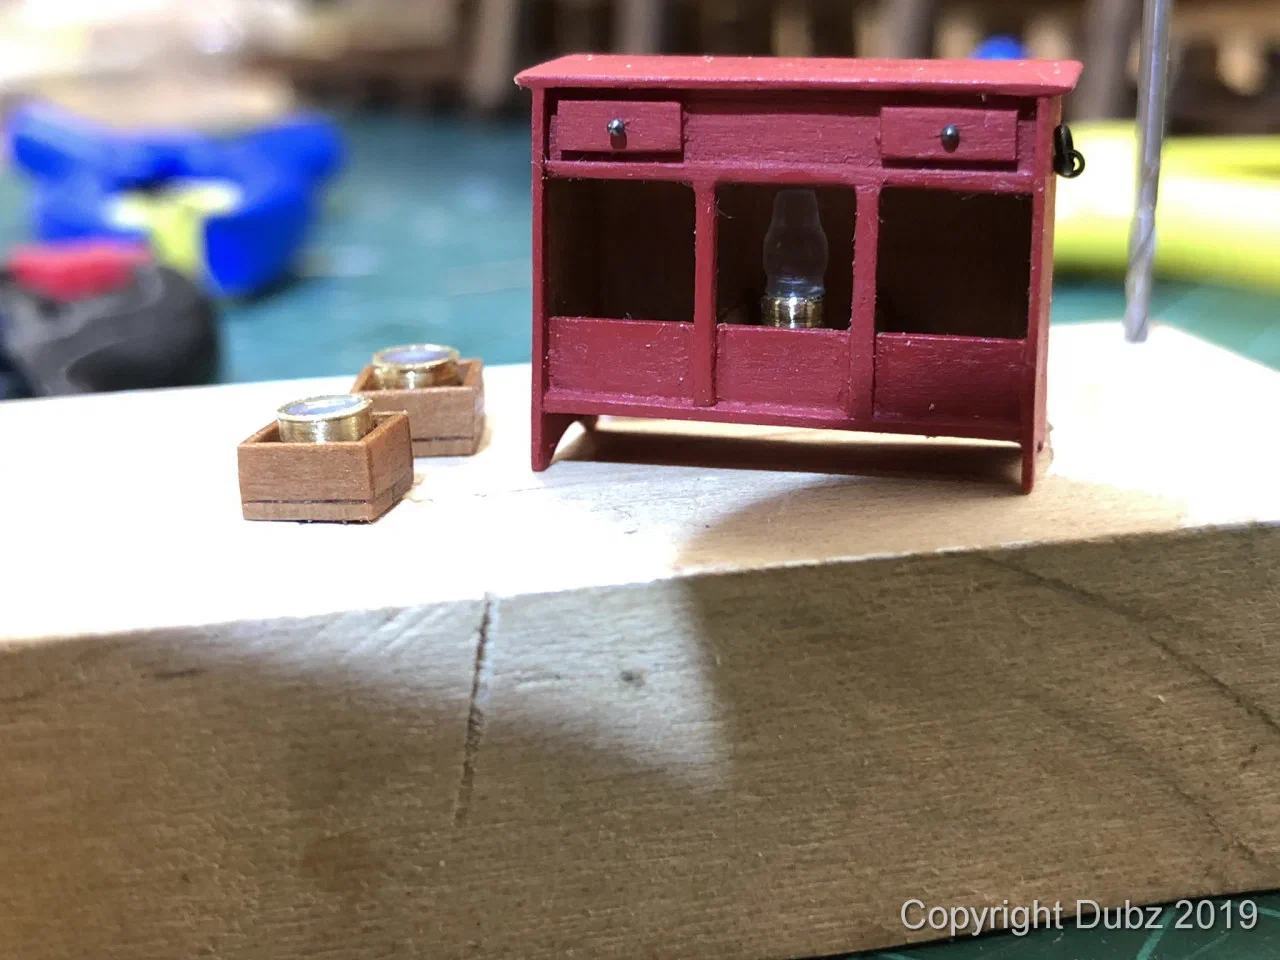
The binnacle was the hardest detail to research. A paper by the Society for Nautical Research mentions only one contemporary model of a cutter that shows a binnacle at all, although surely all of them had one. So the binnacle on the model is my interpretation – with two compasses, a light and, at a friend’s request, tiny fake hinges. Then the ship’s bell was turned, the binnacle secured, the buoy reworked and the red ensign set.
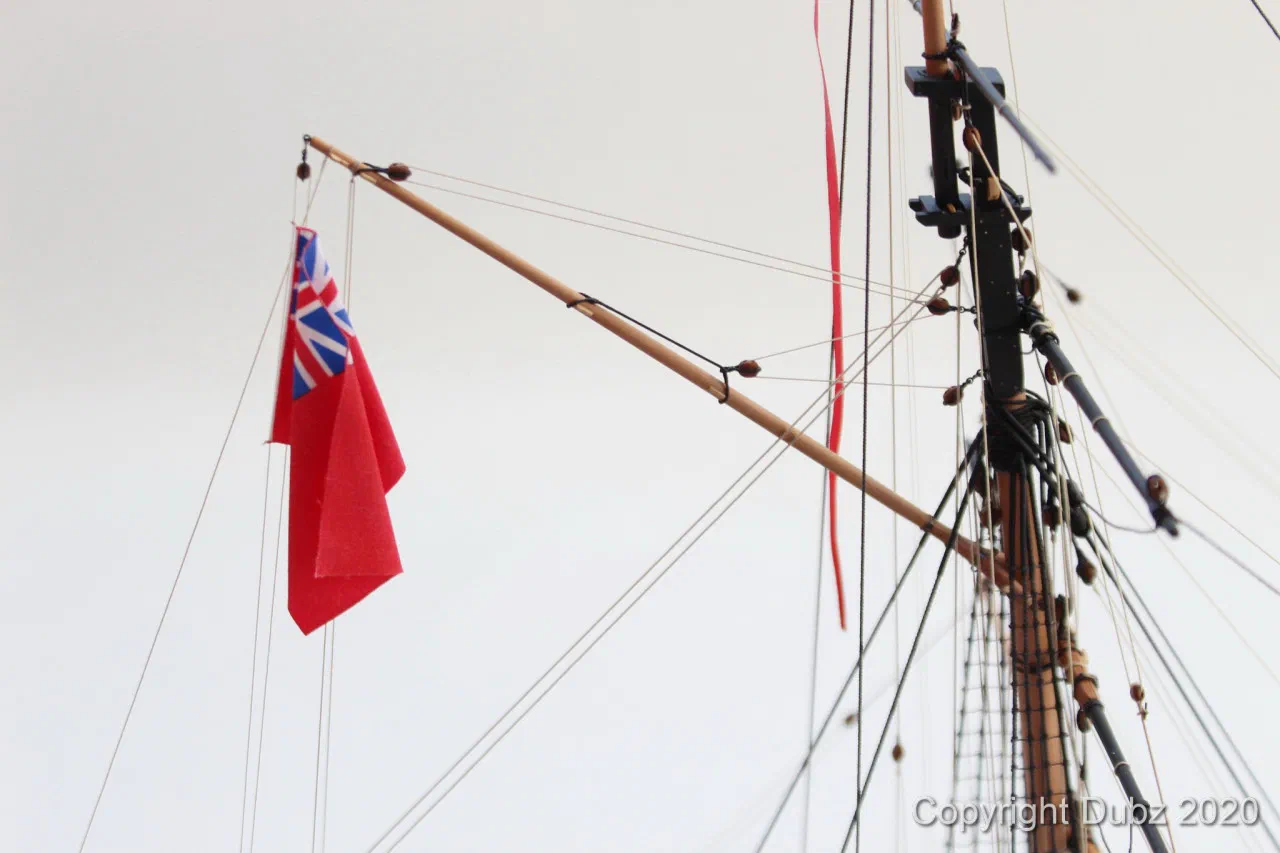
One thing still bothered me: without mast hoops the mast looked strangely naked, but every attempt to make them after the rigging was done had failed. Then Gregory, a member of the forum, lasered a set of mast hoops from pear and sent them to me – free of charge, without even asking for postage. This is what the community of model builders can be like. Thank you again, Gregory.
The finished model
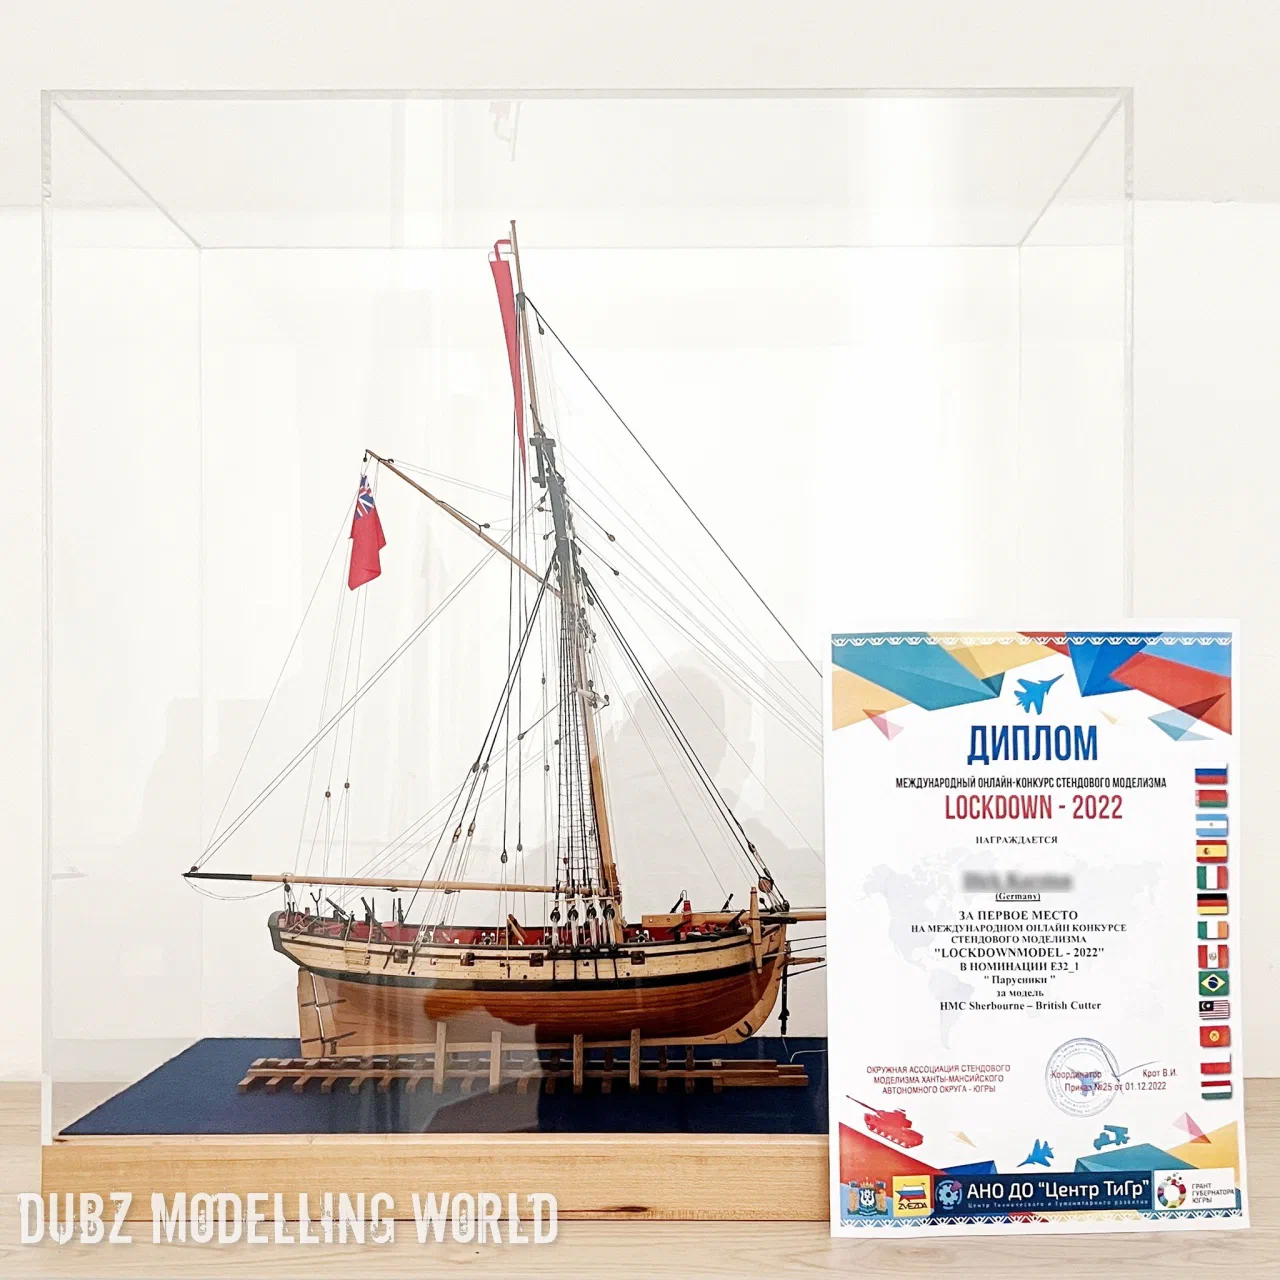
Mounted on a slipway stand and protected by an acrylic case, the Sherbourne is now finished. She is far from the quick out-of-the-box kit I had in mind at the start – and far from perfect. But every compromise on her has a reason, and every detail tells a part of the story of these small ships and of the people who sailed them against the smugglers of the Channel.
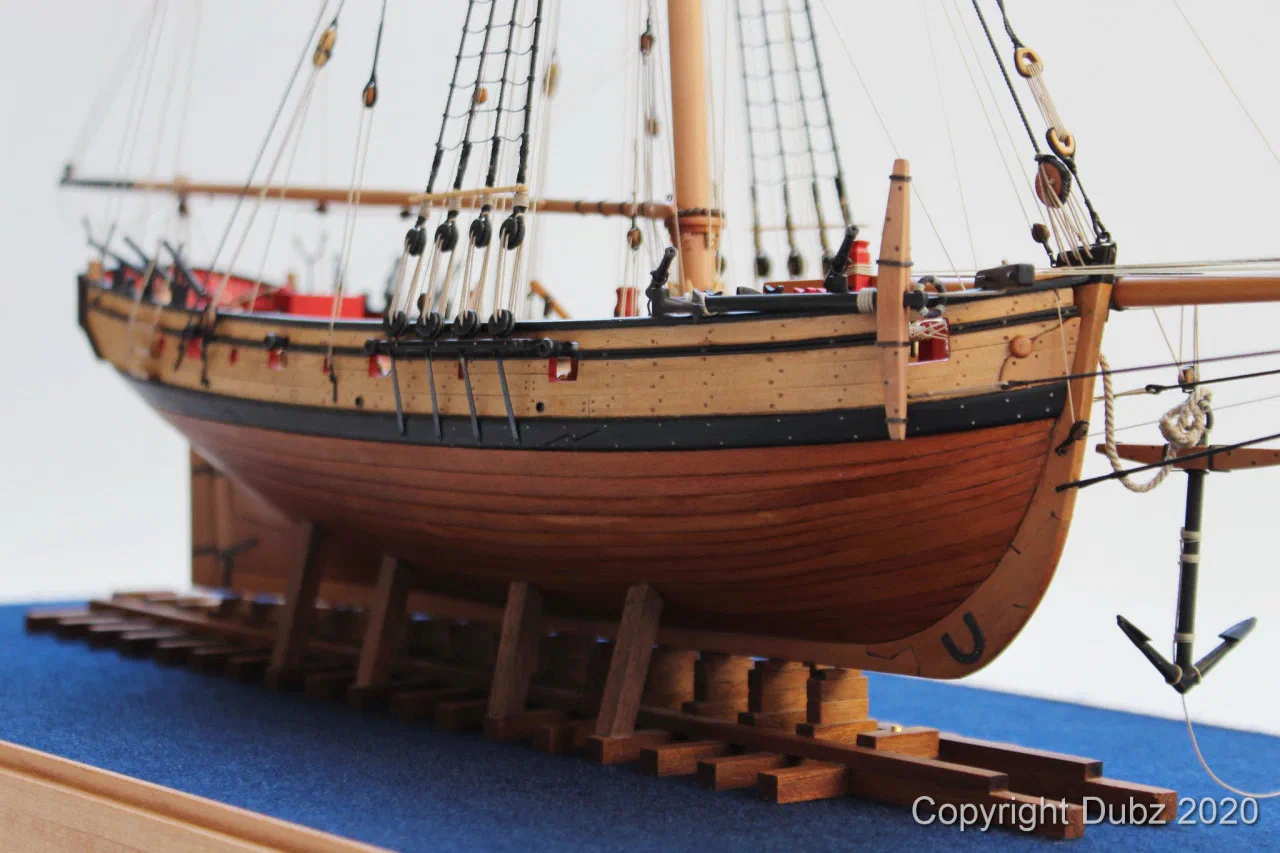
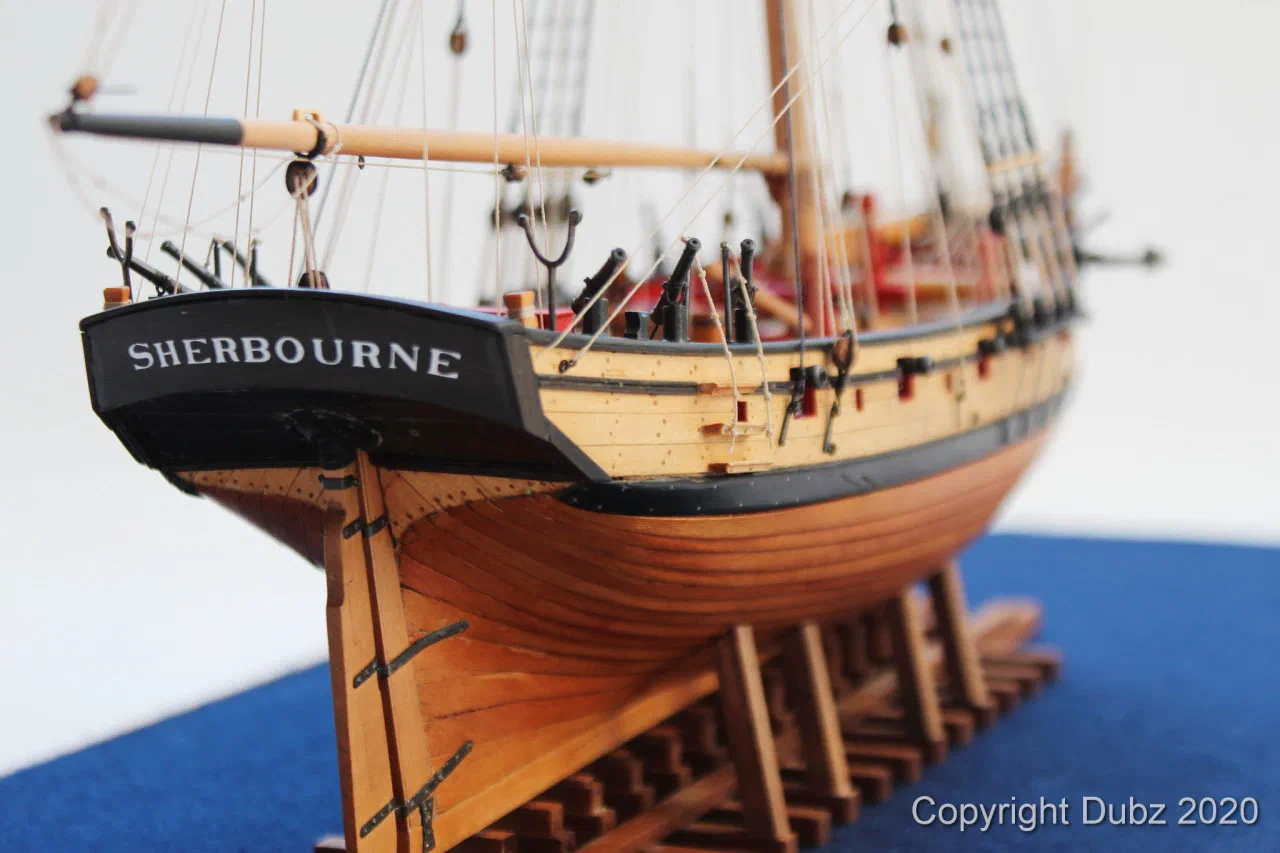
The model was well received: in 2021 she won 1st place in the category “Sailing Navy” at the 4th Concurso Internacional Virtual de Modelismo Naval of the Sociedad Nacional de Modelismo Naval del Perú, and in 2022 1st place in the Lockdown Model Contest.